Back in 2019, an individual named JtingF posted a video about their awesome Protogen costume they were working on, and would continue to post updates as they added more awesome elements to the suit. For those who don't know, a Protogen is a fictional species created by Malice-risu that quickly became popular in the furry fandom. The species is a mix of organic and mechanical, having lots of fur and organic elements, but also armour, lights and a head visor that shows their facial expression as a lit up display.
What happened next is covered in more detail on my fursona evolution writeup, but suffice it to say Merlin made a Protogen version of my sona at the time, and I found it so adorably cute.
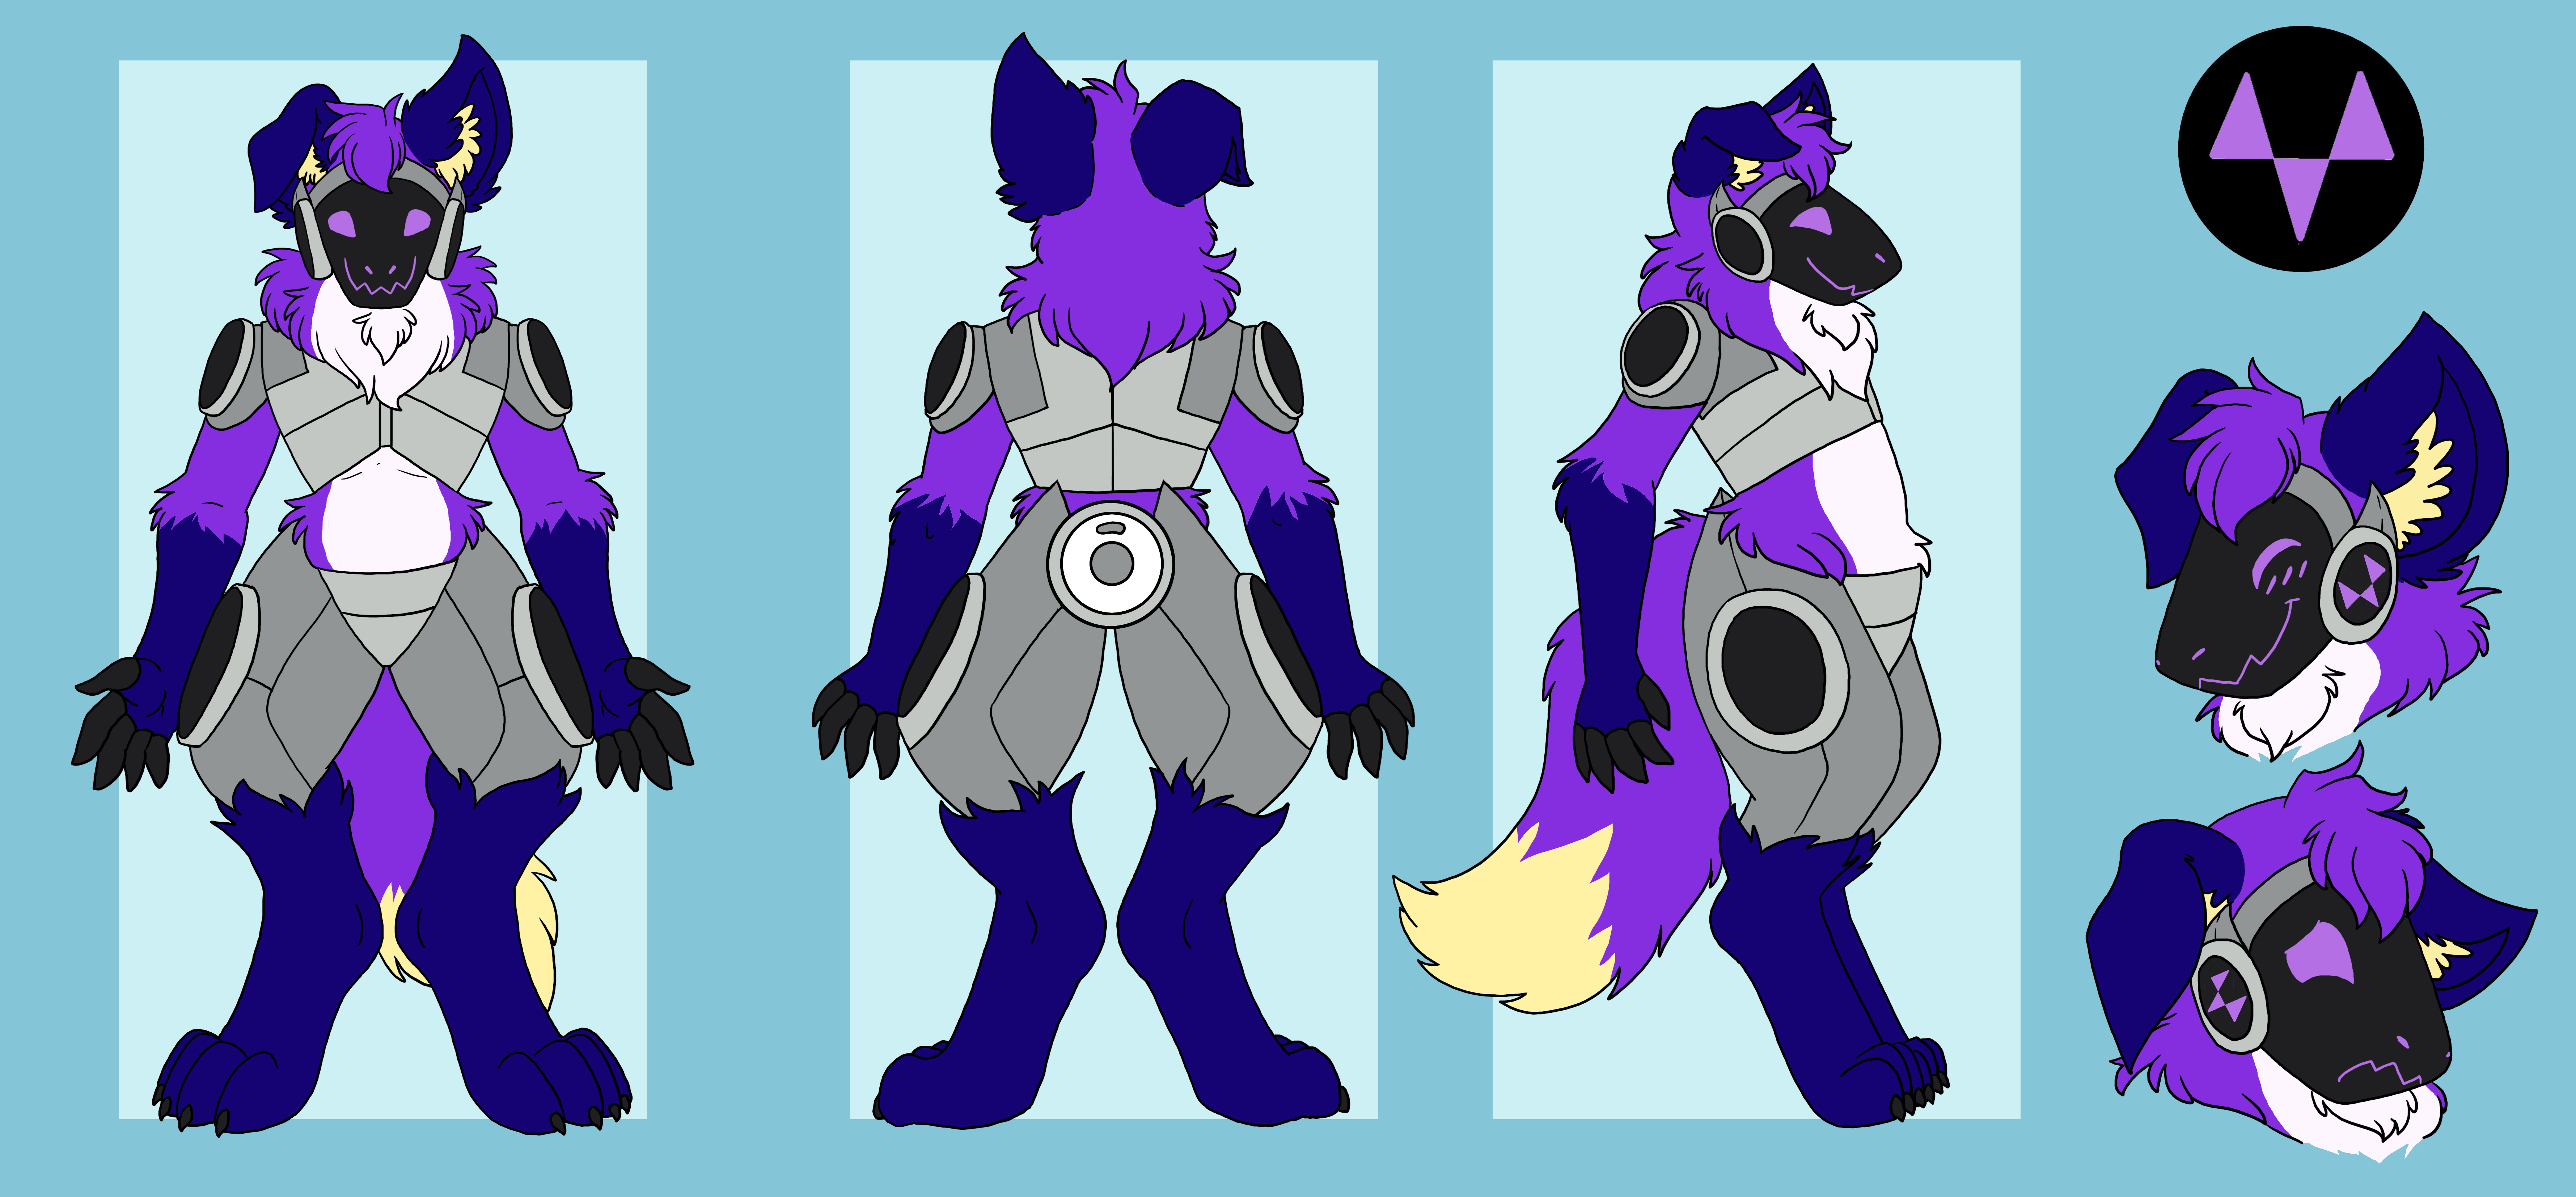
Enamored with Merlin's design, excited by the whole Protogen concept, and hot off of working on R-ALF I desperately wanted to make my own Protogen costume. I wanted it to be smart, flashy, full of features and super cool.
So I got started.
The Plan
The first thing was to figure out how to build it. I'd be focusing on the head first, which was the most important part.
A typical Protogen head consists of:
- a solid frame
- LED matrix panels for showing expressions
- a microcontroller/mini computer to control said lights
- coloured fur
- a translucent visor
The Frame - Part 1
Let's start with the frame. Just a solid piece of painted plastic that every other piece hangs off of. I already planed to model it in 3D, and then print it out on a 3D printer. I'd had enough experience with R-ALF, so I knew how to print it out in parts, glue them together, then sand and paint to finish it.
However, whatever frame I made would have to fit in perfectly with the visor, and making the visor itself was another challenge.
The Visor
For those who don't know, the visor is what covers the front face of the Protogen. The expression lights shine through it, and the wearer can look out through it too.
Since it's made out of tinted translucent plastic (like the lens of sunglasses), it makes the wearers face and the nitty gritt electronics far less visible to outside viewers. Ideally, all they see is a dark shape with the expression shining through. It's a great illusion (at least when not in direct sunlight), but also makes the visor a critical part of the Protogen.
Unfortunately, there were a lot of steps and equipment to a Protogen visor. The physical shape of the plastic is done by using a vacuum forming machine and a mold; and tinting the visor to the correct colour involves chemicals and buying a big kitchen pot that you can never use for food again.
So I decided to buy a premade visor from Kaiborg Studios.
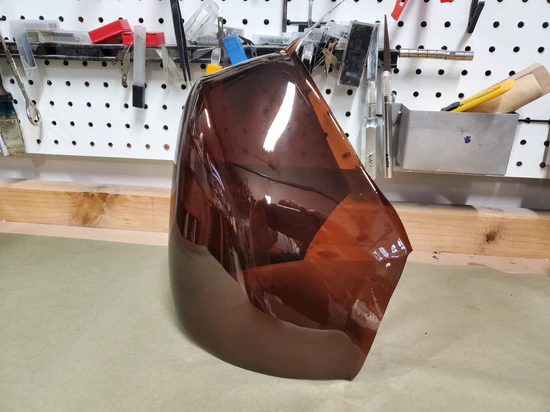
Kaiborg Studios is great for helping anyone make a Protogen head. They don't just provide tutorials (which I'd used to help make the R-ALF head), but provid premade parts for sale. I could have bought the Protogen frame from them that would fit the visor perfectly, but I'd decided I'd wanted to make as much of the head by myself as possible so that it would have my own unique style to it.
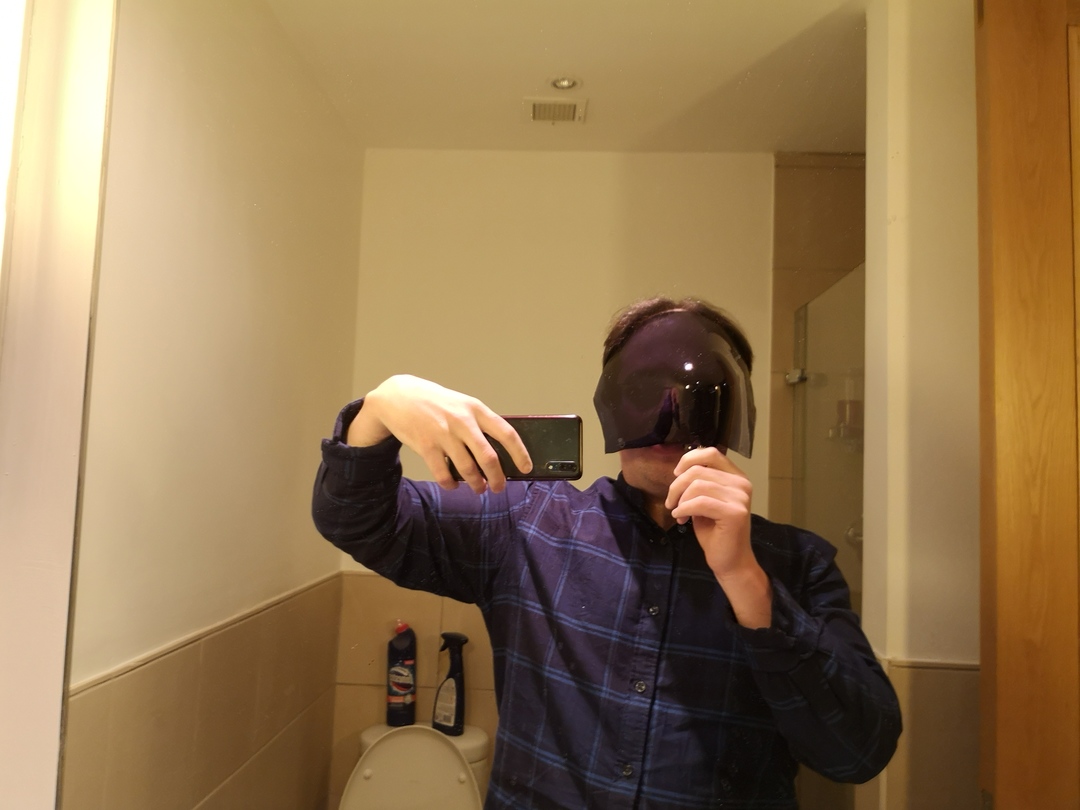
Of course, I would need to make sure that whatever frame I made would fit the visor I got from Kaiborg. So I asked Kaiborg for 3D model files of their frame that I could modify. They understandably did not offer them to me, but they did give me 3D model file of the visor itself. With this loaded into Blender 3D, I could model the Protogen frame around it and make sure the two mostly fitted.
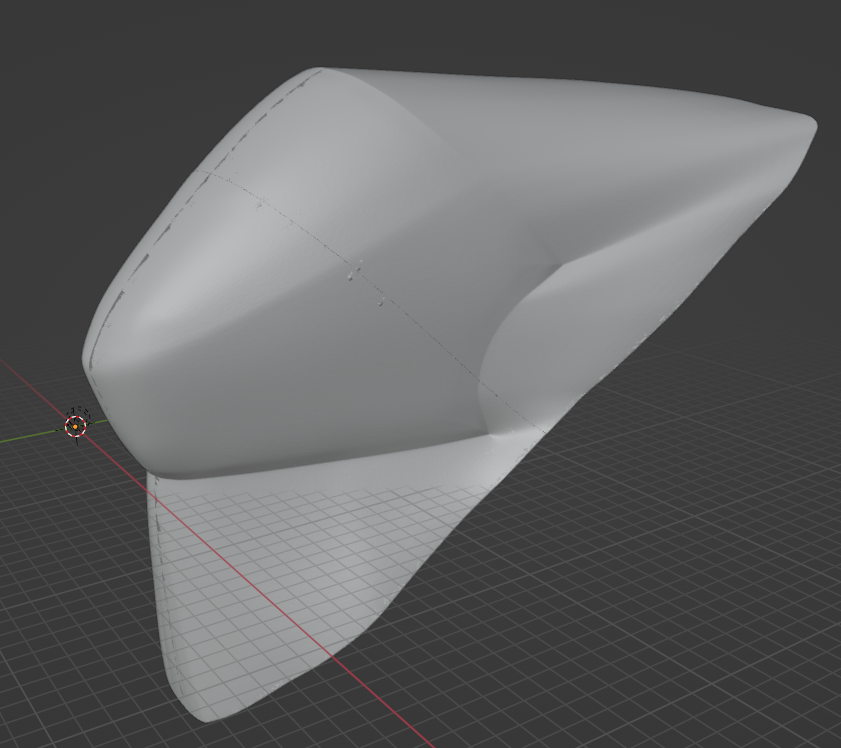
So around November 2019, I had the first part of the Protogen head.
The Frame - Part 2
I then started modelling on that basis using Merlin's references and other bits of research into Protogen (Even did a sketch based on a Zillion Ross tutorial video).
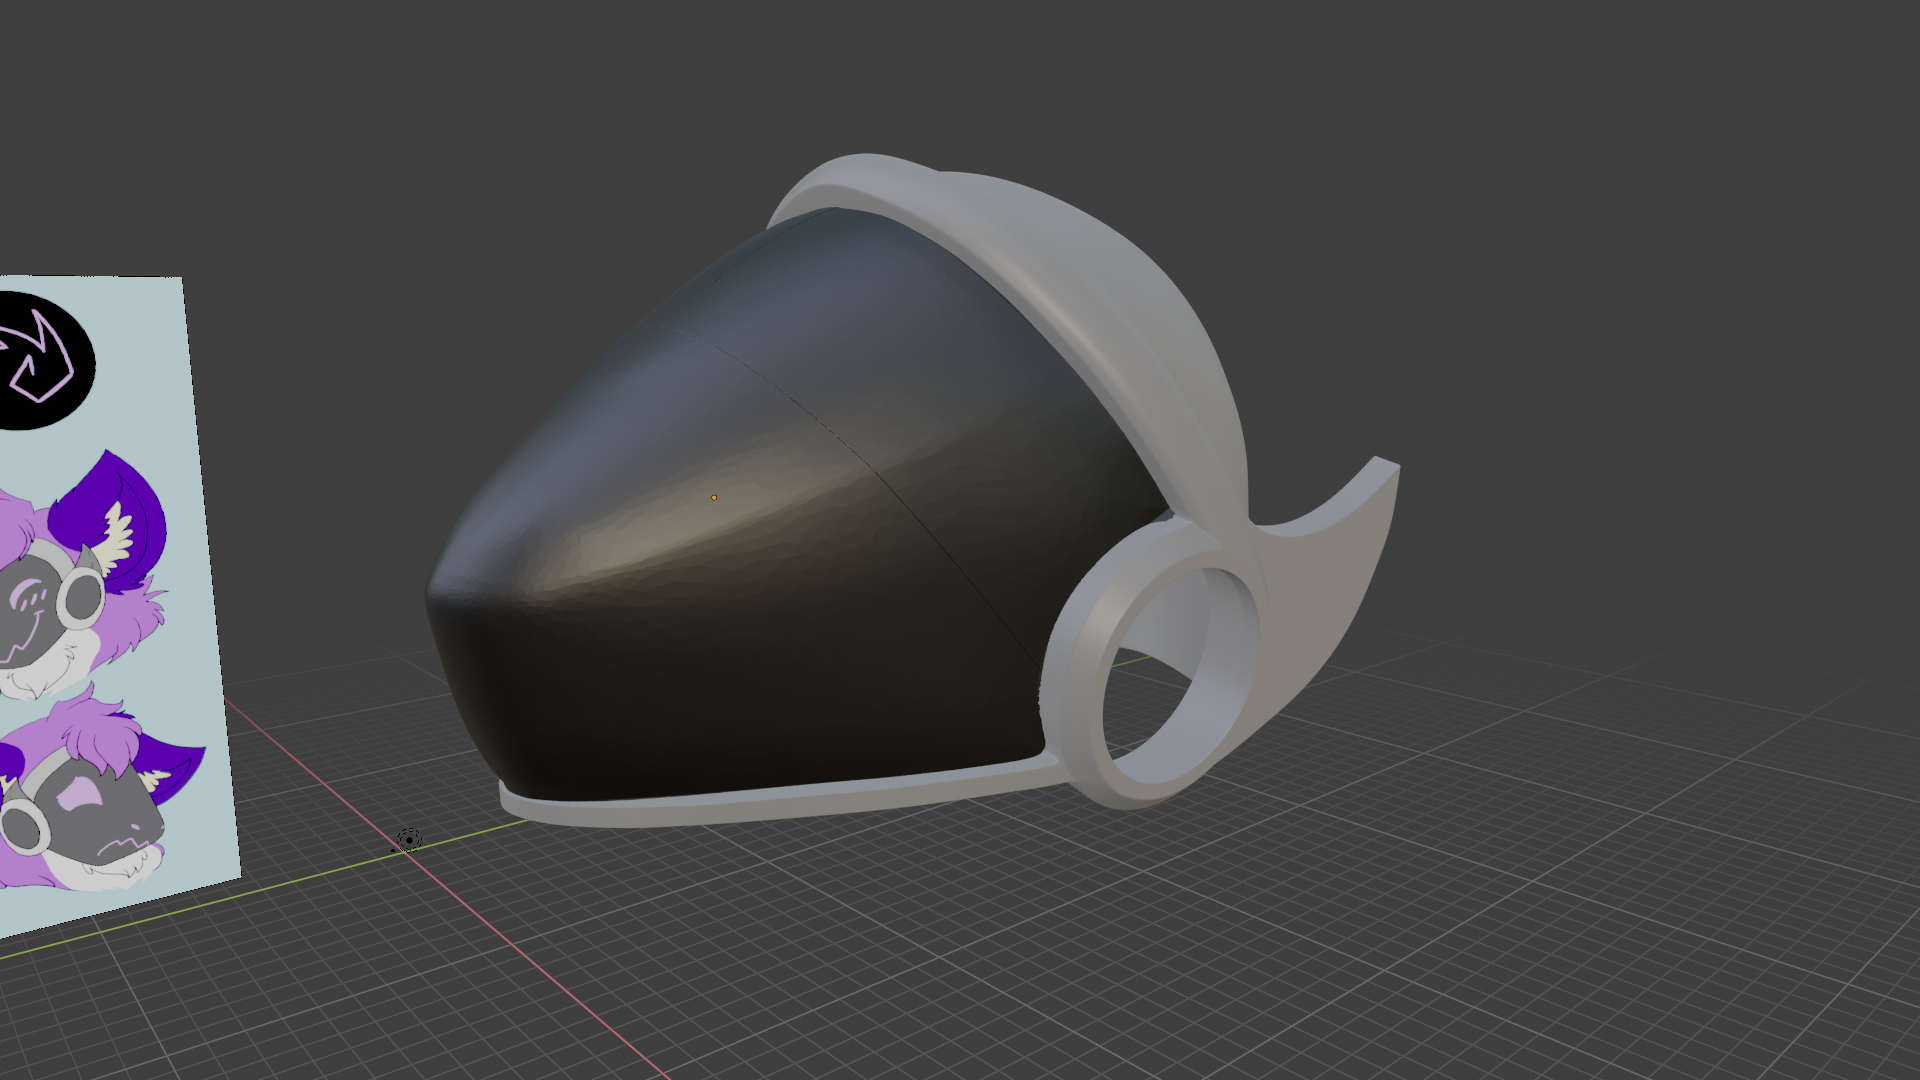
As the frame was taking shape, and I gained confidence the visor I bought would fit into it properly, I knew I needed my attention on another vital component: The LED Matrix.
The LED Matrix
The LED matrix is basically a grid of LED lights that can be programmed to display any pattern. Normally it's coded to light up to show the Protogen's expression. There's no one single way of doing this. The Kaiborg Frame requires 6 LED panels of different sizes. Two for the mouth, two for the eyes, and two for the nostrils. JtingF by contrast has one big panel on each side.
For my Protogen, I knew I did not want there to be a "join" in the middle of the visor. Most Protogen heads have one panel on each side for the mouth. This makes them fine for viewing from the side, but when viewed head on, there's a "break" in the mouth. I wanted my mouth to be continuous from one side to the other and look good from multiple angles.
So I wanted my LED matrix to be:
- Flexible
- RGB (full collour)
- Addressable (control each pixel individually)
- High resolution.
- The right size for my helmet
After a lot of work, and testing different sizes on my 3D model, I was able to get 4 out of 5:
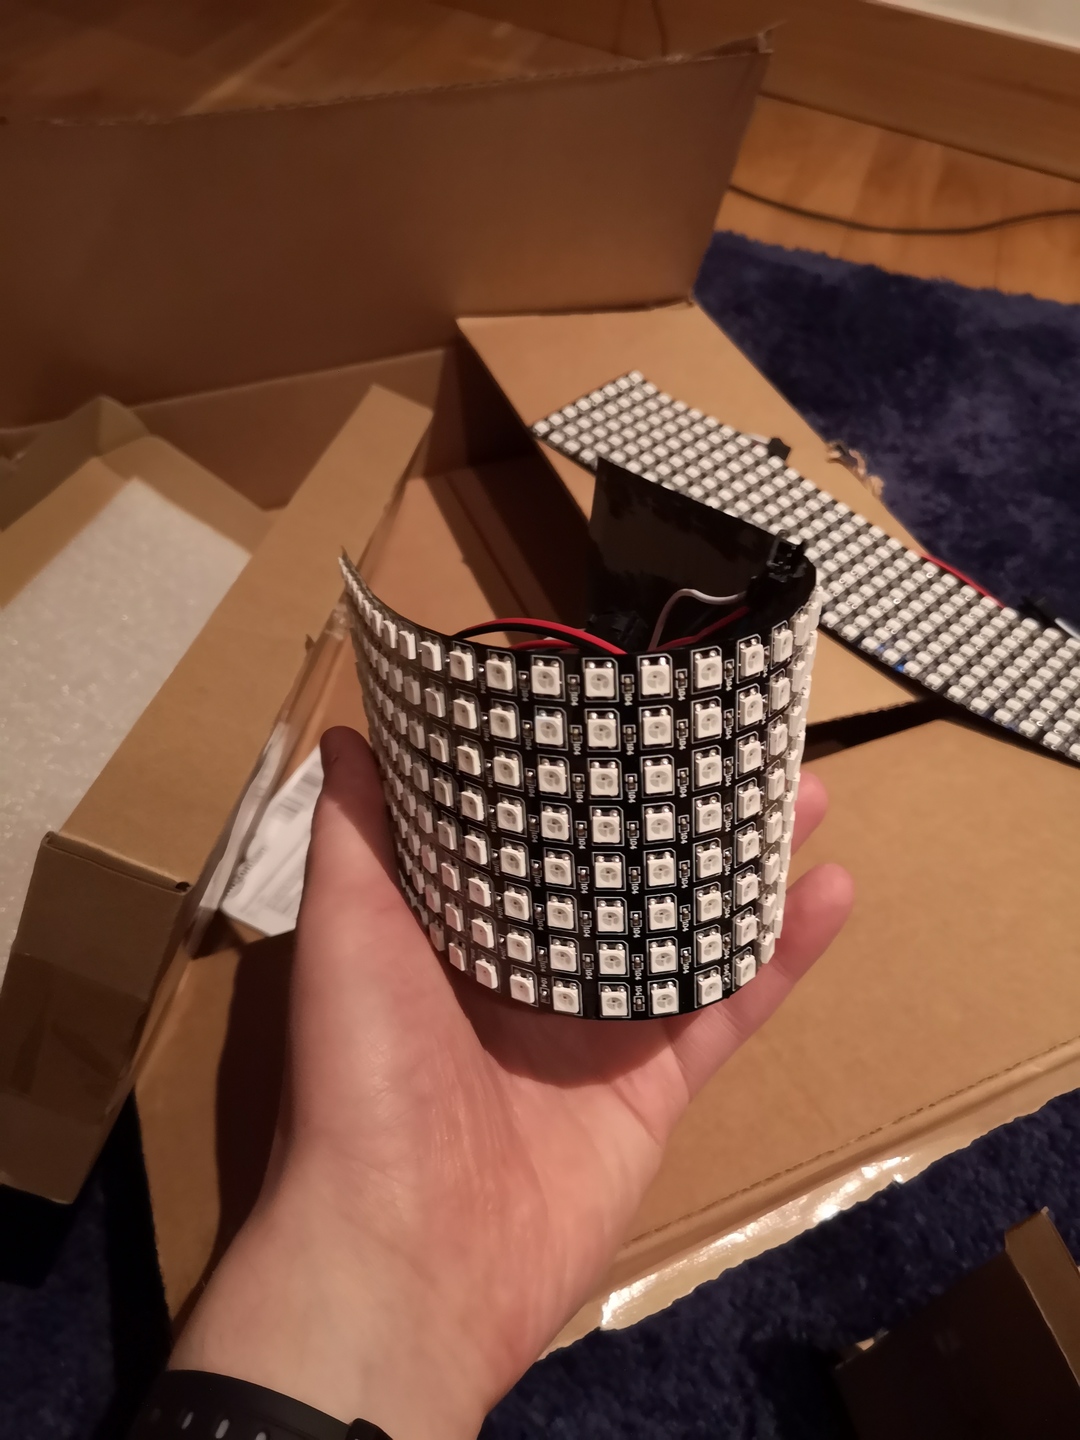
The only thing I compromised on was resolution, it being 8x32 (panel itself being 8cm x 32cm, so one pixel per cm squared). My friends assured me that being low res was part of the Protogen charm, and I've since found it fine for displaying easily readable expressions.
AliExpress had the panels for cheap, but has high delivery times. Adafruit would be faster, but more expensive. I went Amazon which was the middle of the road on cost and delivery.
The idea was I would have two panels, one panel would wrap around the front from ear to ear displaying my mouth, and the other wrapping around above my forehead showing my eyes.
The Frame - Part 3
Work on the frame continued.
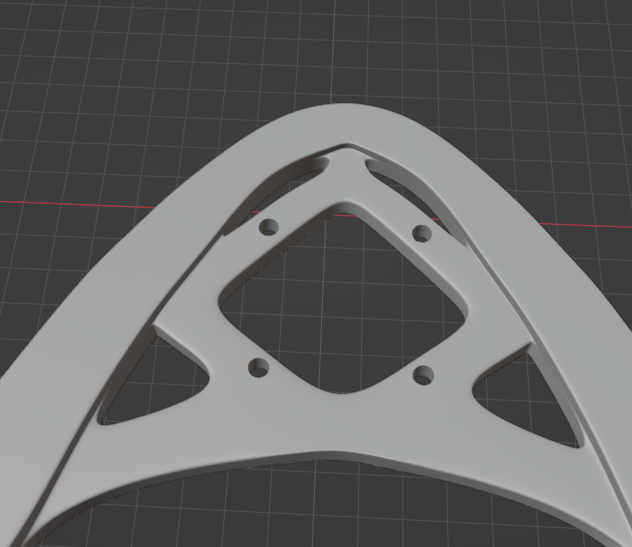
One aspect I was particularly proud of was the bit for the fan. I ordered a small fan which I planned to put under the chin of the helmet to help with ventilation. Before it even arrived, I examined the fan's datasheet and dimensions. It had four holes for screwing into position, so I put four holes in the 3D model of the chin of the frame, tweaking them virtually to make sure they lined up. Sure enough, when I printed it out, the holes lined up perfectly with the real fan and I was able to screw the fan in without problem!
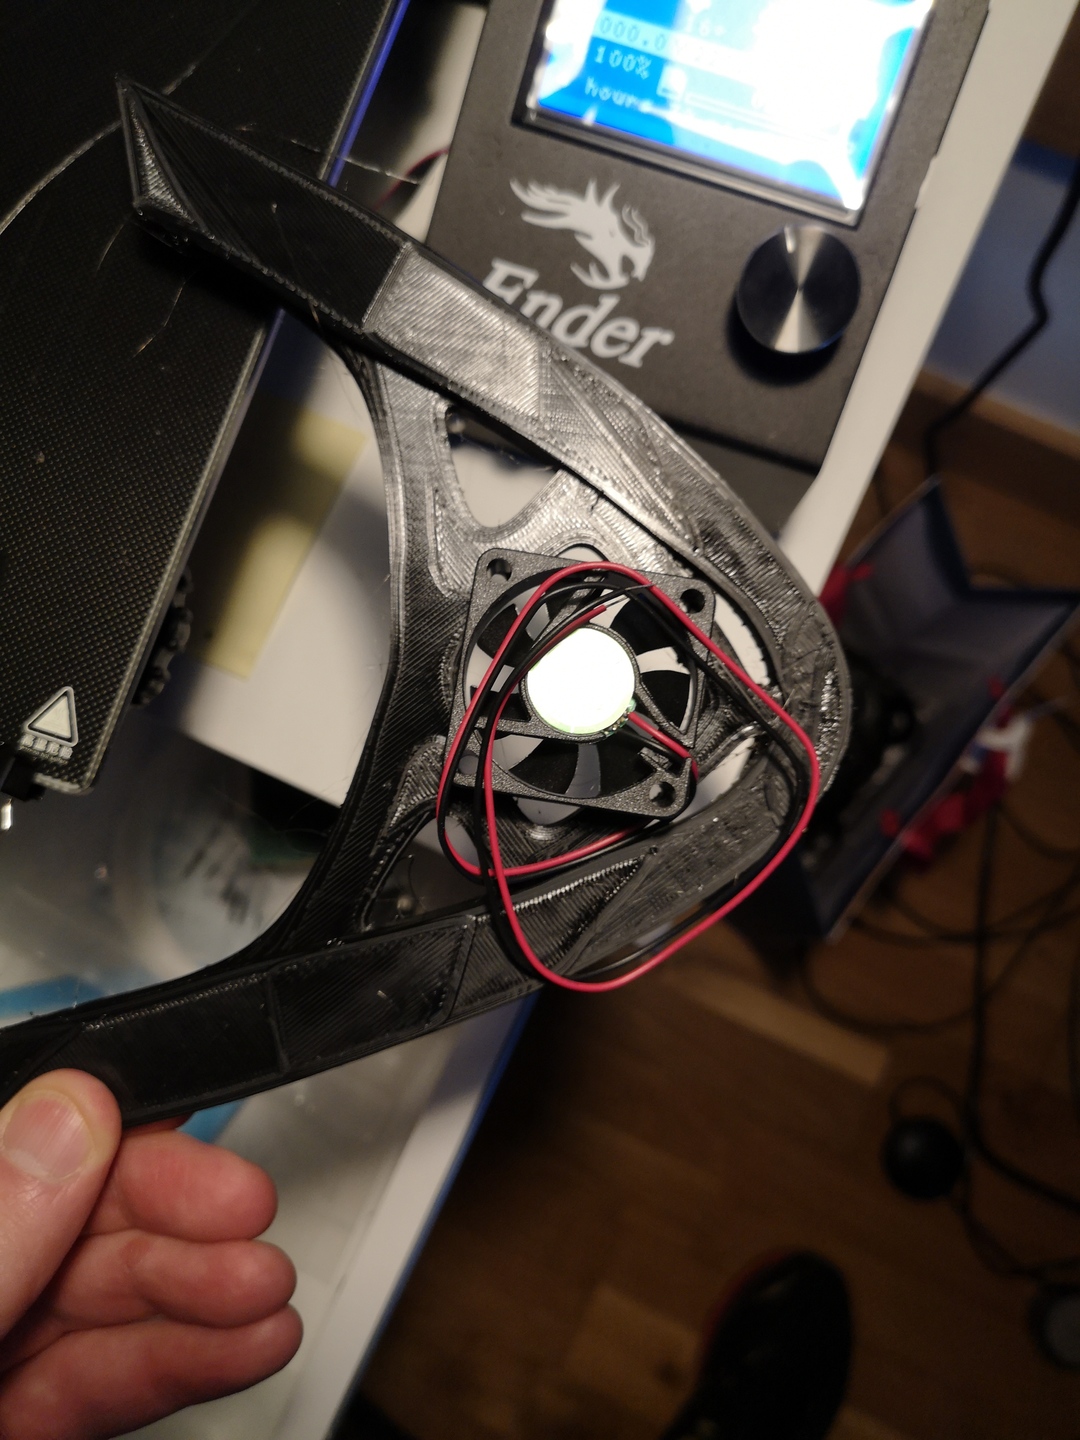
I was gearing up to get something ready for Furry Not New Year (FNNY) in January 2020, an Irish yearly furry event. I wasn't sure how much I was going to get done but I pushed on. In Blender I divided the model into separate pieces and started printing each one out:
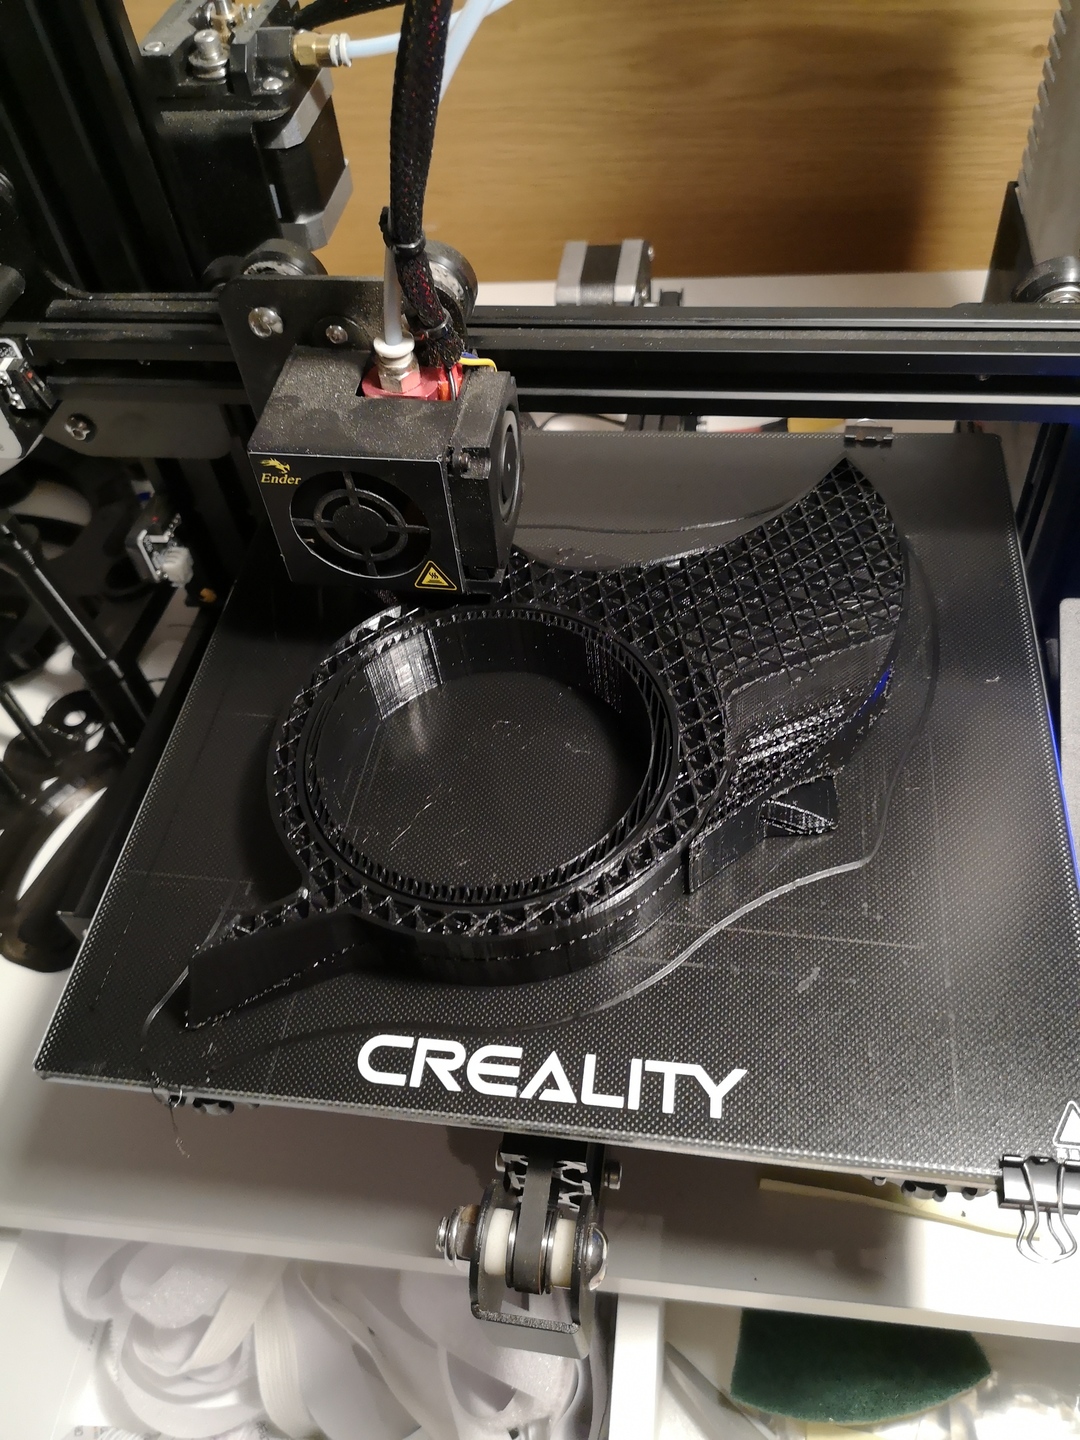
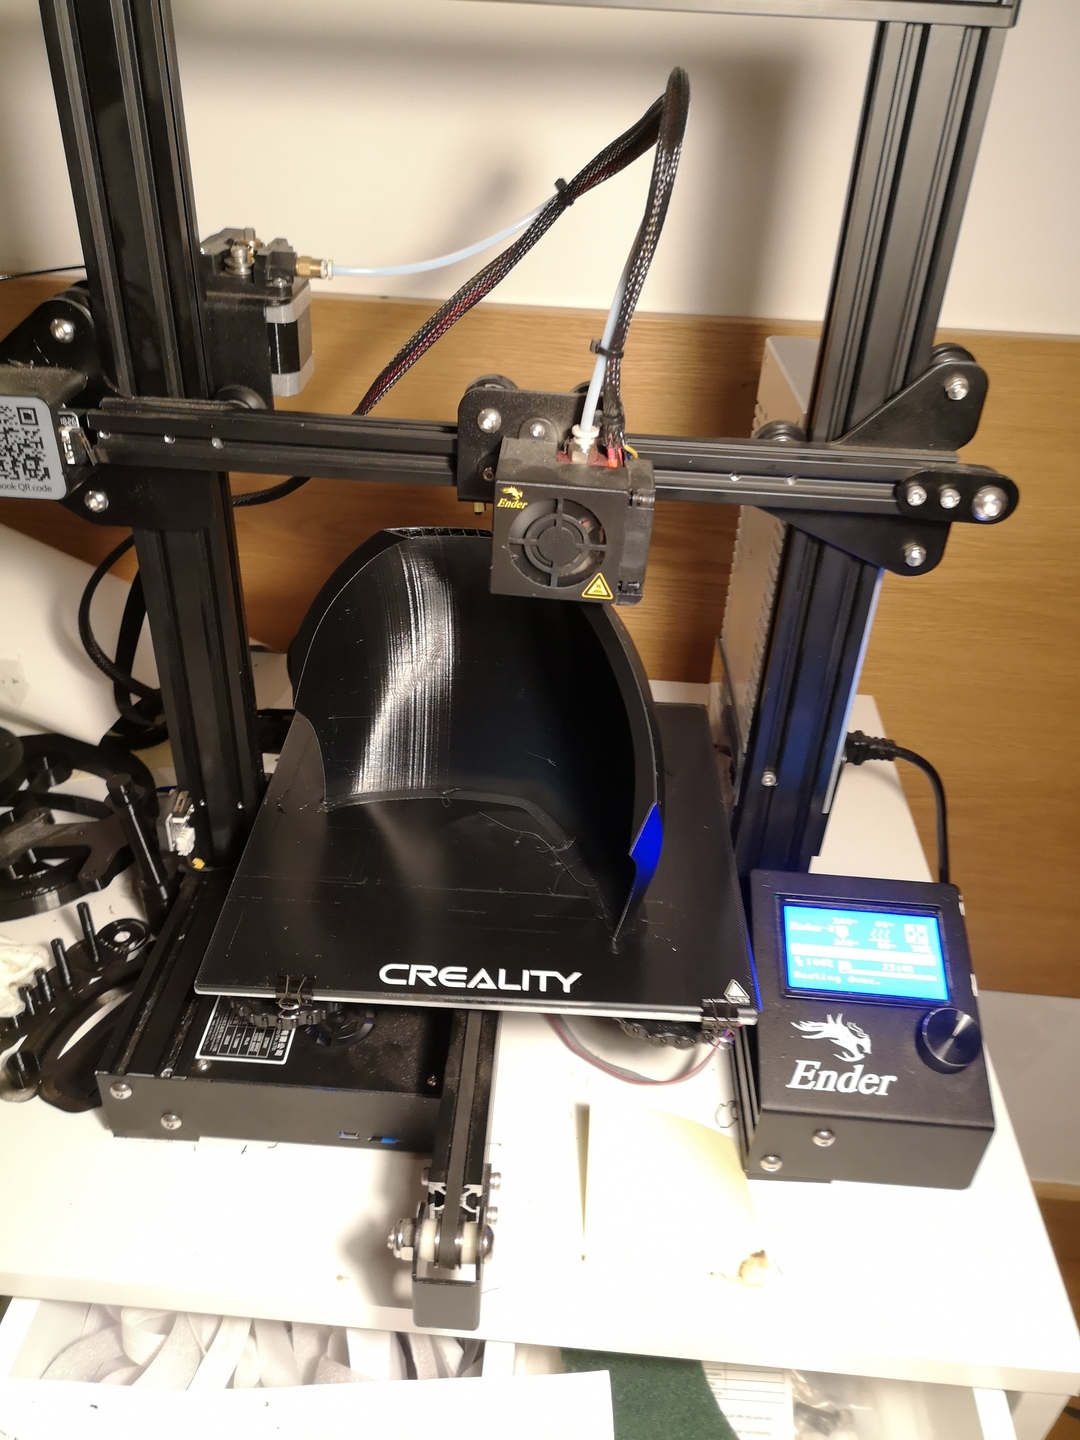
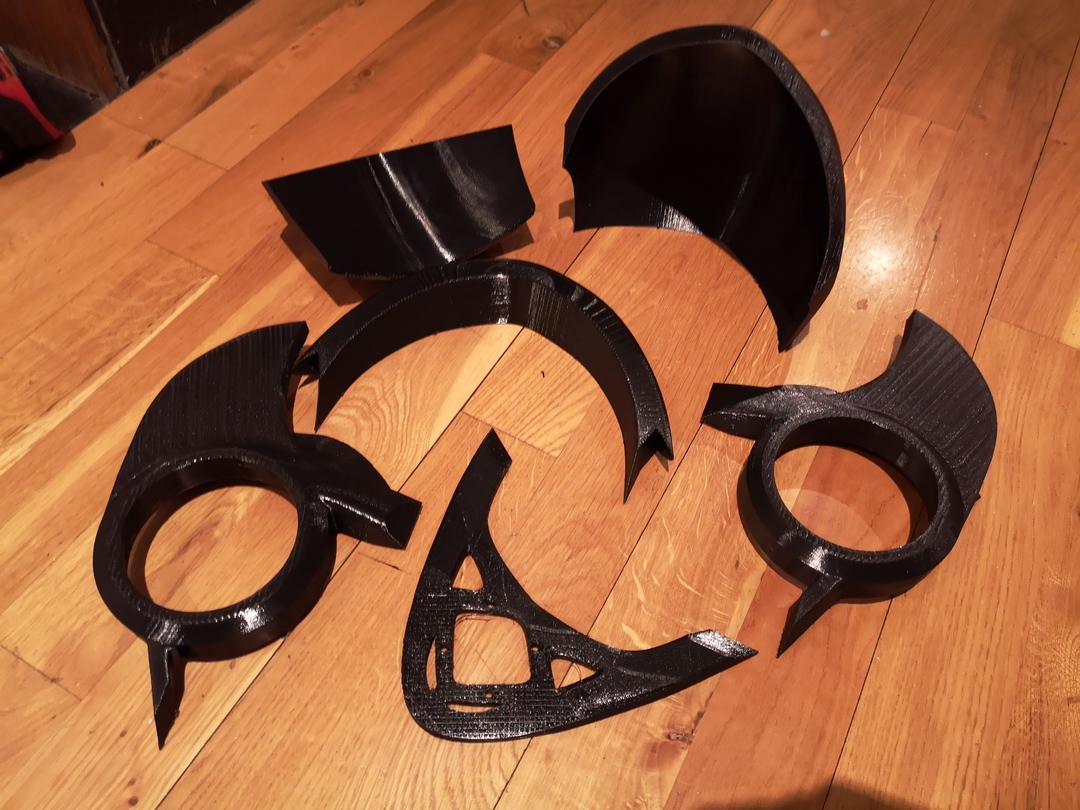
I glued them together:
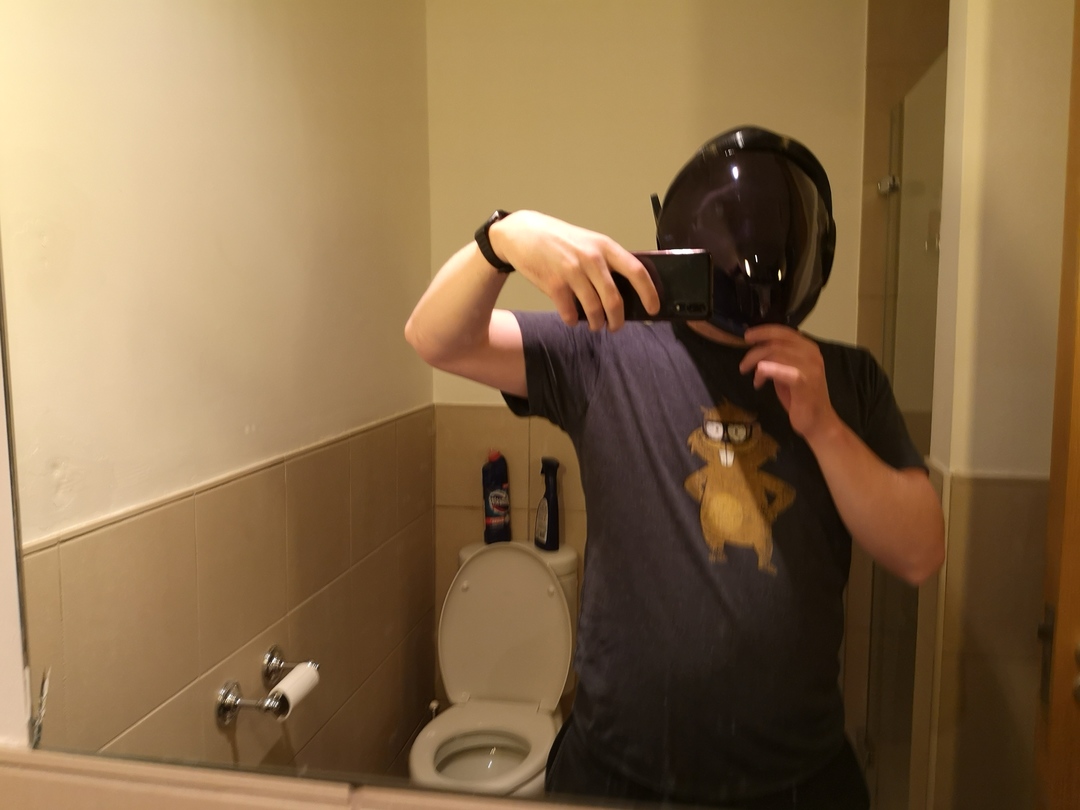
I had trouble putting it on, but with the deadline I moved onto the sanding and filling loop (much like with R-ALF). When it came to spraypainting, I hung it up on my balcony from a piece of rope and gently spraypainted it repeatedly from different angles.
And then it fell.
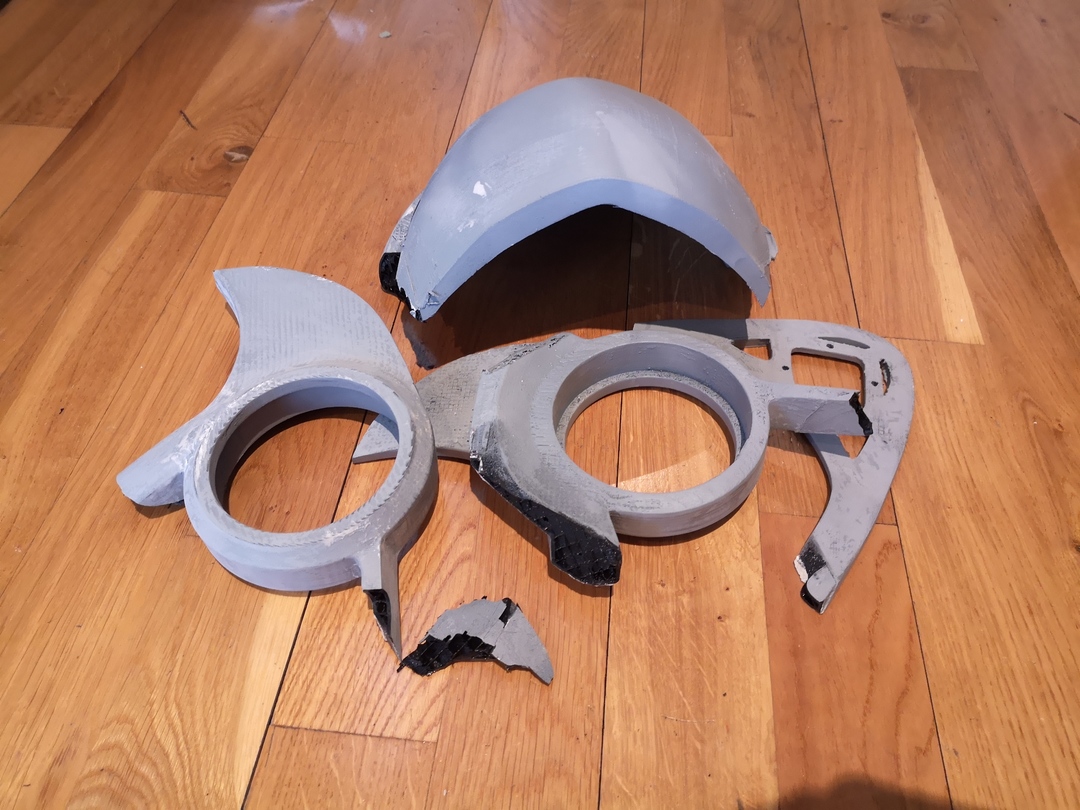
The rope I was using to suspend the helmet got loose, the helmet it fell off the balcony and right down to the ground below where it shattered.
I was shocked, stunned, all that hard work gone, and zero chance of having anything ready for the event.
Dismally, I collected the pieces and shared the story with others. They were supportive, and I did still enjoy the event, but I still temporarily shelved the project.
The Return
A few months later, I built myself up again to tackle it. By this stage the pandemic had kicked in so... yeah, guess this was a pandemic project.
I took the opportunity to redesign the helmet somewhat. I said I had trouble putting on the original helmet frame, but it was worse than that. Putting it on was actively painful.
You see, when designing the helmet, I had a 3D human head in the program so that I could design the helmet around it. Since the head was scaled to roughly the size of my own head, I knew that if the head fit in the virtual helmet, then my real head would fit in the printed out helmet. The problem is, I only checked whether my head could fit in the helmet when it was on, not whether it would fit for the entire action of putting on the helmet. The helmet could accomodate my ears fine when it was on, but would scrape my ears every time I put it on and off. Painfully.
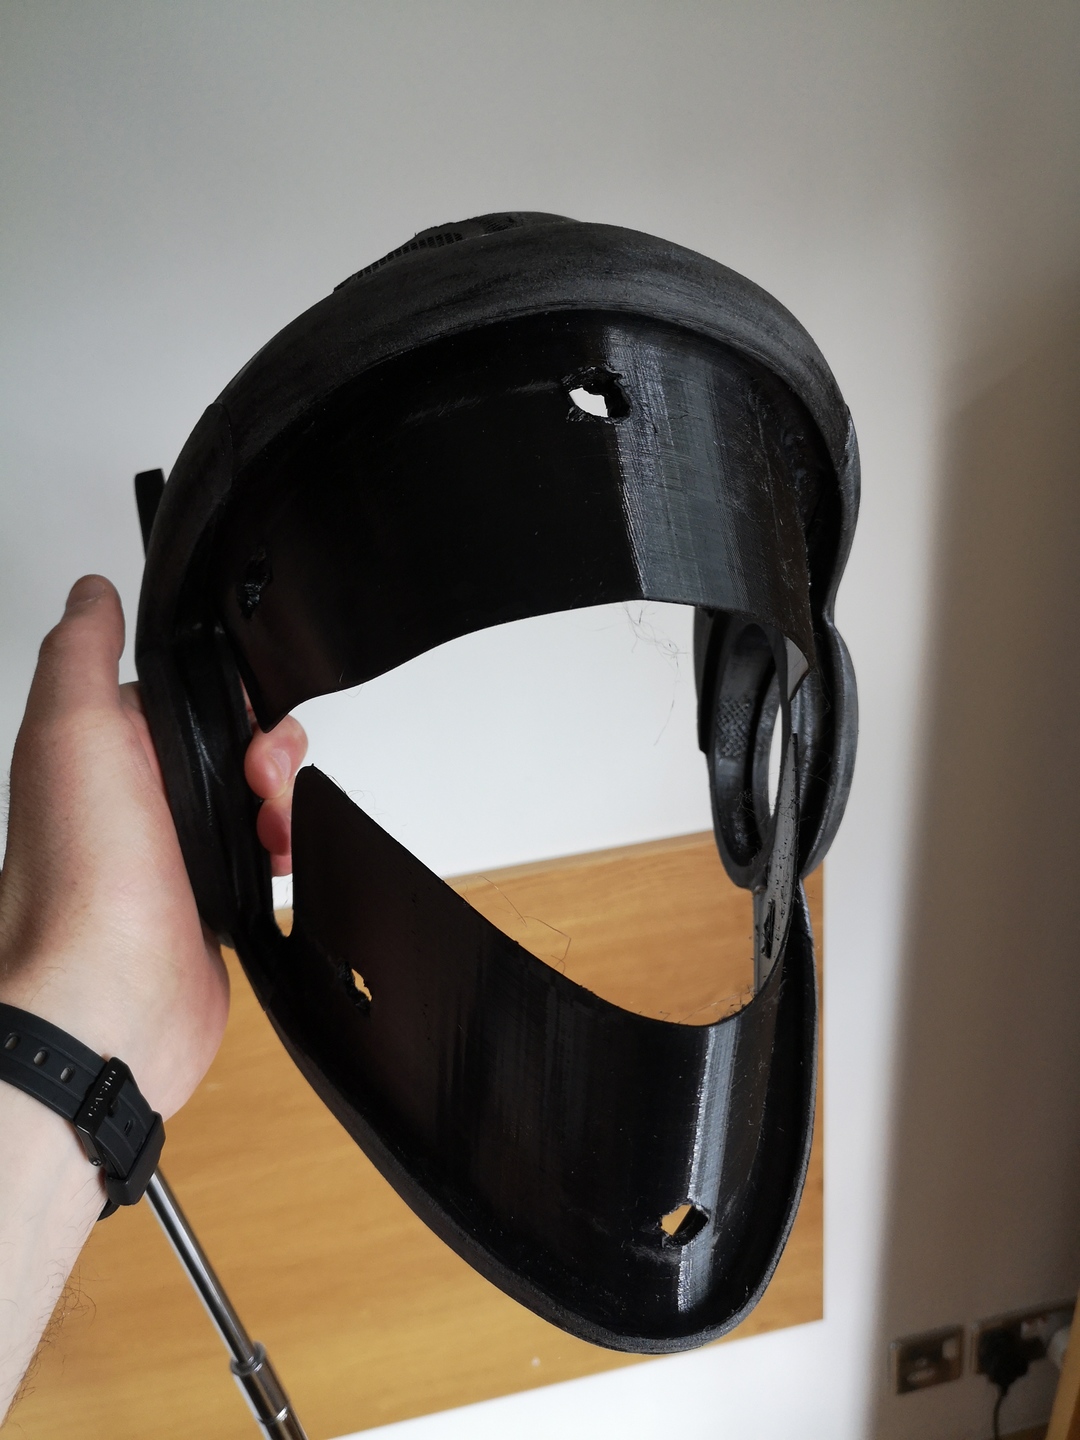
So I took this as an opporunity to revise the whole helmet design. While I was at it, I added a place for the LED matrix to rest on.
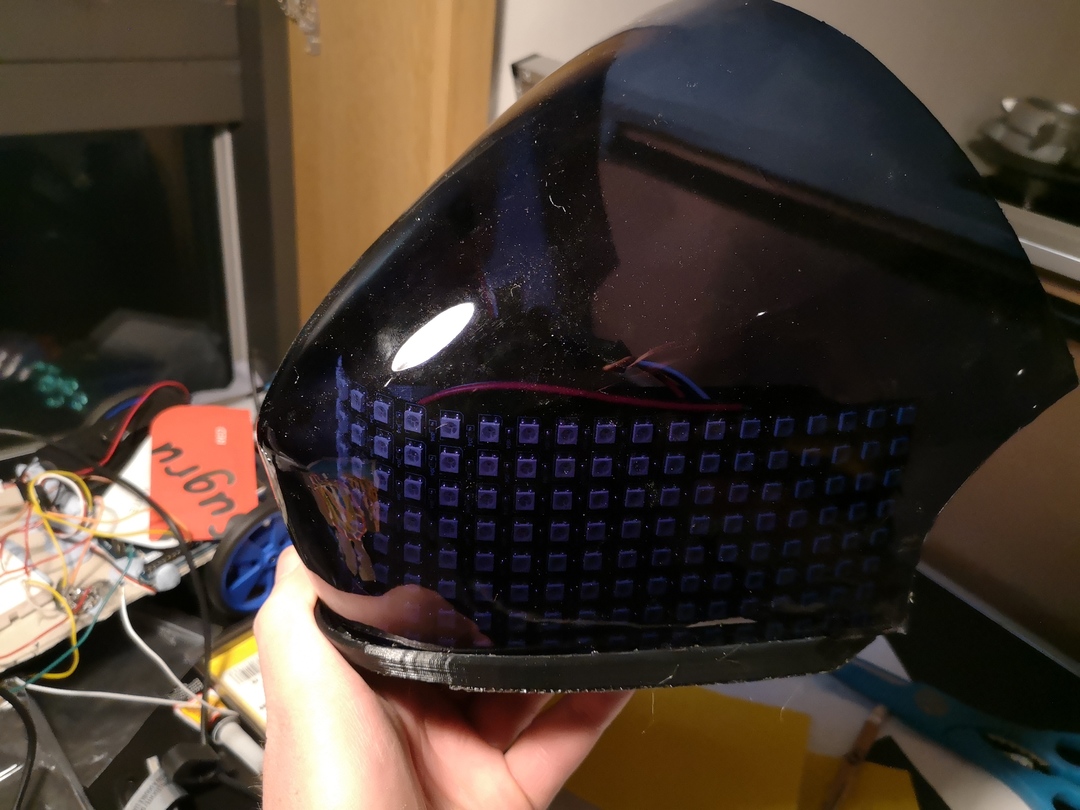
It was great, except that I later discovered I'd forgotten holes for the wires on the back of the LED matrix. That was "fixed" by using a soldering iron to make more holes in the helmet. Hey, it worked!
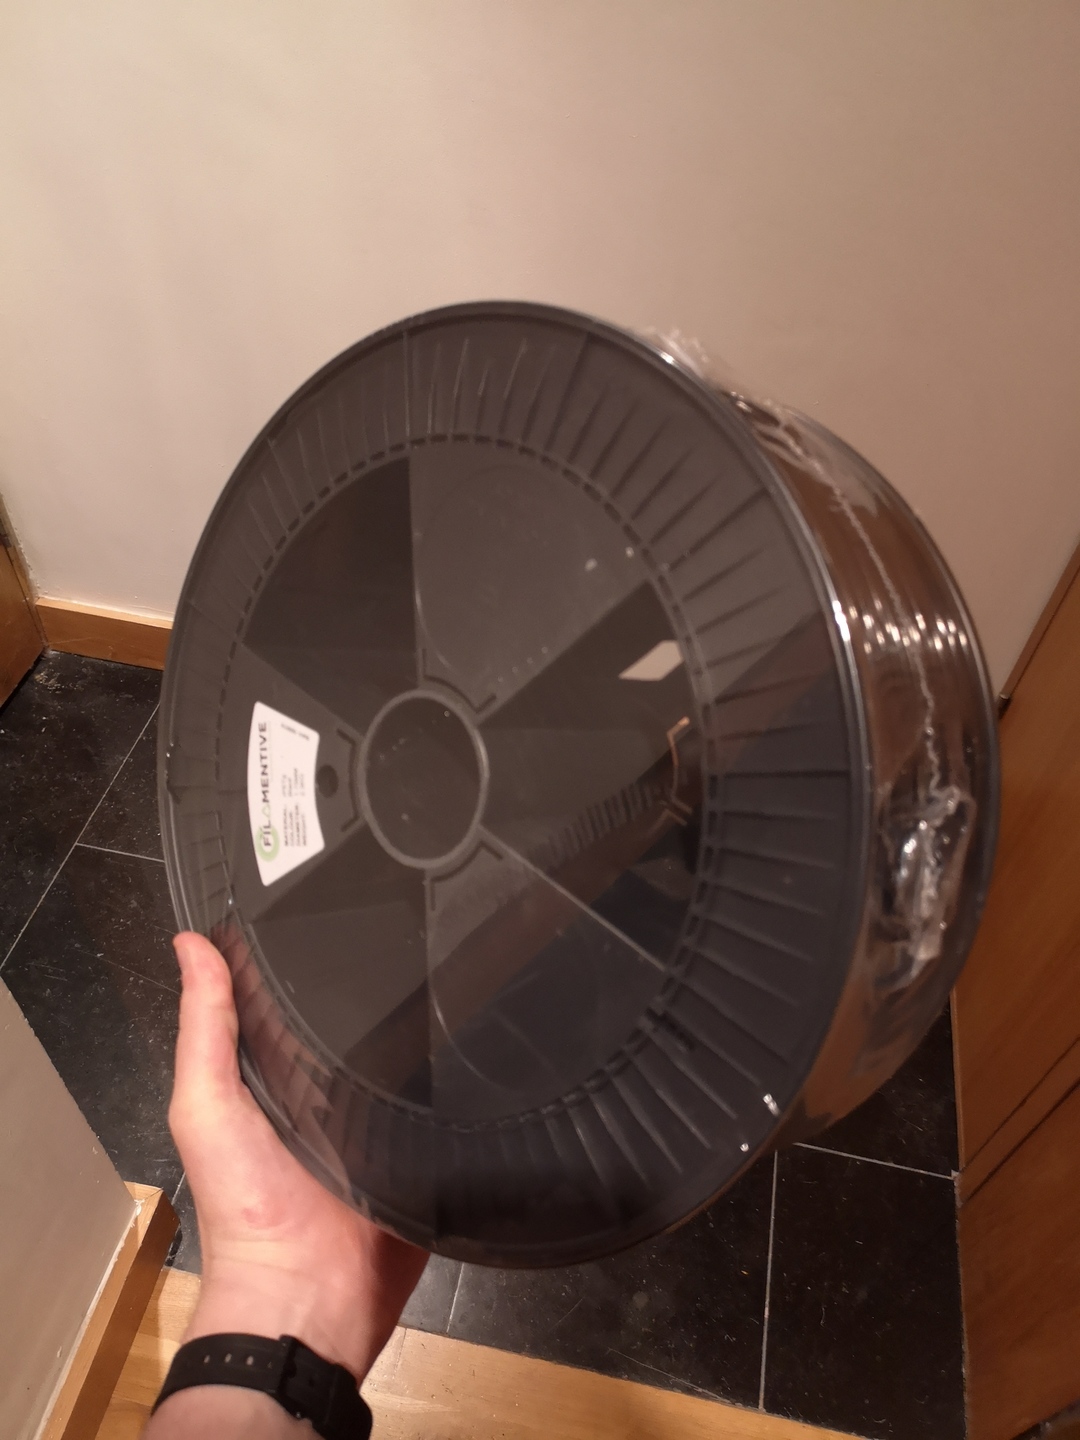
So it was time to print the whole thing all over again, using a great big 2.3kg roll of PET-G:
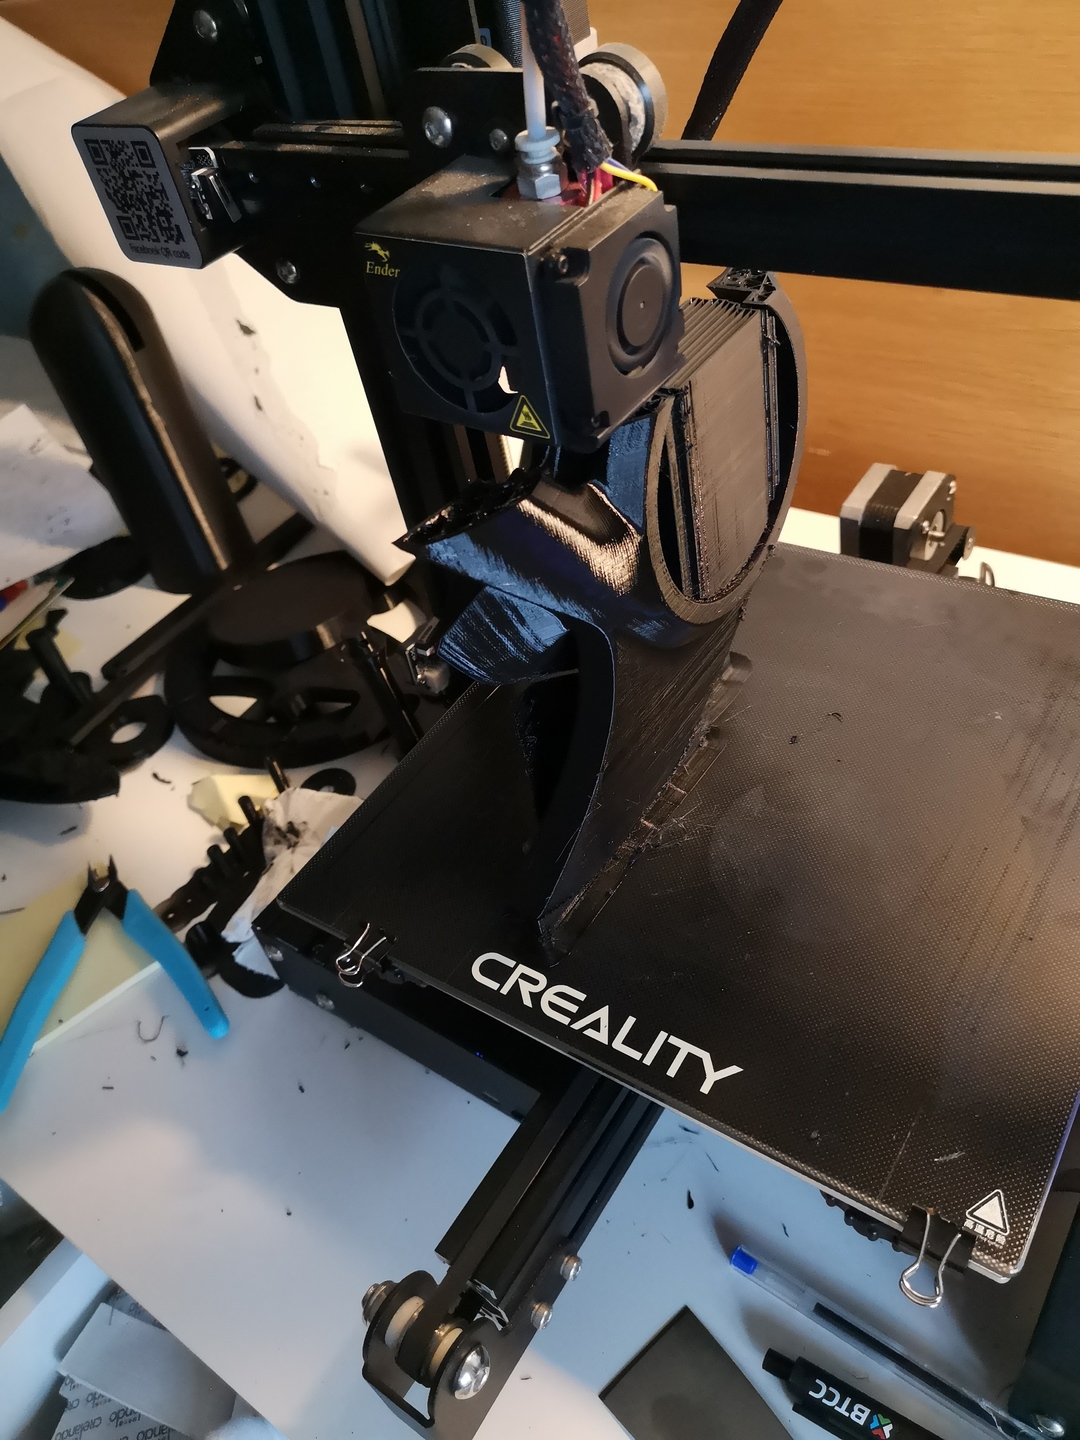
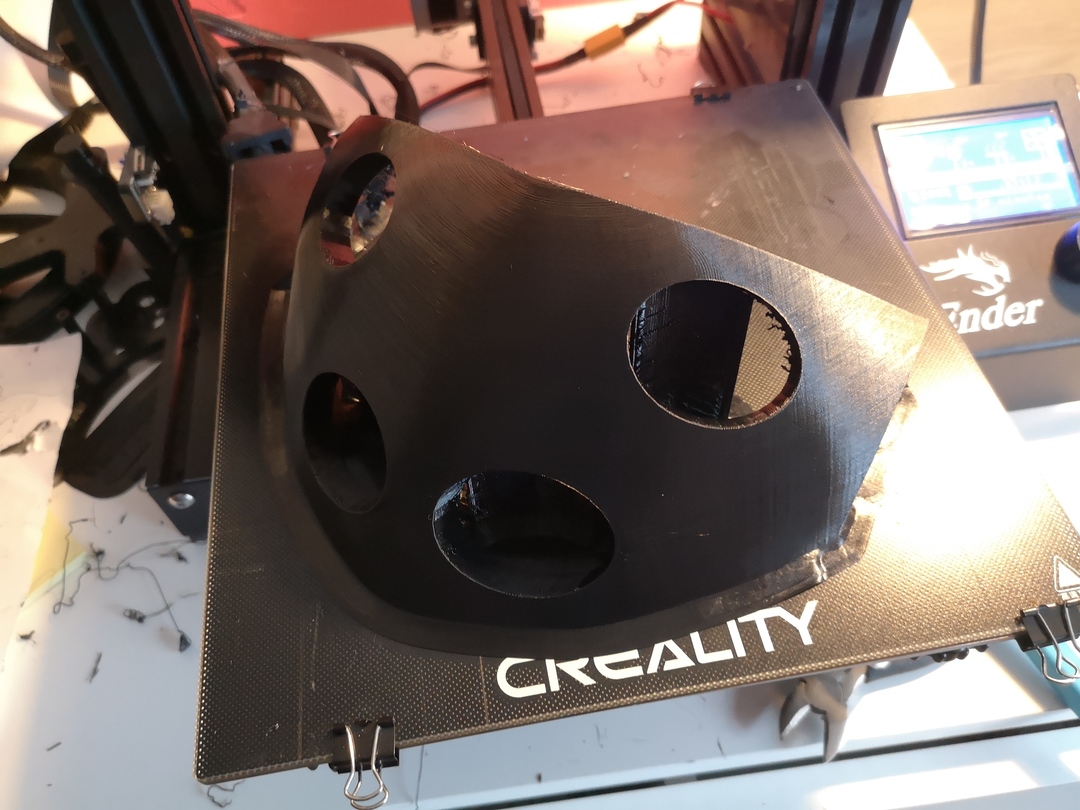
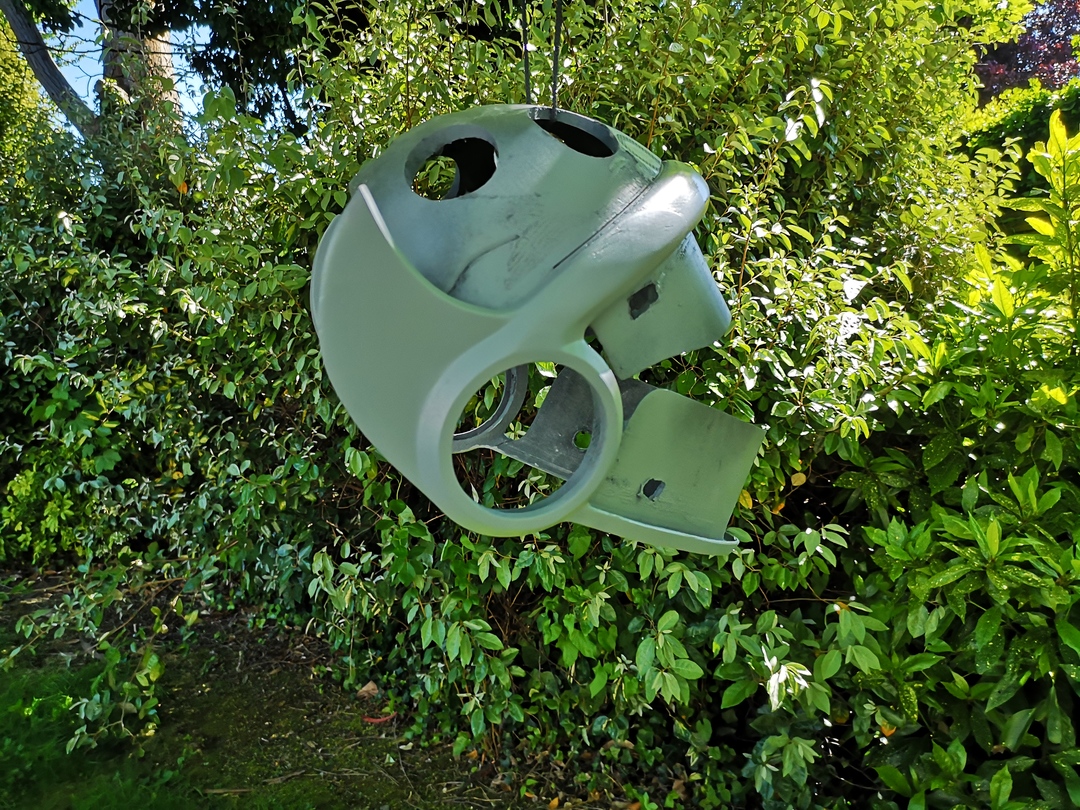
So the process of printing, gluing, filling and sanding began again. This time when it came to spraypaint, I hung it from a tree with soft ground underneath, and very secure rope ties.
The Expressions
The LED matrices fit well into their mounts, and I got to wiring them up to an Arduino.
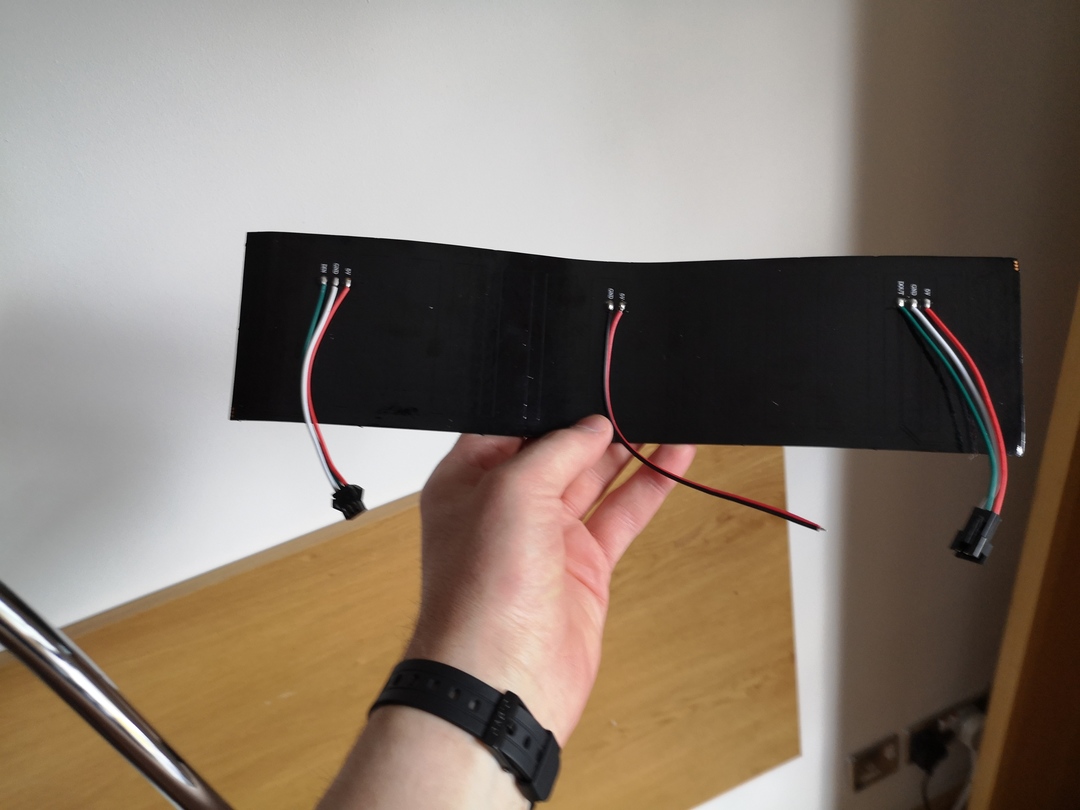
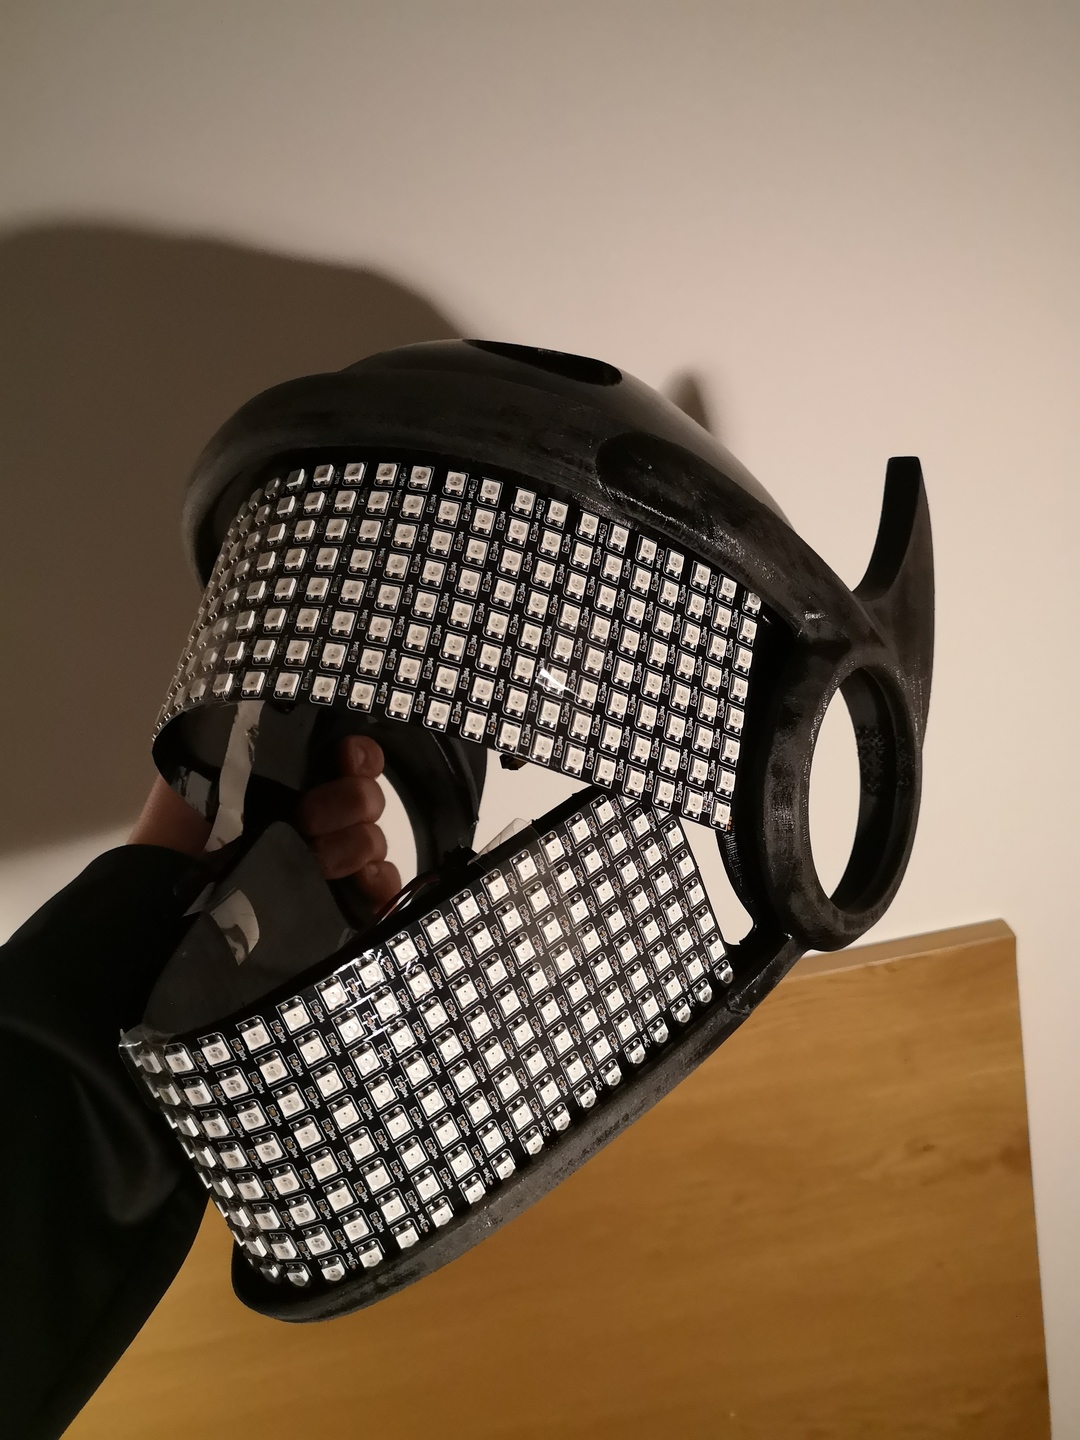
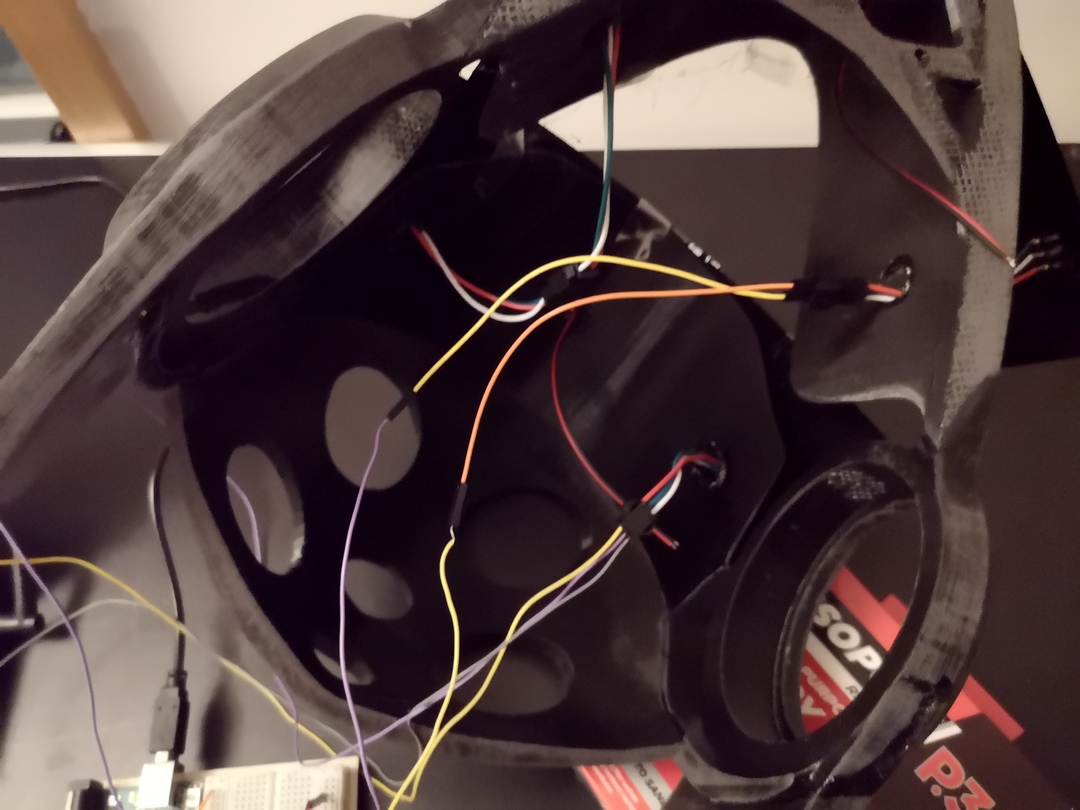
Basic programming was pretty straightforward. I used the Adafruit GFX Graphics Library and was able to draw pretty easily with that, or print out text. Effectively, once I entered in how many LED matrices I had, how many lights they had, and how they were orientated, I could easily set the colour and brightness of any individual pixel light.
However, being able to technically set each pixel colour is different from actually lighting up an expression. So I created a simple HTML page that let me draw expressions while giving me the exact data that I needed to enter into my program in order to show the expression on the actual visor. This was cool, except I had to copy and paste the data, and recompile and upload the program every time I wanted to change expression.
So then I had an idea. I swapped out the regular Arduino for a Arduino MKR WiFi 1010, basically a small Arduino with wifi, and used that to connect to my web server via my home wifi. With a bit of web development, I was able to have it so that editing the expression on the web page would update the expression on the actual visor. I let my friend Tapewolf try it out. It was fun seeing the expression on my Protogen change as he interacted with a webpage while in another country; but then he predictably exploited a bug in my program that caused a buffer overflow on the Arduino and crashed my Protogen.
Still, it made it easy to quickly draw a bunch of expressions and see which ones I liked. When I got one I was happy with, I hard coded it into the Arduino as my default expression. I always planned to add more expressions and a way to switch between them, but for now there's only a single static expression.
The Batteries
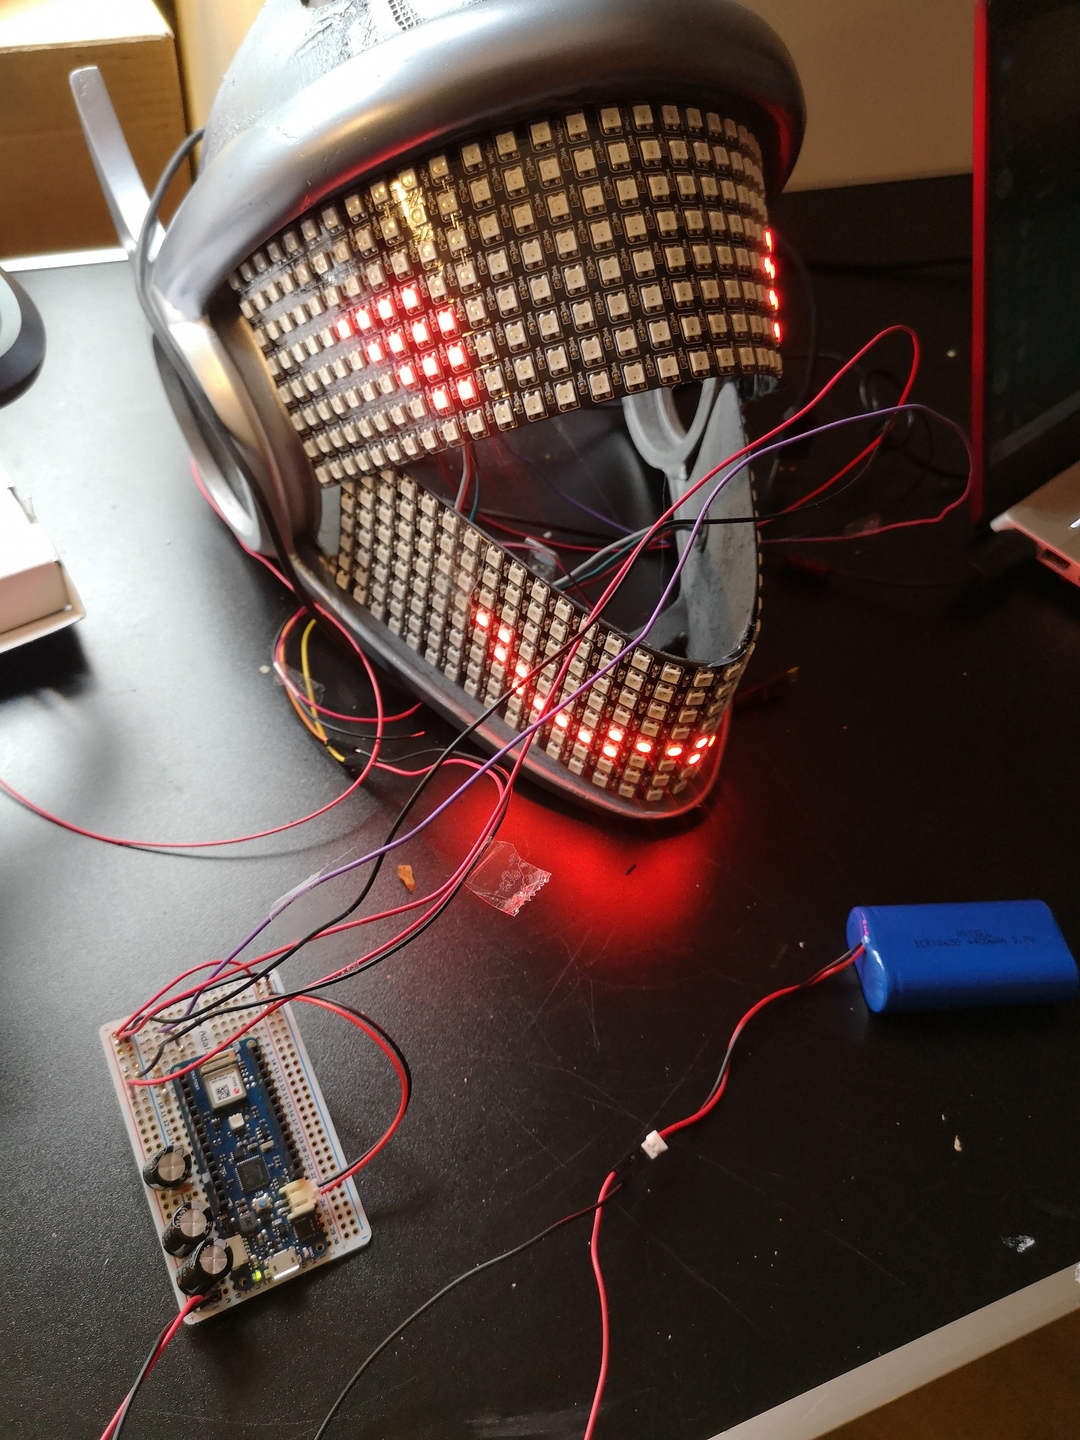
I bought a bunch of rechargable batteries from Adafruit (since cheap rechargable batteries are a no no), and generally used one of them to power the Protogen LED matrices and fan. I could even use regular batteries since I also purchased a battery holder, and they all used standard JST connectors making batteries easy to remove and replace.
Regardless of which battery I used, generally it's power went into the power and ground lines of a breadboard or proto-board. This power would be fed directly into the fan, the Arduino, and various points on the LED panels (it's advisable to connect the panels to power and ground at various points). Early versions would have the whole thing turn on the moment the battery is connected, but from Adafruit I also got a cable with a switch on it that made it easier to turn on and off. I also got things that would let me charge the Protogen battery from a USB cable.
I'll be honest, I don't know my batteries very well, and some of them explode. So you're not meant to put the batteries in the helmet in front of your face, which is exactly what I did. Yeah, that stuff is dangerous. In my defense, the annoying thing is that the exploding, dangerous batteries and the much safer ones have such similar names. There's Lithium Ion Polymer batteries, Lithium Ion batteries and acronyms like LiIon, LiPoly and LiPo... and in fact they might all be dangerous.
This guy here recommends LiFePO4 batteries (Lithium Iron Phosphate Batteries) for fursuit batteries and he's made suits with a LOT more RGB lights than I have, so his advice probably beats mine.
The Tech
Here's a rough diagram of the wiring of the Protogen (emphasis on rough, its more for general layout than accuracy):
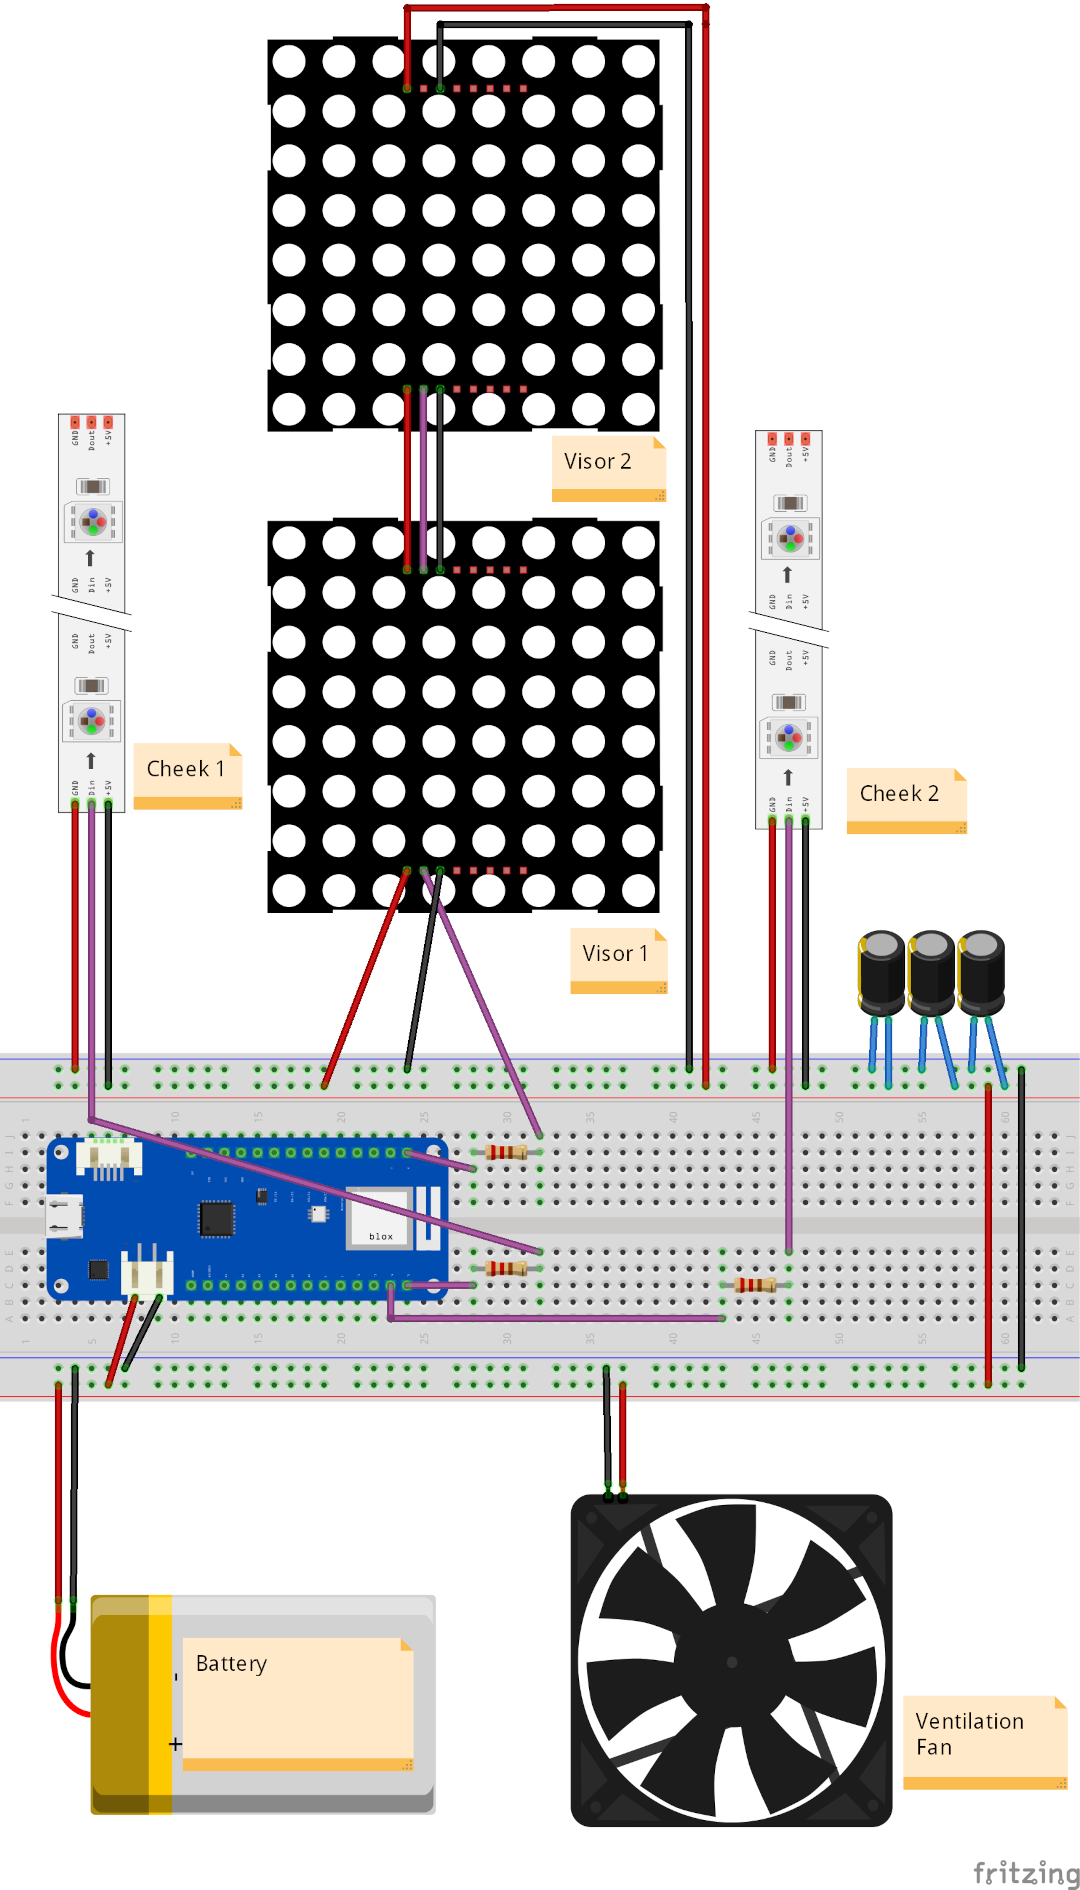
As you can see, the layout is pretty straightforward.
The battery powers:
- The Fan
- The microcontroller (an Arduino MKR Wifi 1010)
- Three groups of RGB LEDs:
-
- The Visor consisting of:
-
-
- A 32x8 panel for the eyes
-
-
-
- A 32x8 panel for the mouth
-
-
- Left Cheek Lights
-
- Right Cheek Lights
Controlling the RGB LEDs has some best practices you can read about here. In my case, its the reasons for the capacitors over the power lines and resistors in the data lines.
The source code that the Arduino runs to operate the Protogen can be found here. I edited it slightly before uploading, so let me know if you have issues with it. Once again, it's good for a general overview.
The Ears
With the visor mostly working, I focused on the next bit, the ears. I started with using some car sponges from Halfords (where I got some of the silver spraypaint and filler builder), sculpting them to the right shape.
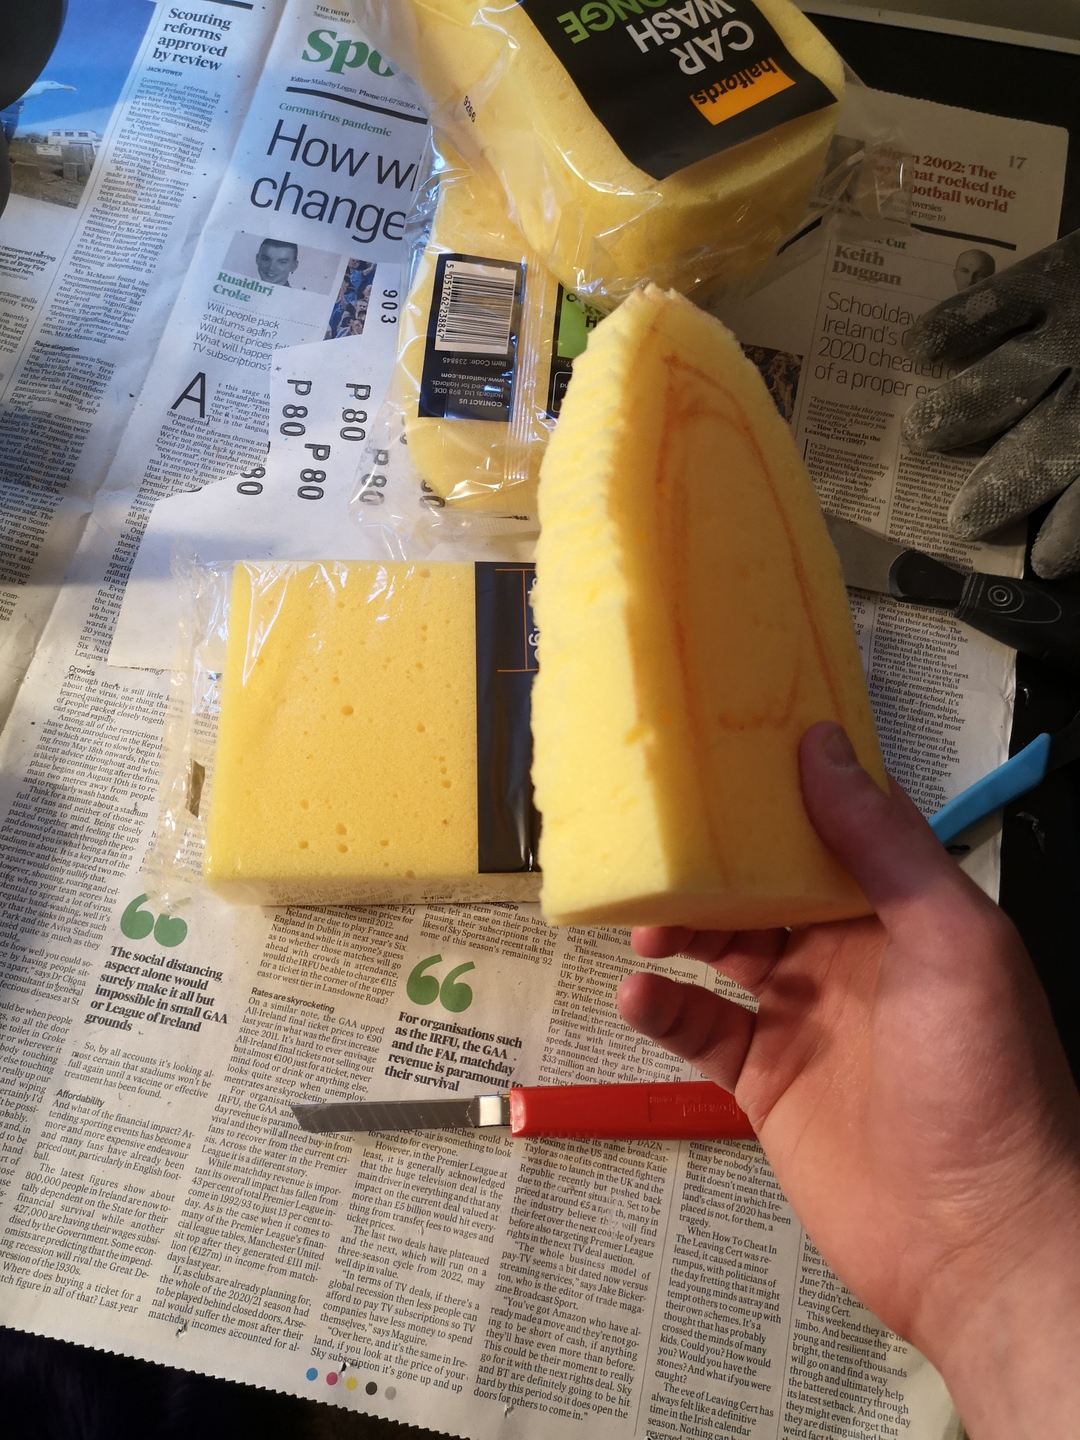
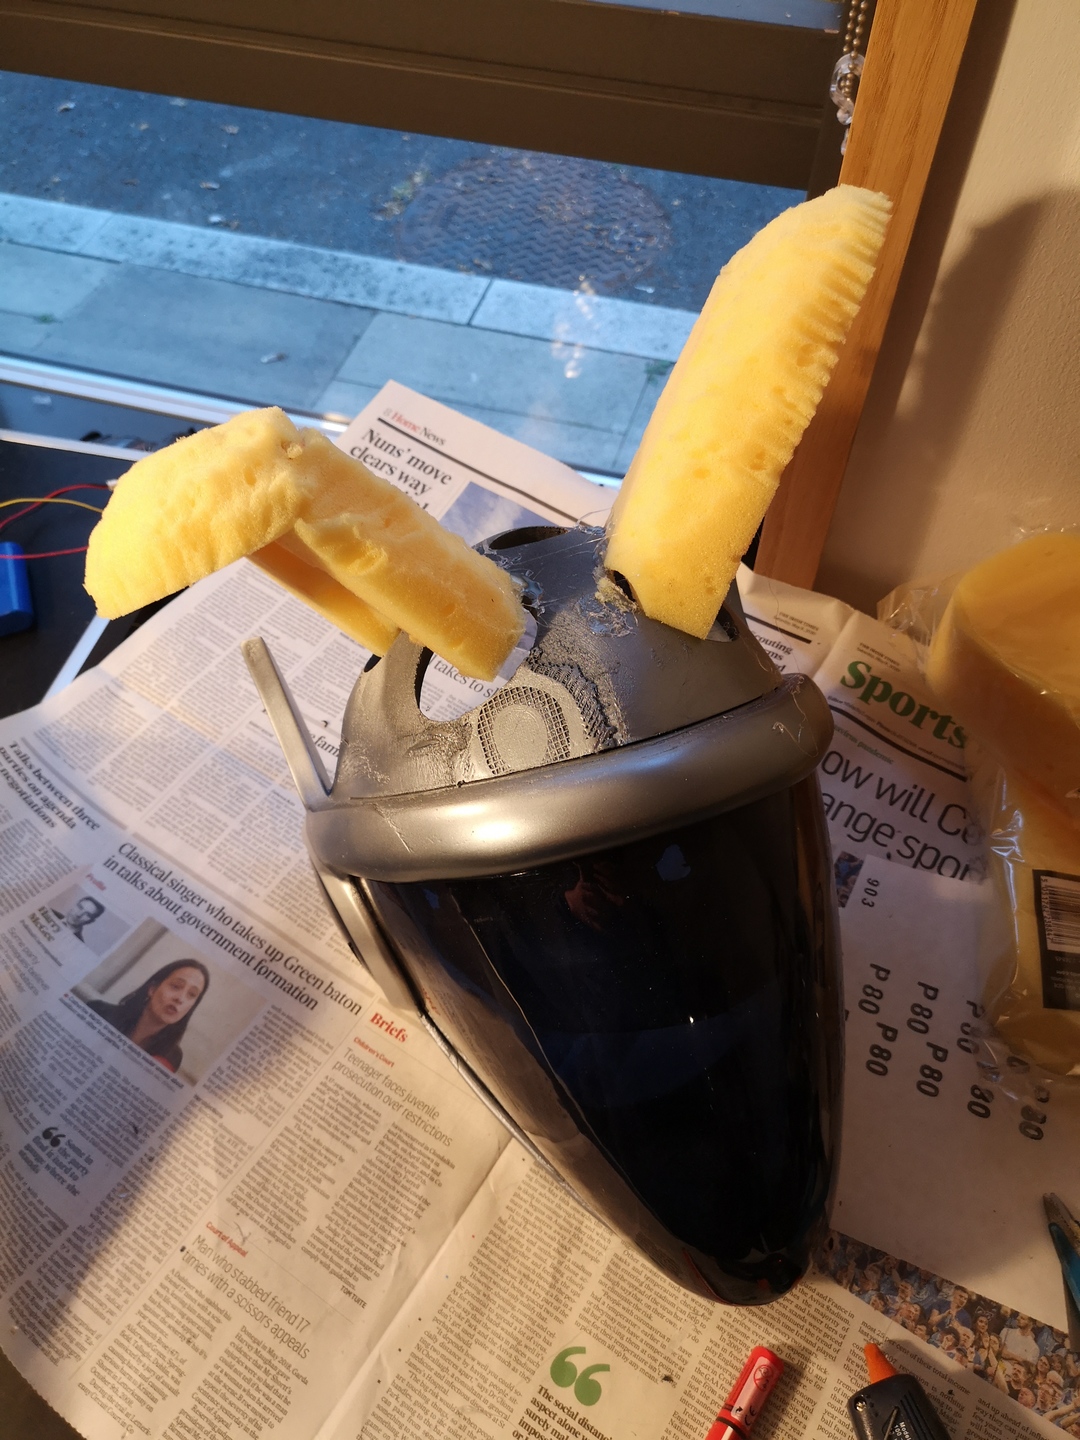
I did not like their shape, so I tore them off the helmet, and managed to find a good website that sold me chunks of upholstery foam in whatever dimensions I wanted. I ordered some big blocks, and got to work scuplting out the shape. The bent ear was trickier since I needed to make it from several chunks and use hot glue to keep it all together.
The Fur
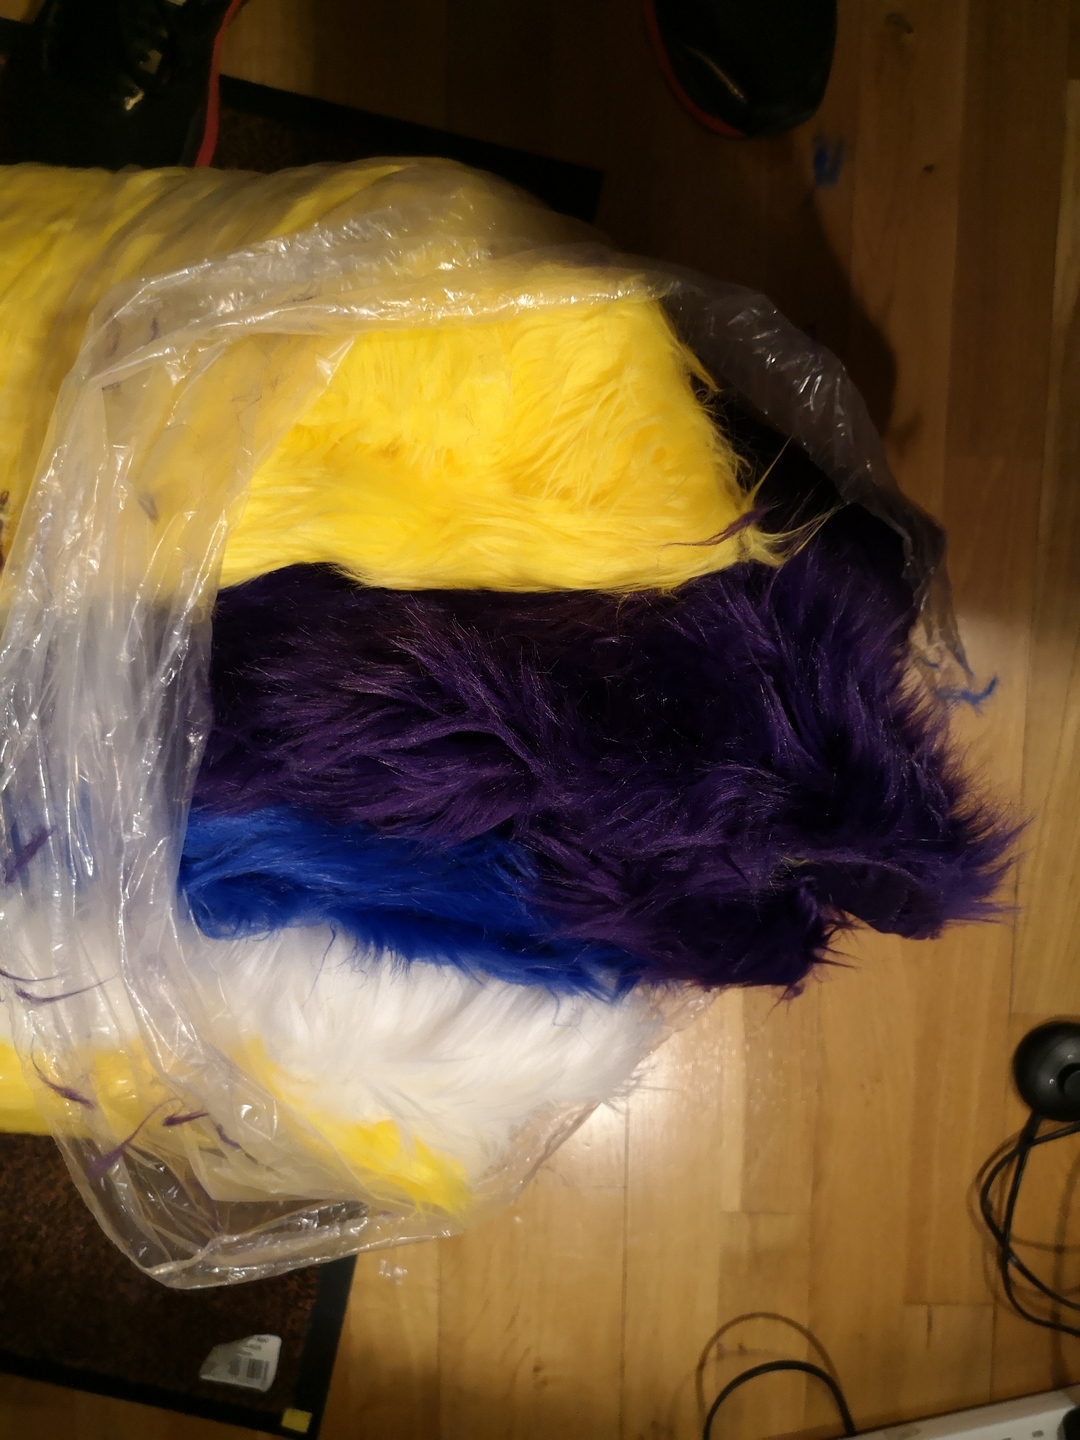
And then the fur! I'd ordered the fur much earlier in the process. I tried to save money with my first order of fur by ordering cheap stuff, only to end up with low quality fur (I believe known as fun fur). Lesson learned, I shelled out more money for higher quality fur, and I was mostly happy except that the blue fur was in slightly the wrong shade (cobalt blue rather than royal blue).
In any event, I started cutting out fur for the Protogen helmet... and stopped.
Truth is, I didn't really know what I was doing. I'd gotten the fur direciton wrong in one bit cut out, and I wasn't sure how I'd fit the bits of fur together at the end. I thought of cutting out the right pieces and just hot gluing them straight onto the helmet, but advice from my friend Merlin told me this could make it look messy and I didn't want to bungle it up.
I hadn't really worked with fur before, I didn't want to screw it up, so I just... stopped working on the helmet. Yep, I took another break.
To be fair, I'd been working on it in parts from March to May of 2020, but I found myself losing motivation for multiple reasons. Firstly, with the pandemic in full swing, there wasn't a convention to show it off at, though ironically one of the reasons I had worked on it so much in may was that the pandemic had cancelled a wedding and Confuzzled giving me more time to work on it. Next, I wasn't sure how to work with fur, this was literally my first time doing anything more than quick and dirty fur sewing.
To top it off, I kinda felt I was already moving on from having a Protogen as my main sona. The reasons and details are, once again, covered in my fursona evolution writeup, but the short version is that a few months after I stopped working on the Protogen, in late 2020, I finally developed my Chox fursona, and was super happy with it.
So the unfinished Protogen helmet lay there, another thing cluttering up my workshop.
The Return... Again...
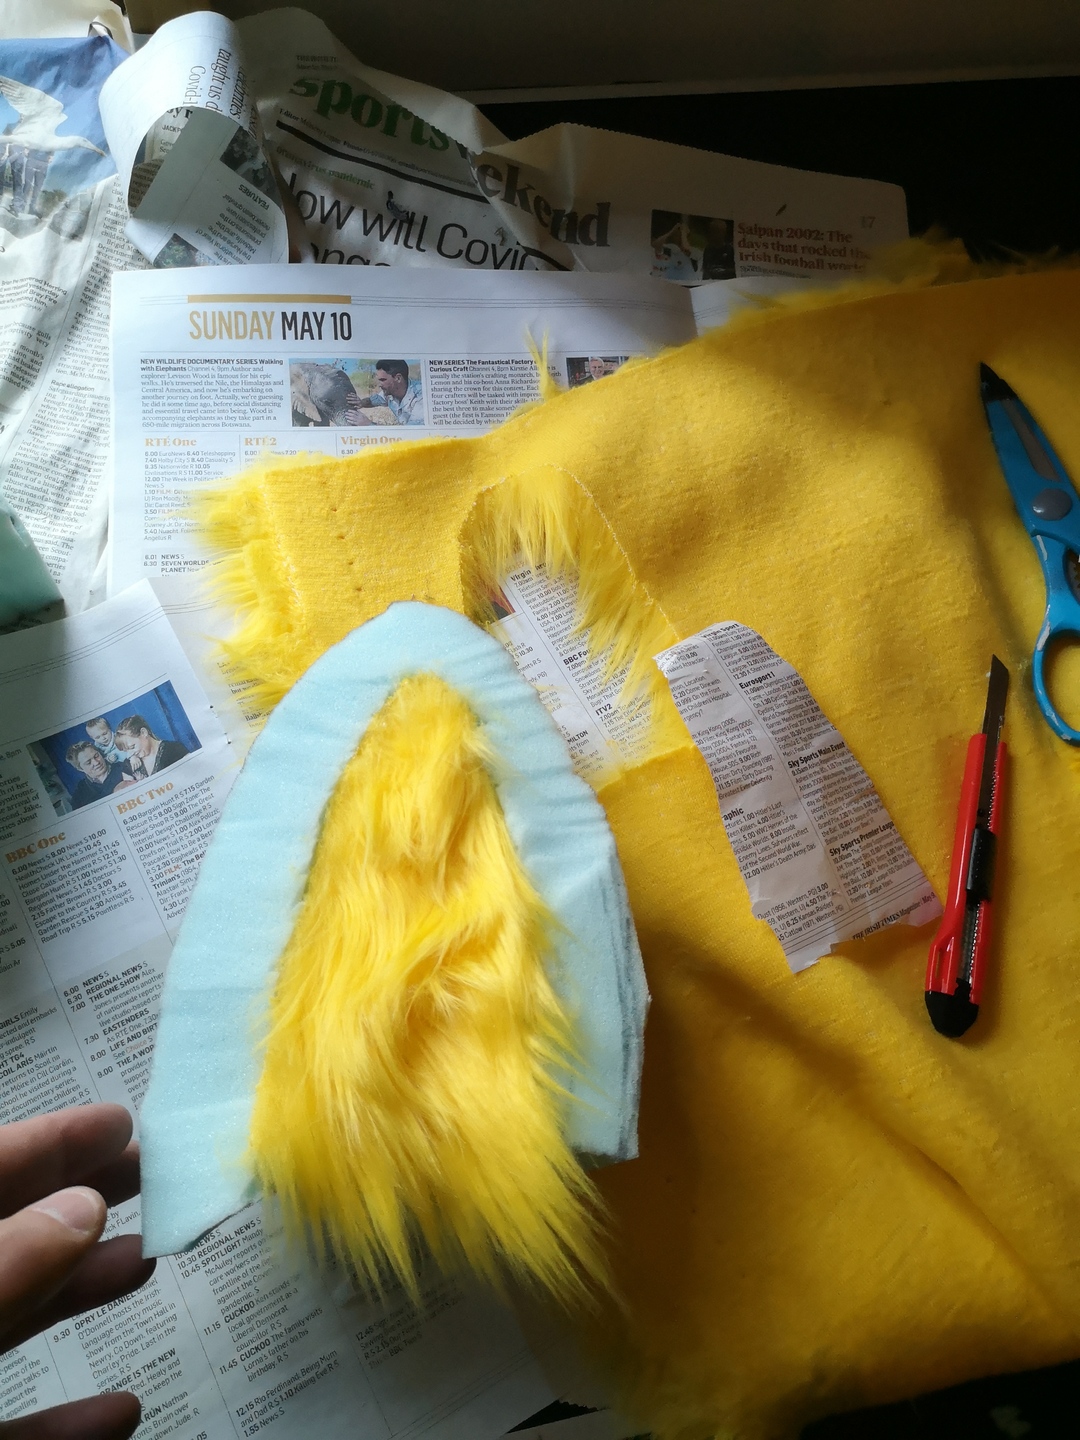
The following year, I got a minor burst of motivation to finish the Protogen head one way or the other. As I've said, the furring of the head was the part that really stumbled me, but I looked up and found a really good video tutorial on how to fur a protogen head by Mugiwara Cosplay. I would watch that video over and over. I realised two things I needed to fix. Firstly, glue the ears to the fur before gluing to the helmet, and secondly use duct tape and cling film to figure out the pattern of the helmet and the ears that I would later use to cut the fur.
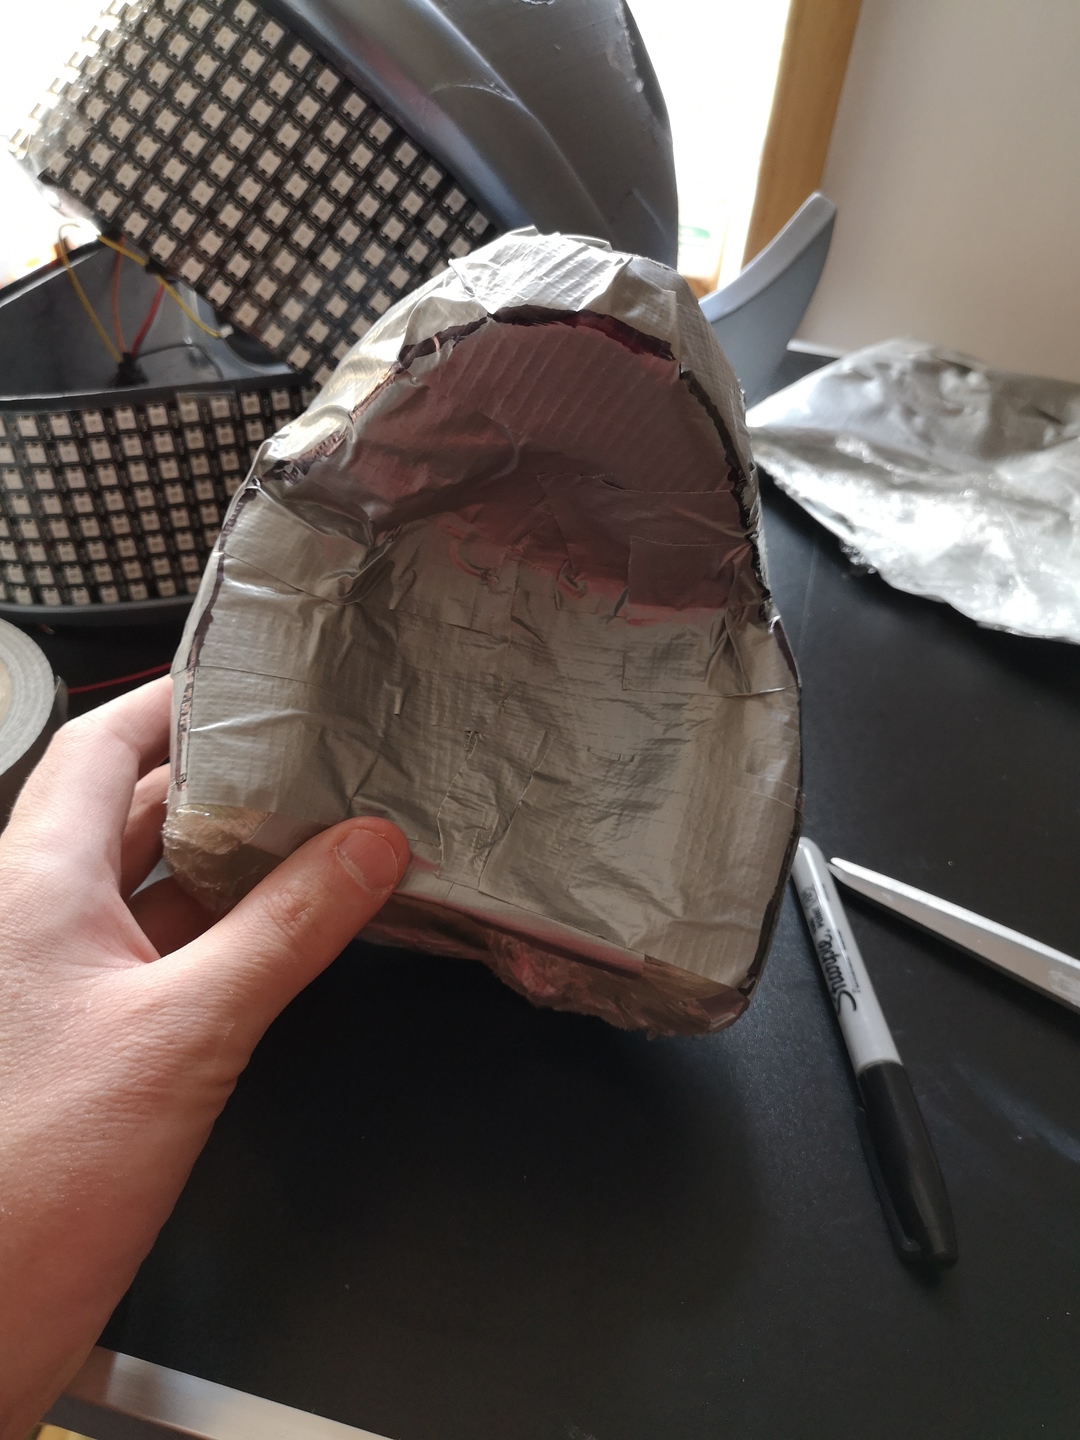
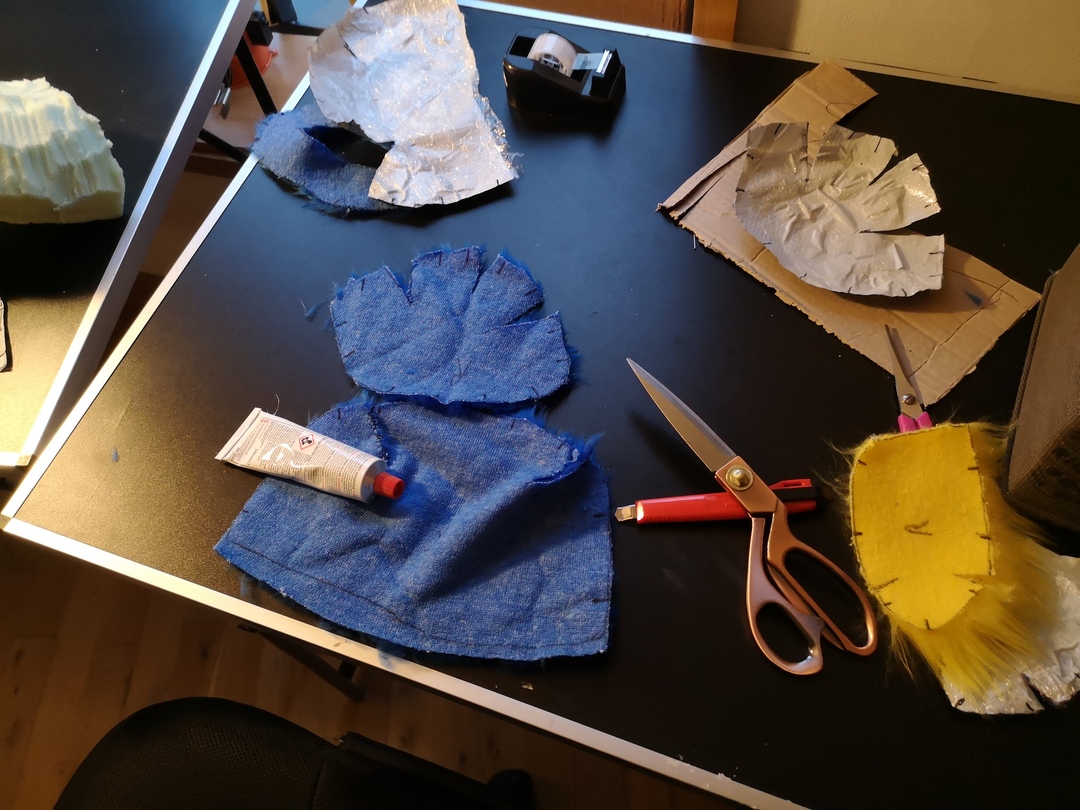
To quickly explain pattern making: In order to put fur, or any fabric, on a non-flat surface you need a pattern, a series of shapes, to cut the fur into. When these fabric shapes are sewn together they form a 3D shape that matches the surface of what you want to put them on. So how do you figure out the pattern? Well, the method I was using was to wrap the object in cling film (cellophane?) and then gaffer tape (duct tape?). You write on the tape with a marker where you want the cuts, and then you cut through all the tape into sections. These cut shapes of tape are your pattern, and you use them to cut out fabric/fur patterns of the same shape. When you sew them together, hopefully they confirm to whatever shape and surface the cling film and gaffer tape was originally on.
So I gave it an effort. I followed the instructions to cover the head and ears in duct tape and cut them out for the pattern. The maker recommended using a Monster Makers head bust to hold the helmet, but I didn't have one so I just tied some pillows together.
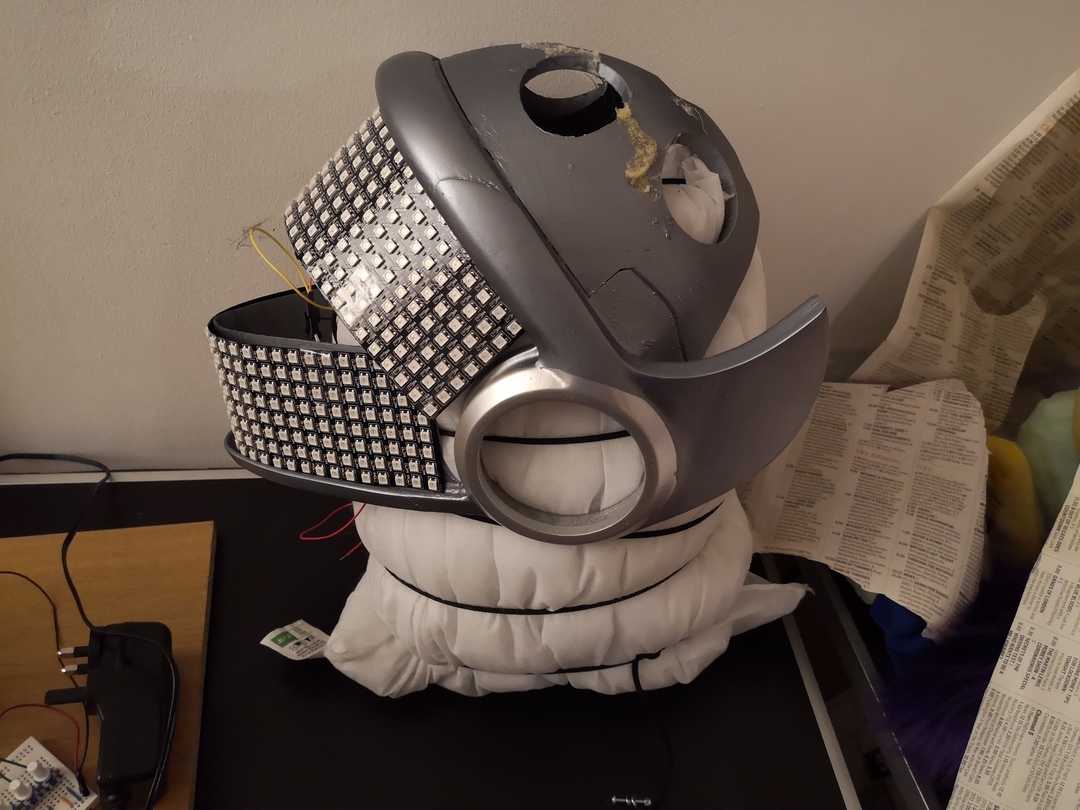
With the patterns cut out I... well, stopped working again. Once again, I hit the part involving actually sewing fur and wasn't up for doing that.
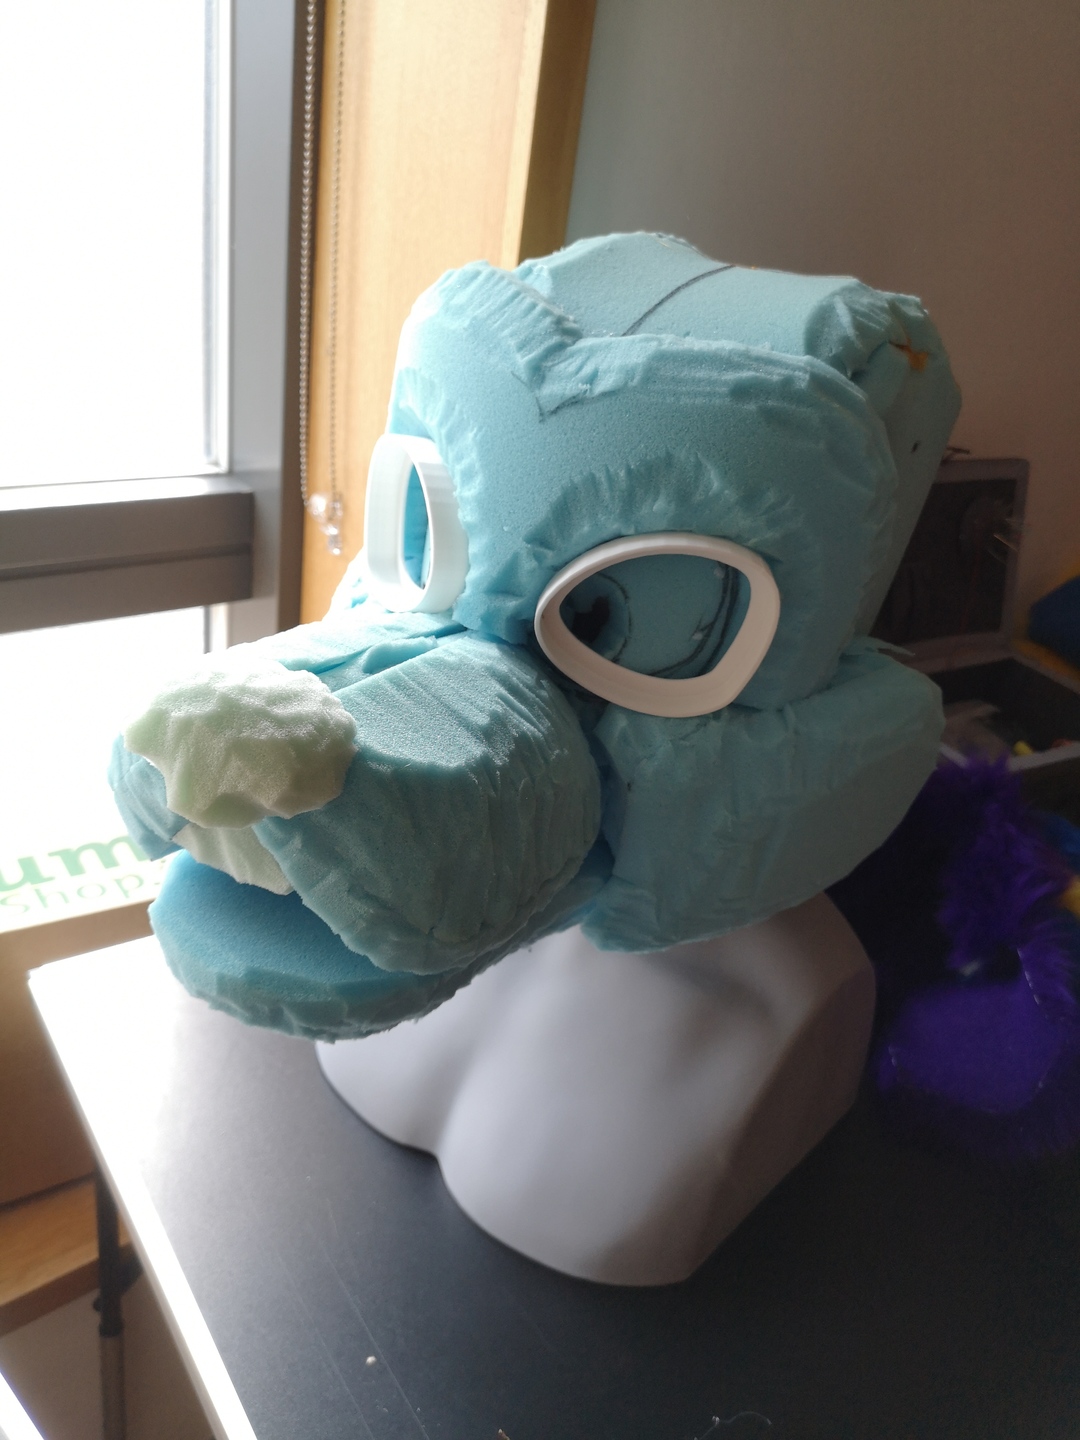
The months rolled on, once again the Protogen helmet lay there, it's pattern pieces stored away. Then in September 2021 I actually started work on a bonna fide fursuit. You see, with my new chox sona, I got a bunch of art and wanted to fursuit as them. I had applied to many fursuit makers when they opened but got rejected. I understood, it was the spots! Too much extra work. So I decided to start following another tutorial video, this time for regular fursuits rather than Protogen. I got the whole foam head sculpted out until, you guess it, I had to work with fur again. The project stalled.
The Re-Re-REturn!
The months rolled on again. Other projects, events and Christmas took my attention. Then in February 2022, something wonderful happened, my first furry convention since the pandemic hit. Scotiacon!
It was fun; fursuits, events, hangouts, everything. During the pandemic it had seemed like the furry fandom had faded slightly, that there was no point working on something like this. Scotiacon helped reinvigorate my whole approach to this, reminding me again of the world out there.
Less than a month later (after a family holiday) another event was on the horizon, Dublin Comic Con, an event I knew a bunch of other Irish furries would be at. With only a few days to go, I messaged Tapewolf, saying I wanted something ready in time and wasn't sure if I should try to finish the fursuit head, or the Protogen helmet. It was a tight deadline whichever I chose, but through talking we decided to go with the Protogen, and I began racing to finish it.
First up, I needed to do the duct tape thing with the ears foam shapes and get their pattern. Then, paying close attention to fur direction, I cut out the fur pieces.
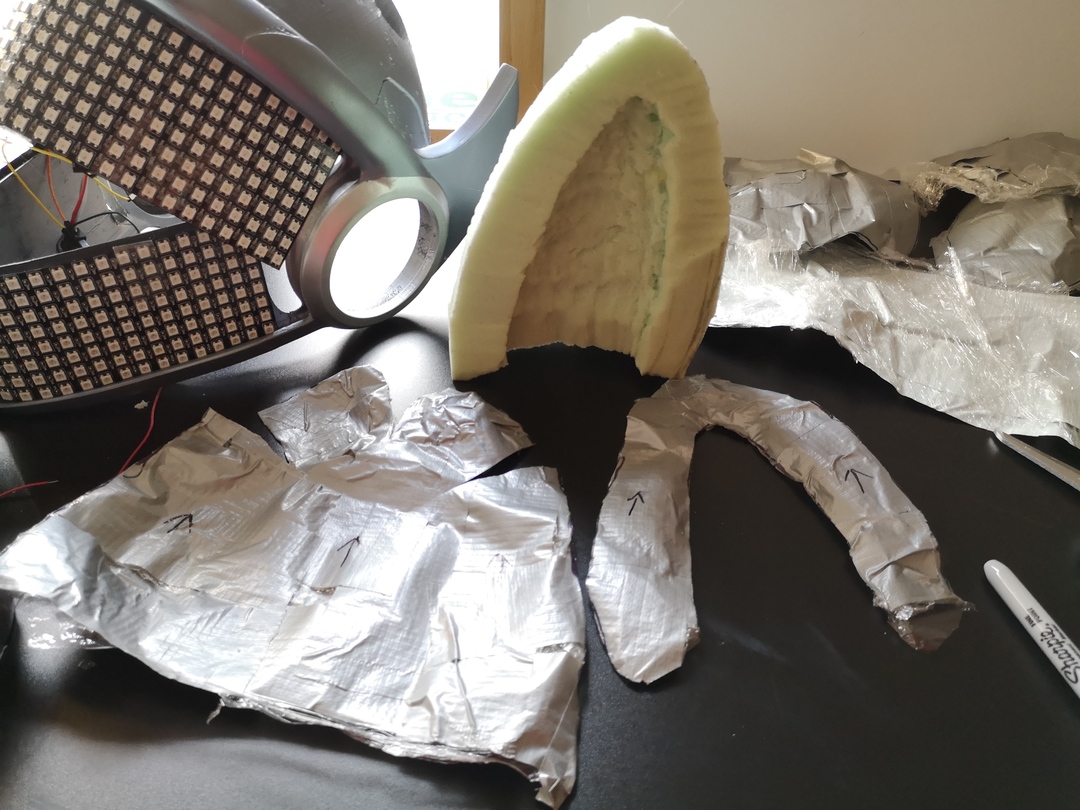
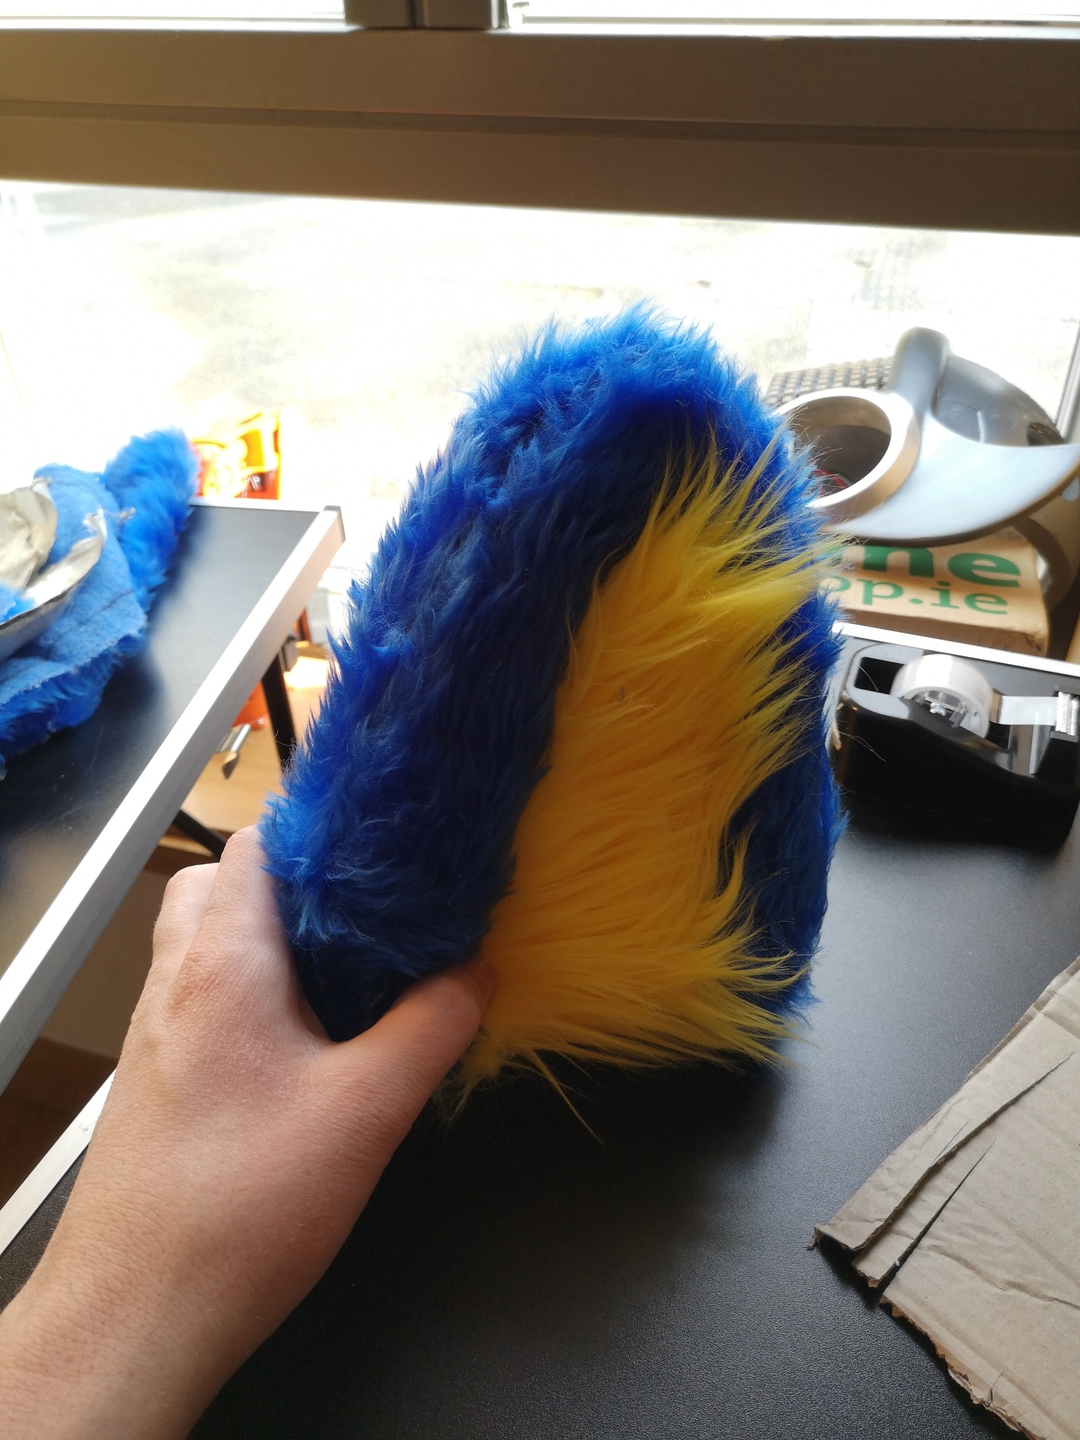
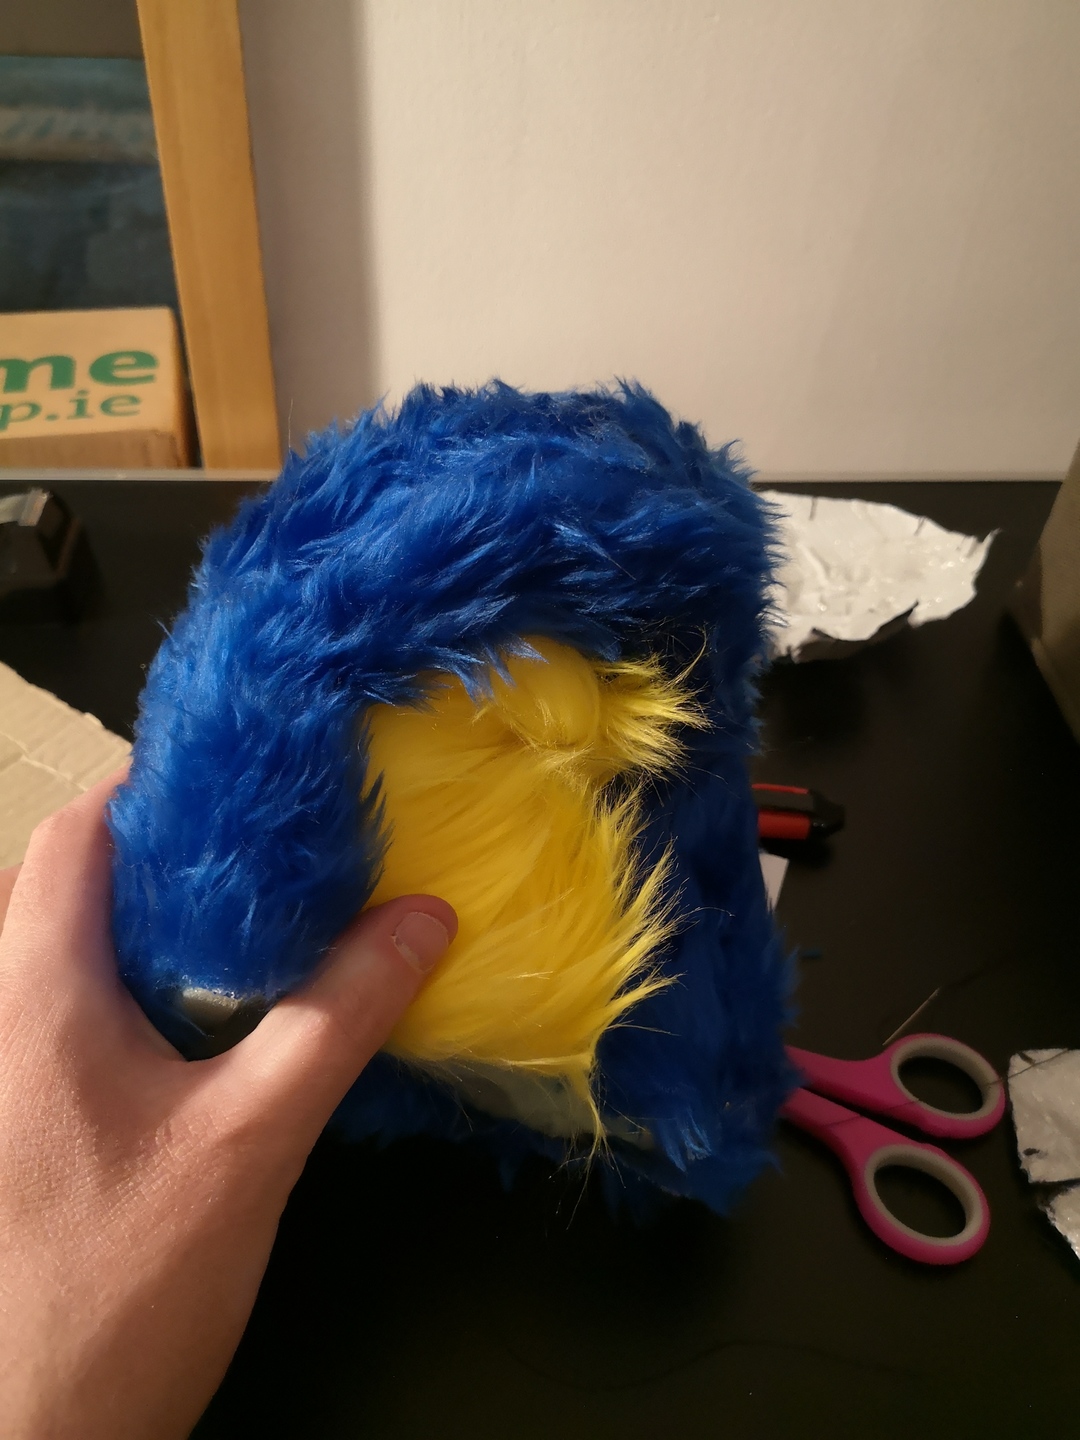
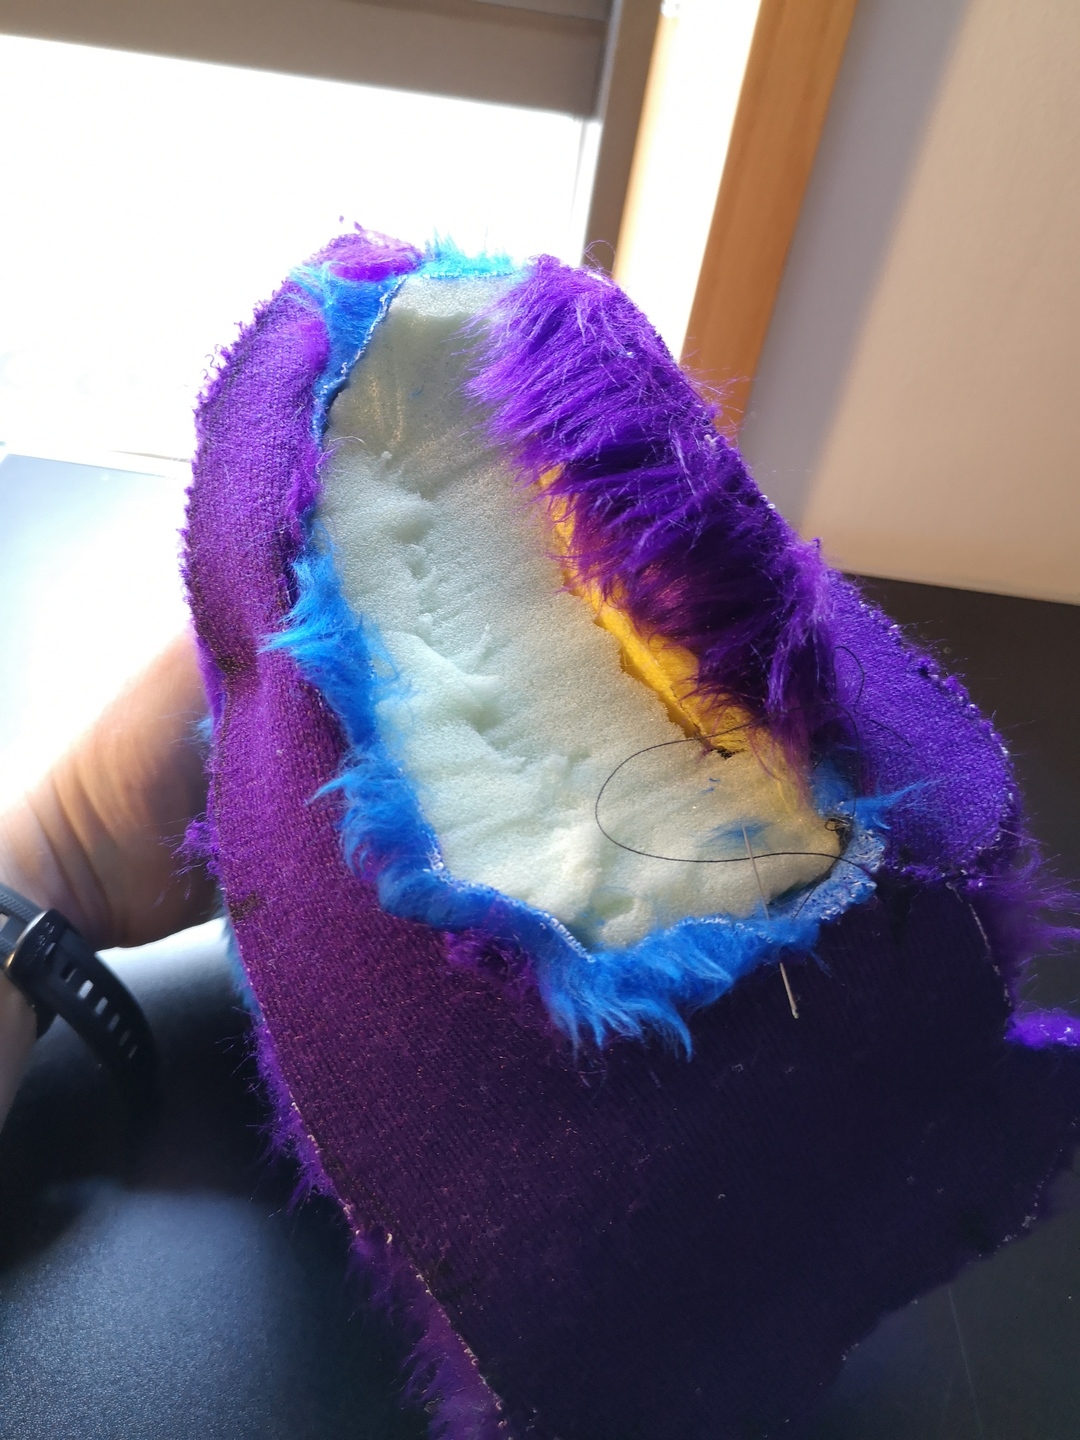
Next up was hand sewing the fur pieces together. I analysed the Protogen tutorial video to get the right stitch to use, and used it. With the ears sewn properly, I found I could easily put the ear foam into their fur sleeves (with some hot glue to keep them in there), and have two proper ears.
It was great, but not enough in time for the convention. I had a good time at the con, meeting with others and all, but I went in my Lemonbrat hoodie, not as a Protogen.
Returning back, I continued my work. The truth is 3D printing, coding and electronics were something I'd experience with, but fur? Basically sewing fur was something I was unfamiliar with. Thankfully the con pressure had forced me to confront my worries by making me work on the ears, and get me past my mental block. Just as well, because the next part had a lot of fur sewing.
I had the Protogen ears, but I didn't have the furry cowl, the furry part covering the head and neck of the helmet that would really make the whole thing work. I started work, cutting out pieces for the top of the head and sewing them to the ears. Finally, it was coming together and I was no longer afraid of sewing fur.
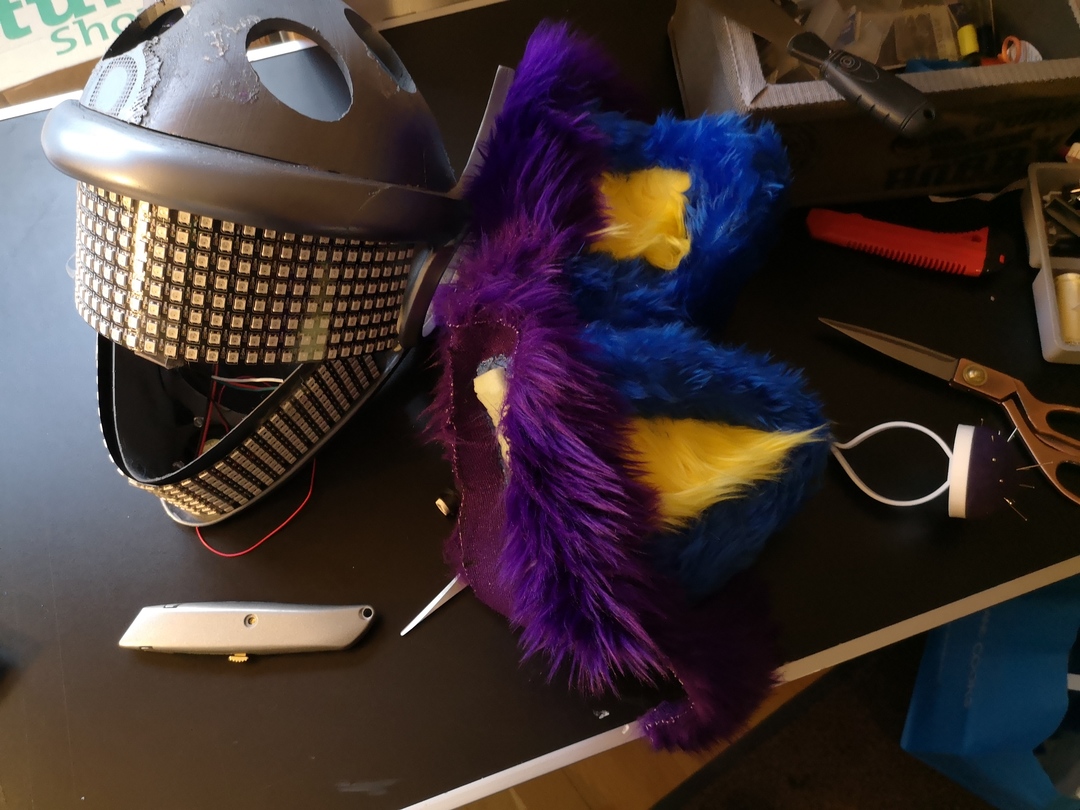
Interestingly, some of my fear of screwing up turned out to be justified. When testing the pattern shapes by losely sellotaping them together and putting them on me pysically (a good technique to quickly test you've got the right shape before cutting out the fur itself) I discovered I had a problem. The "pillow" bust I had used didn't have any shoulders, so the pattern I cut from it would have gone straight down from the neck without widening out. This would probably have made it bunch up and be uncomfortable, rather than spread out properly on my shoulders and upper torso.
In the end, I got the Monster Makers head bust and redid the patterns on the new bust. The head definitely helped things fit more.
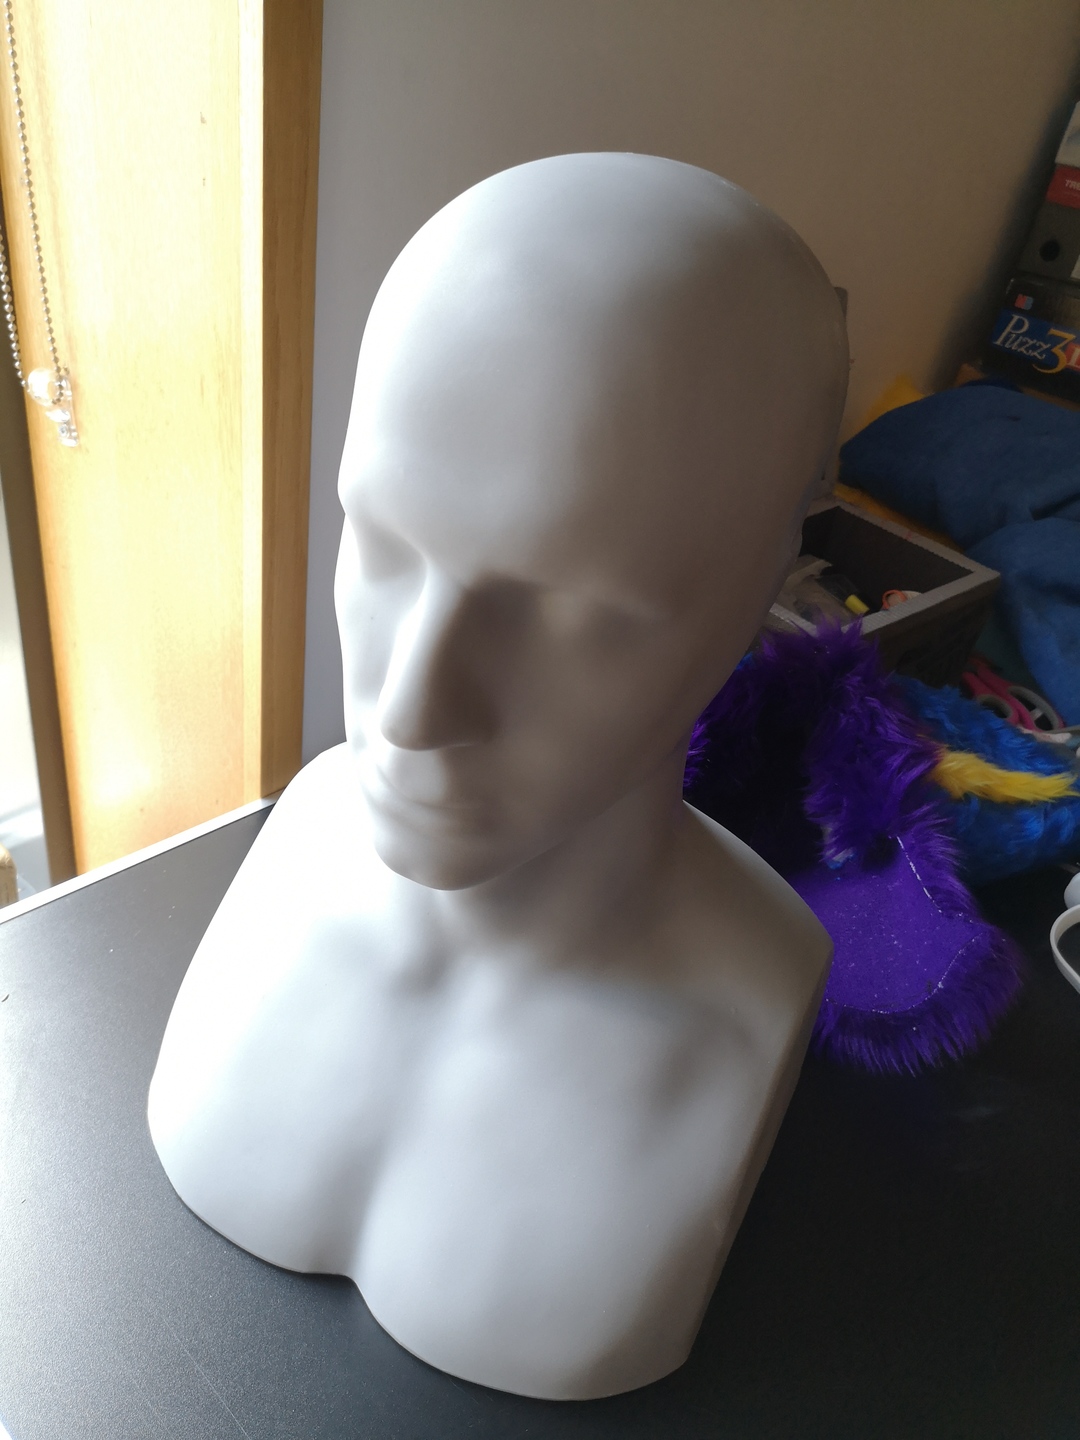
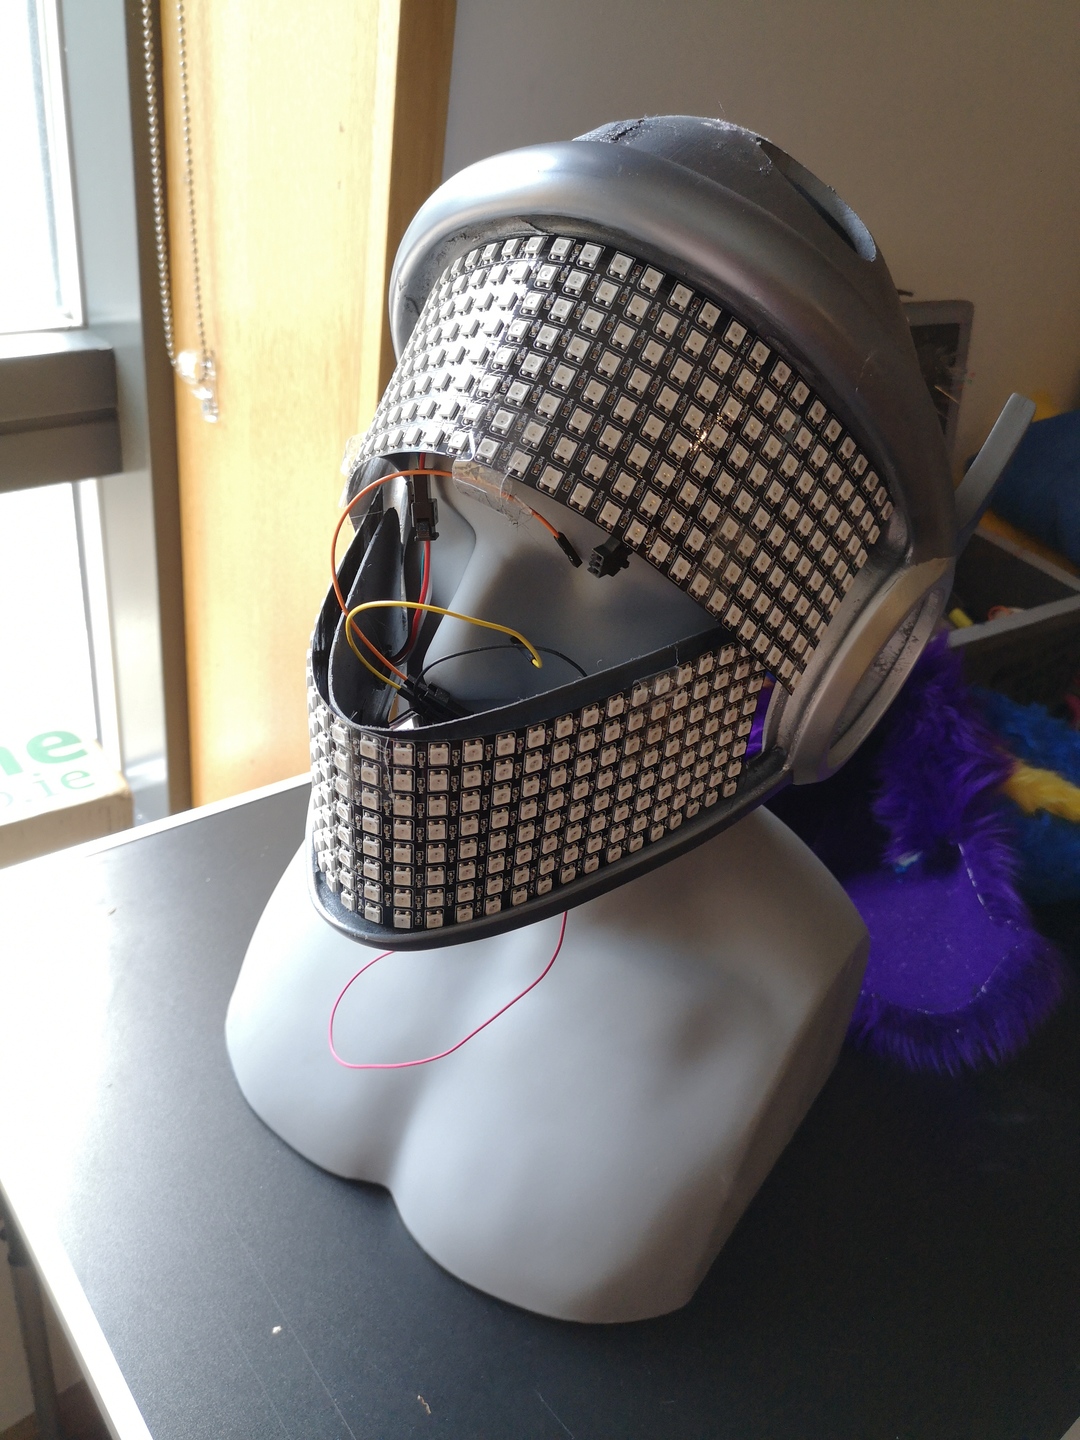
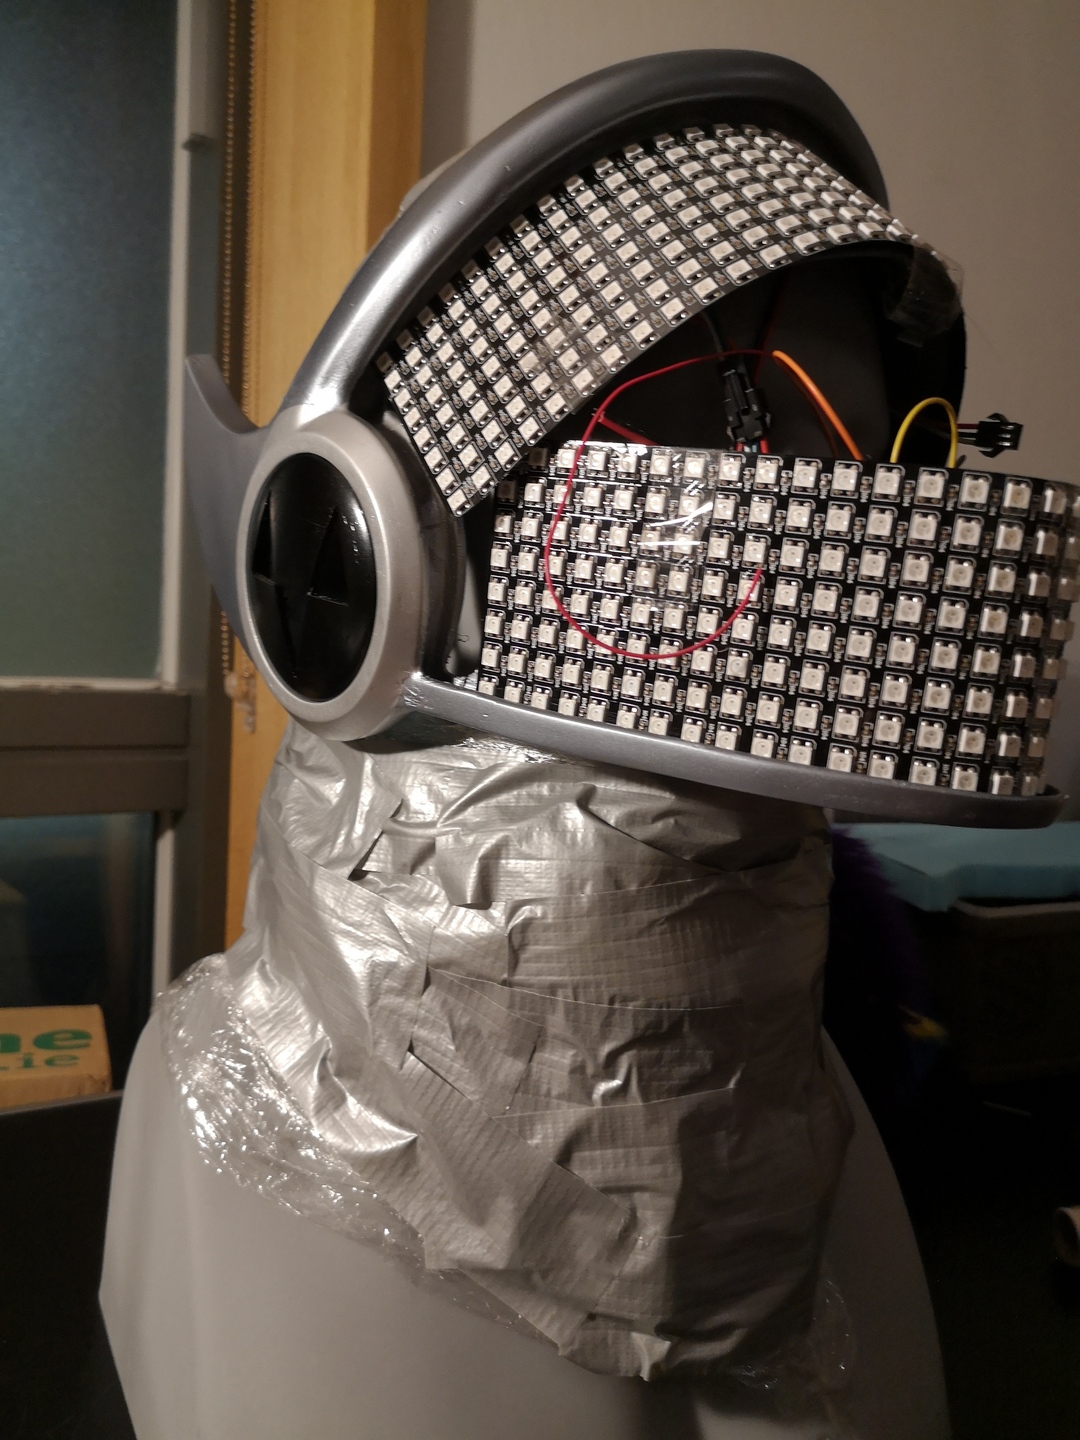
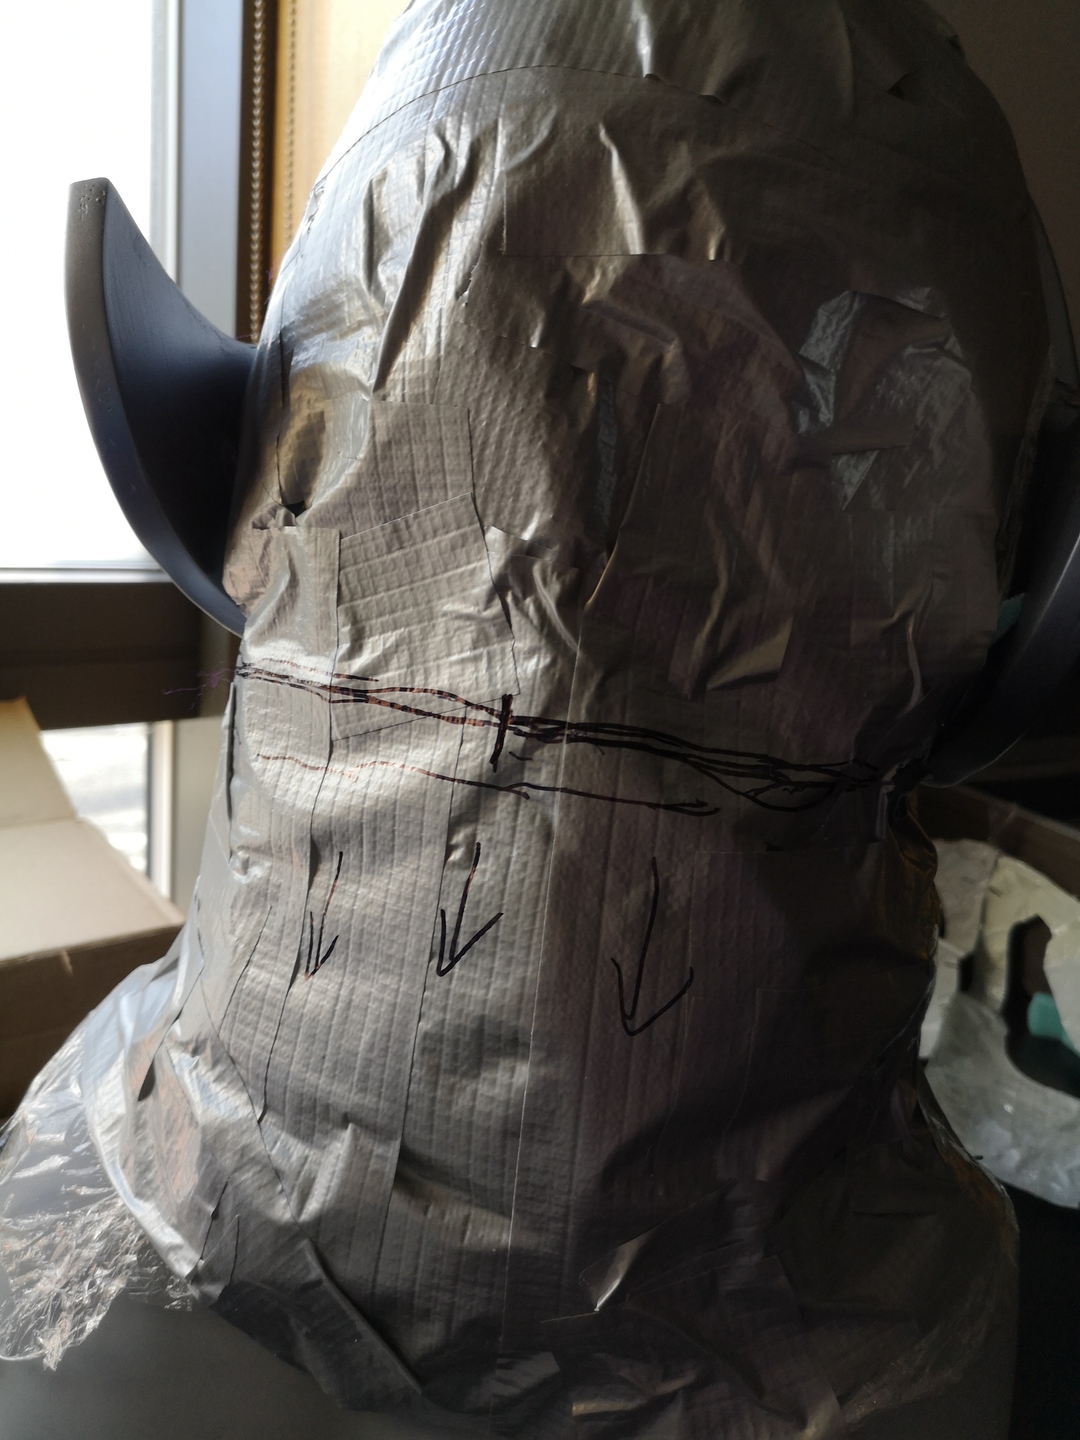
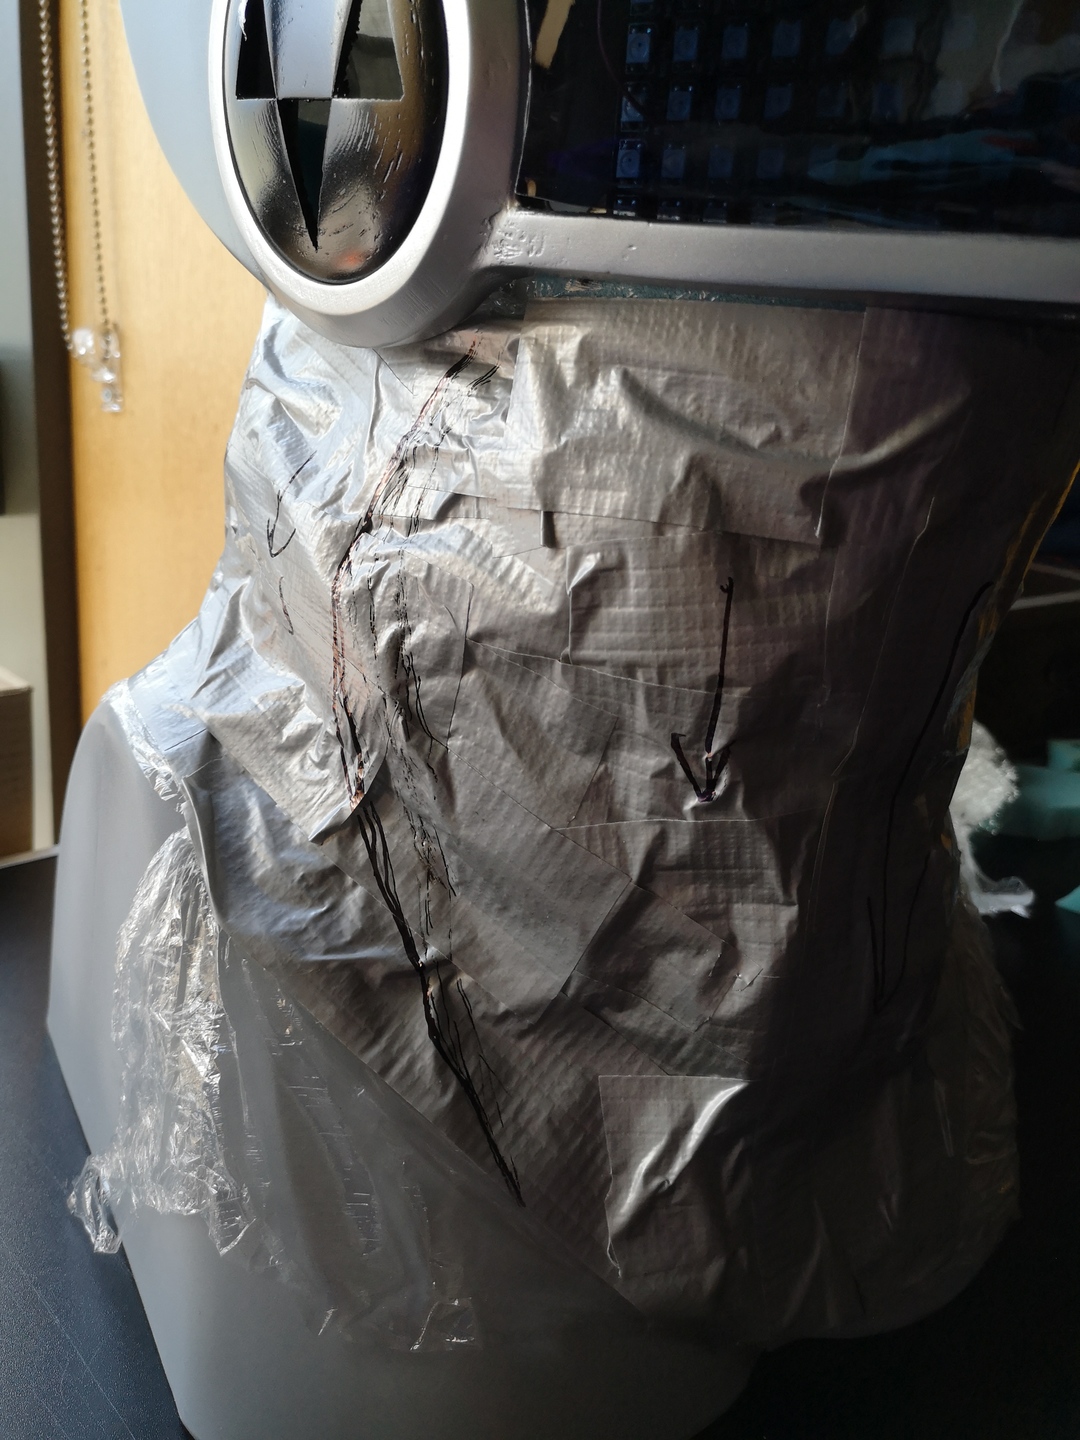
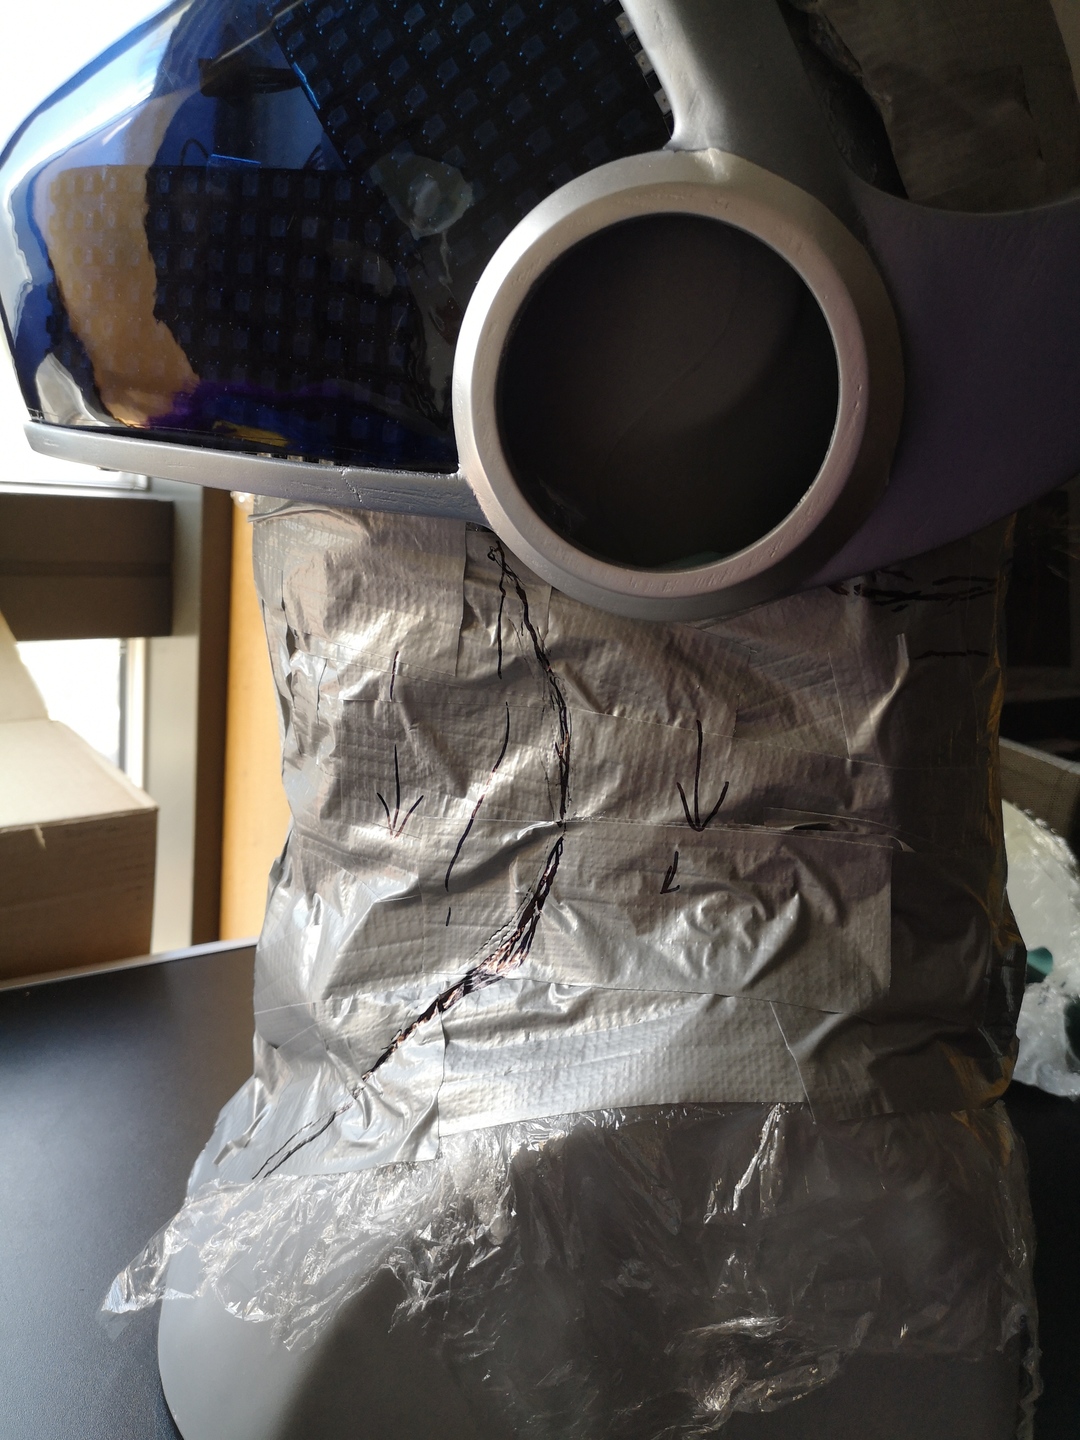
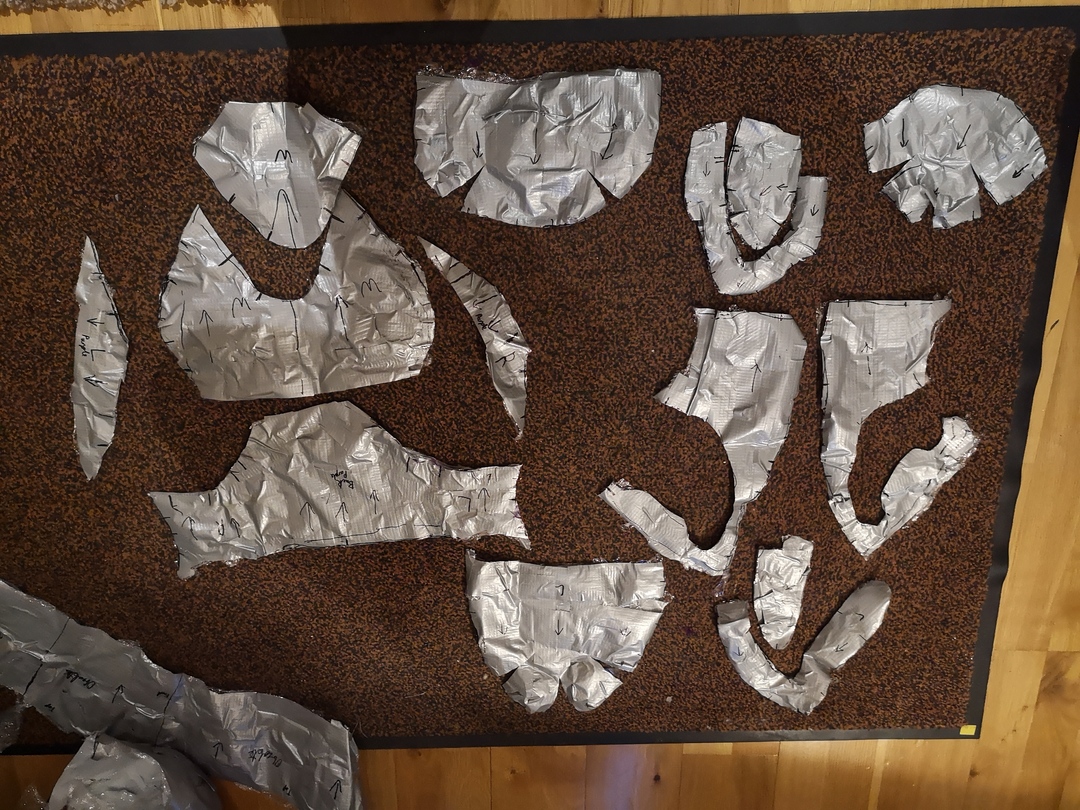
And sew (sic) with the new pattern, I cut out the fabric shapes and finally sewed them together.
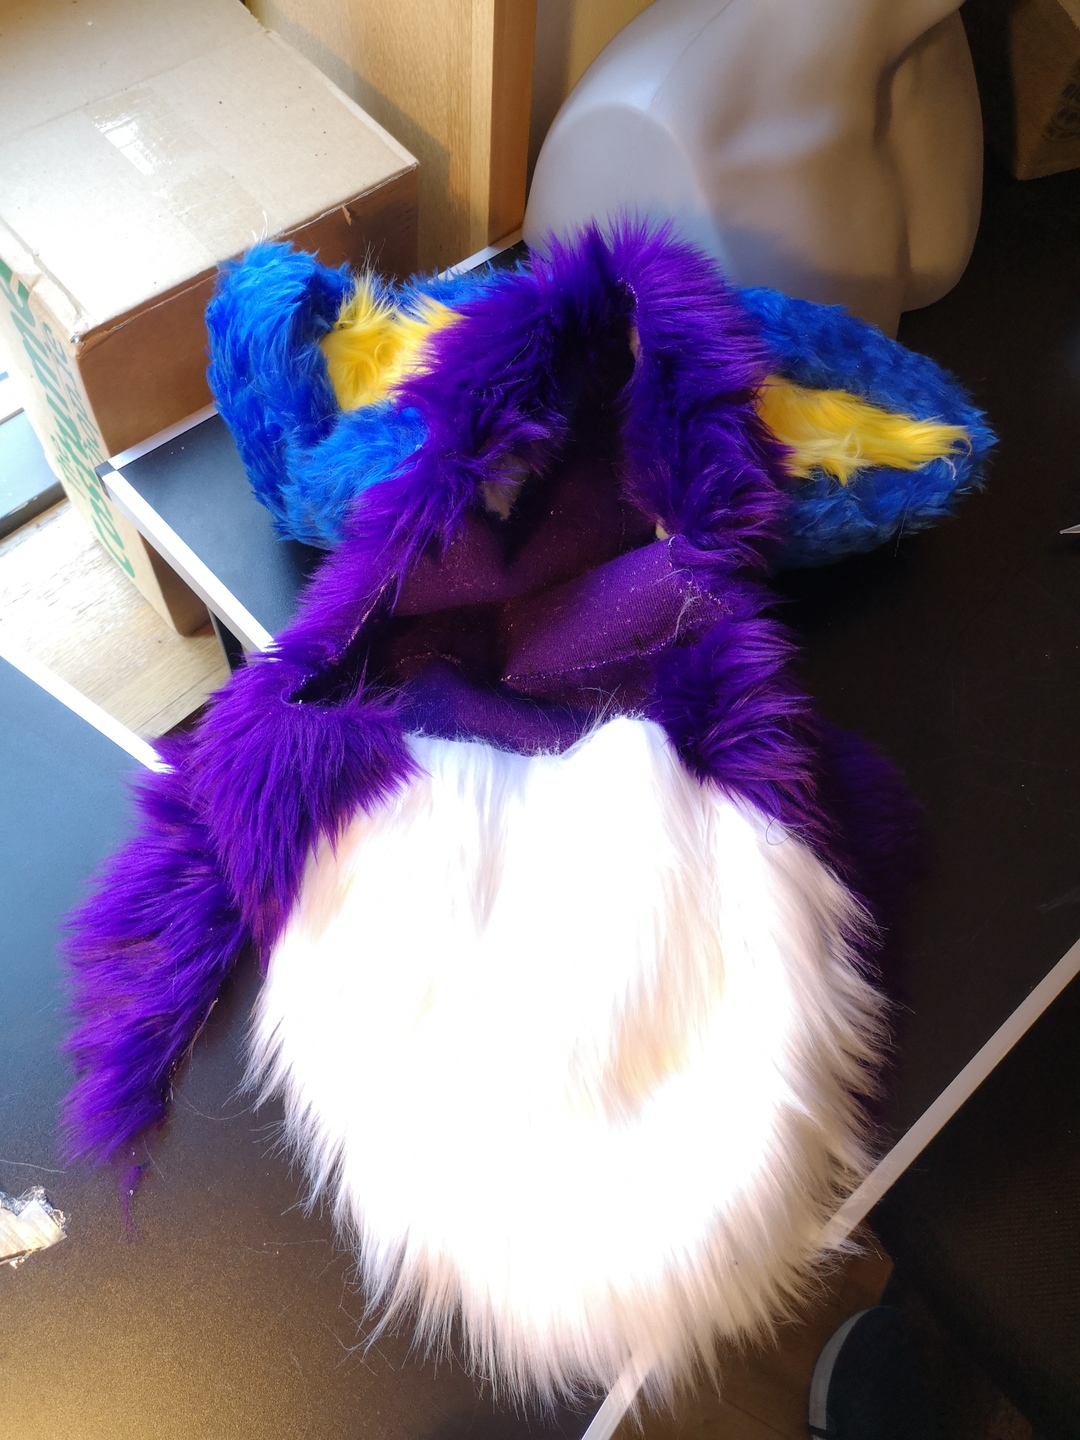
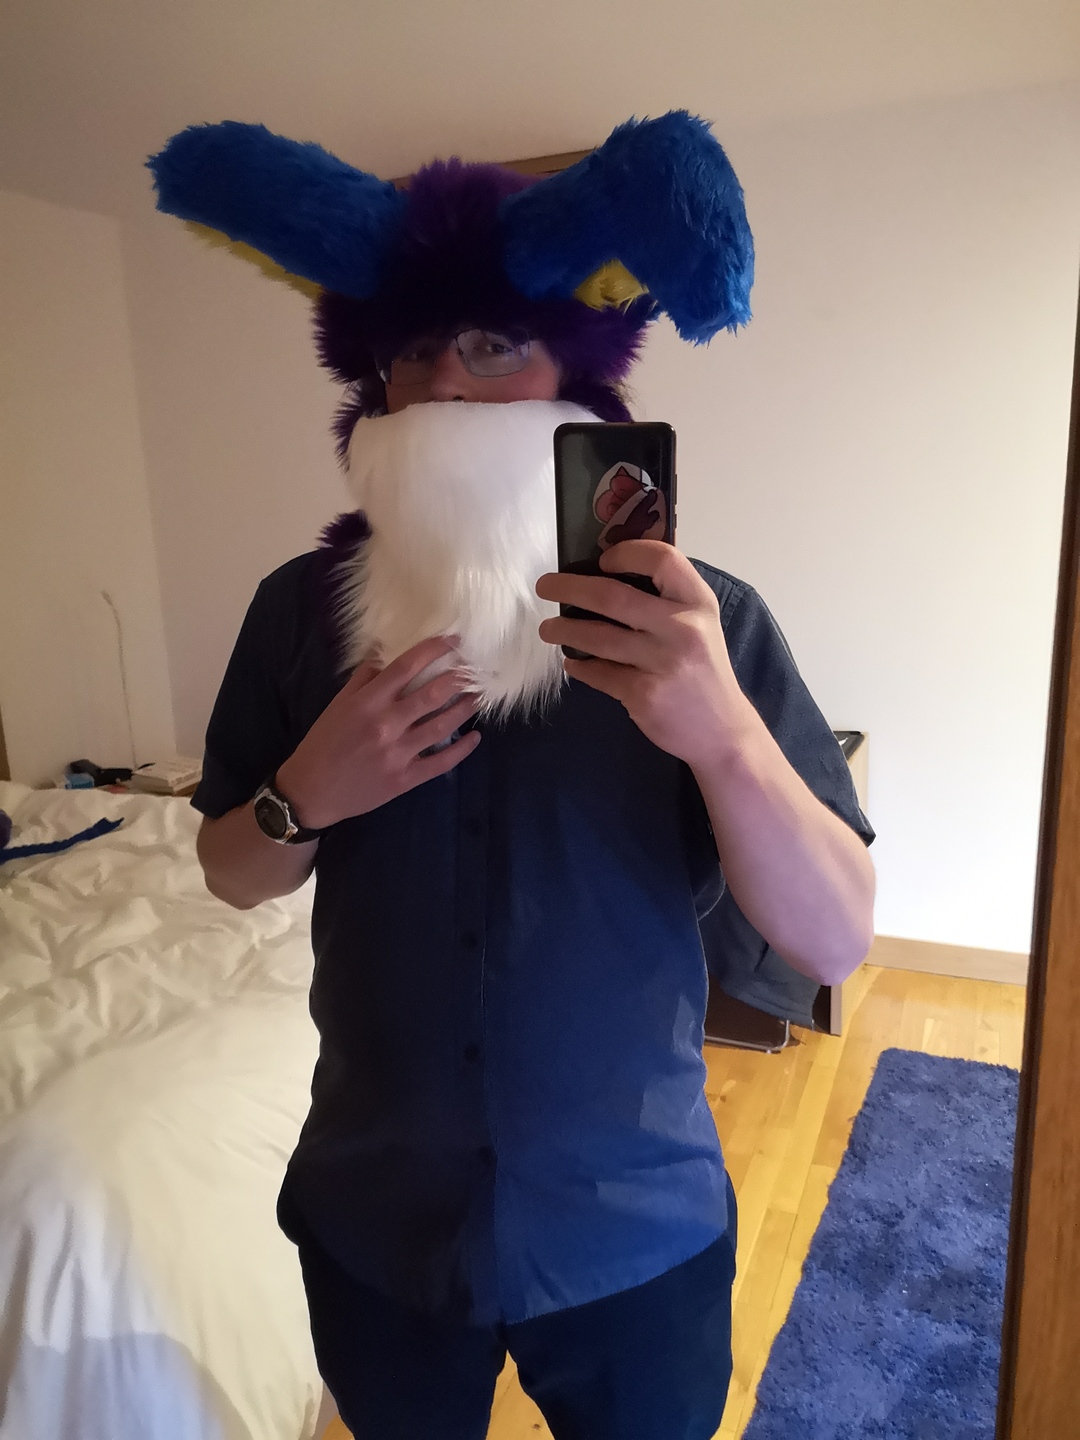
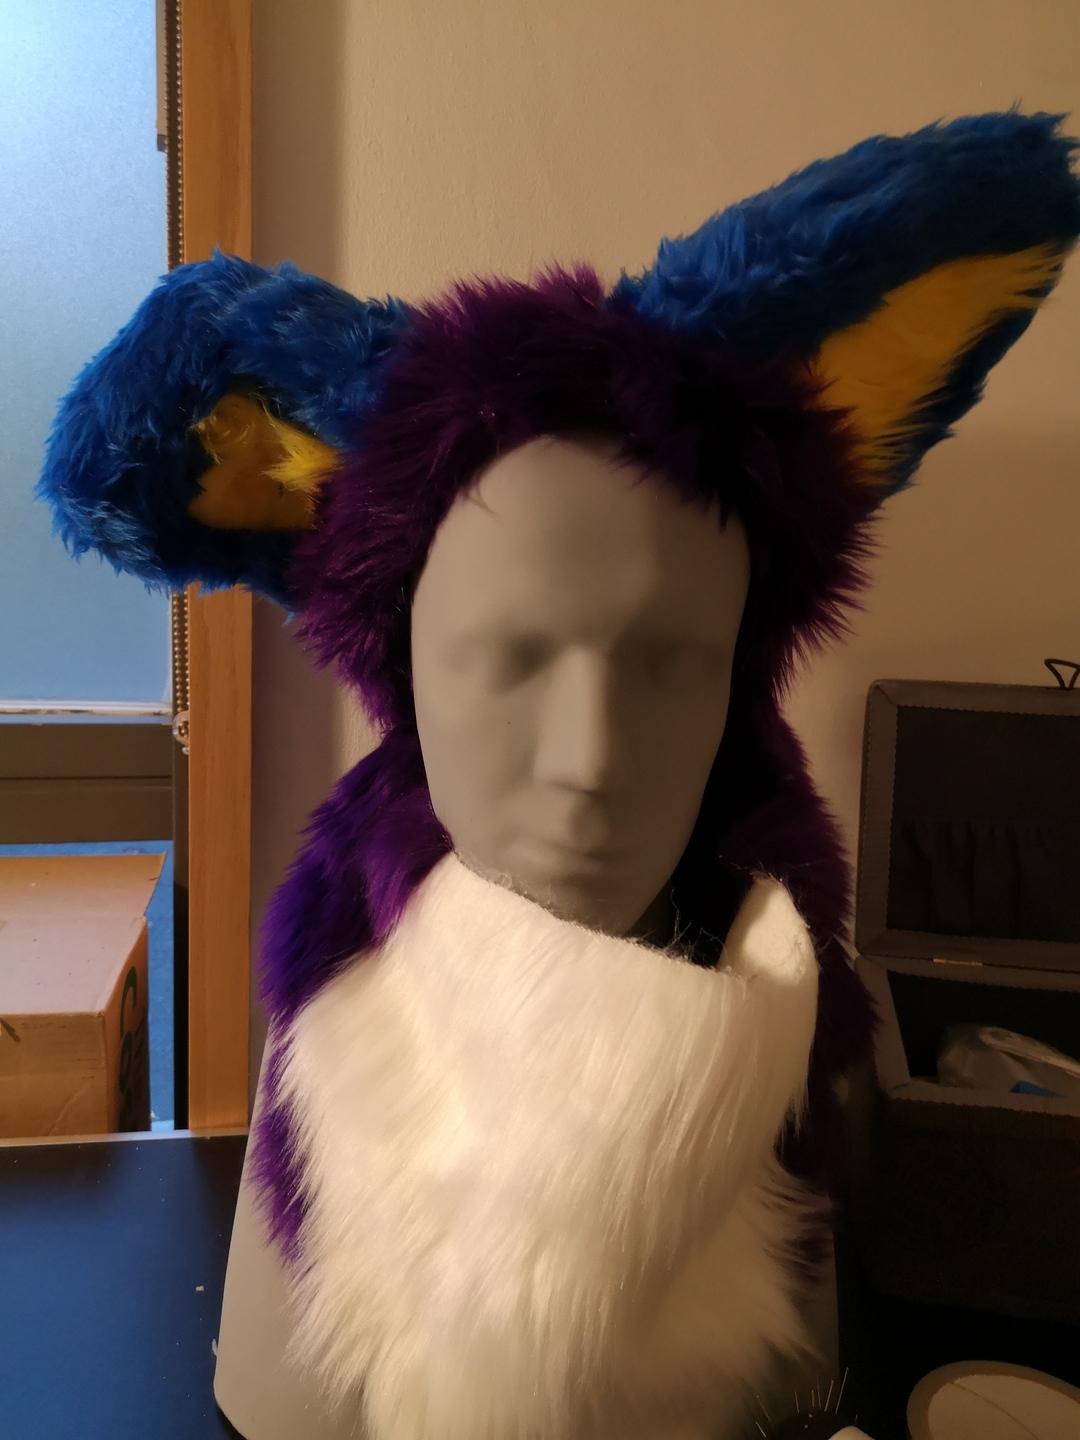
The cowl was done!
The Cheeks
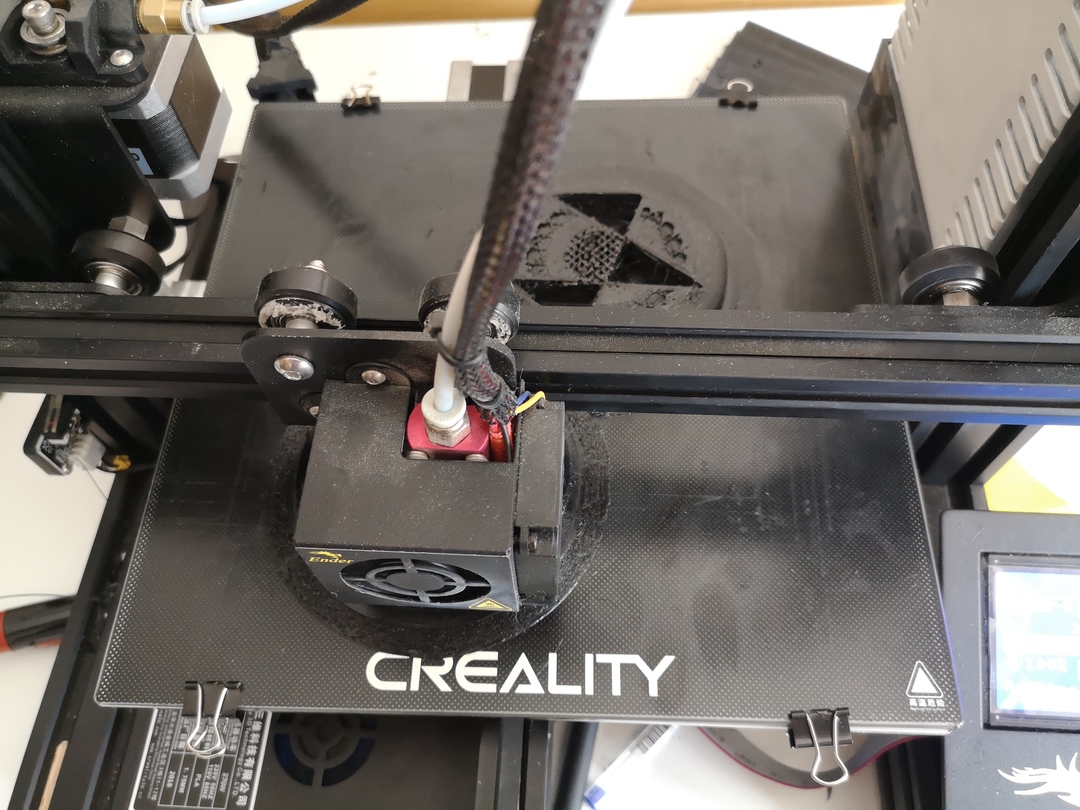
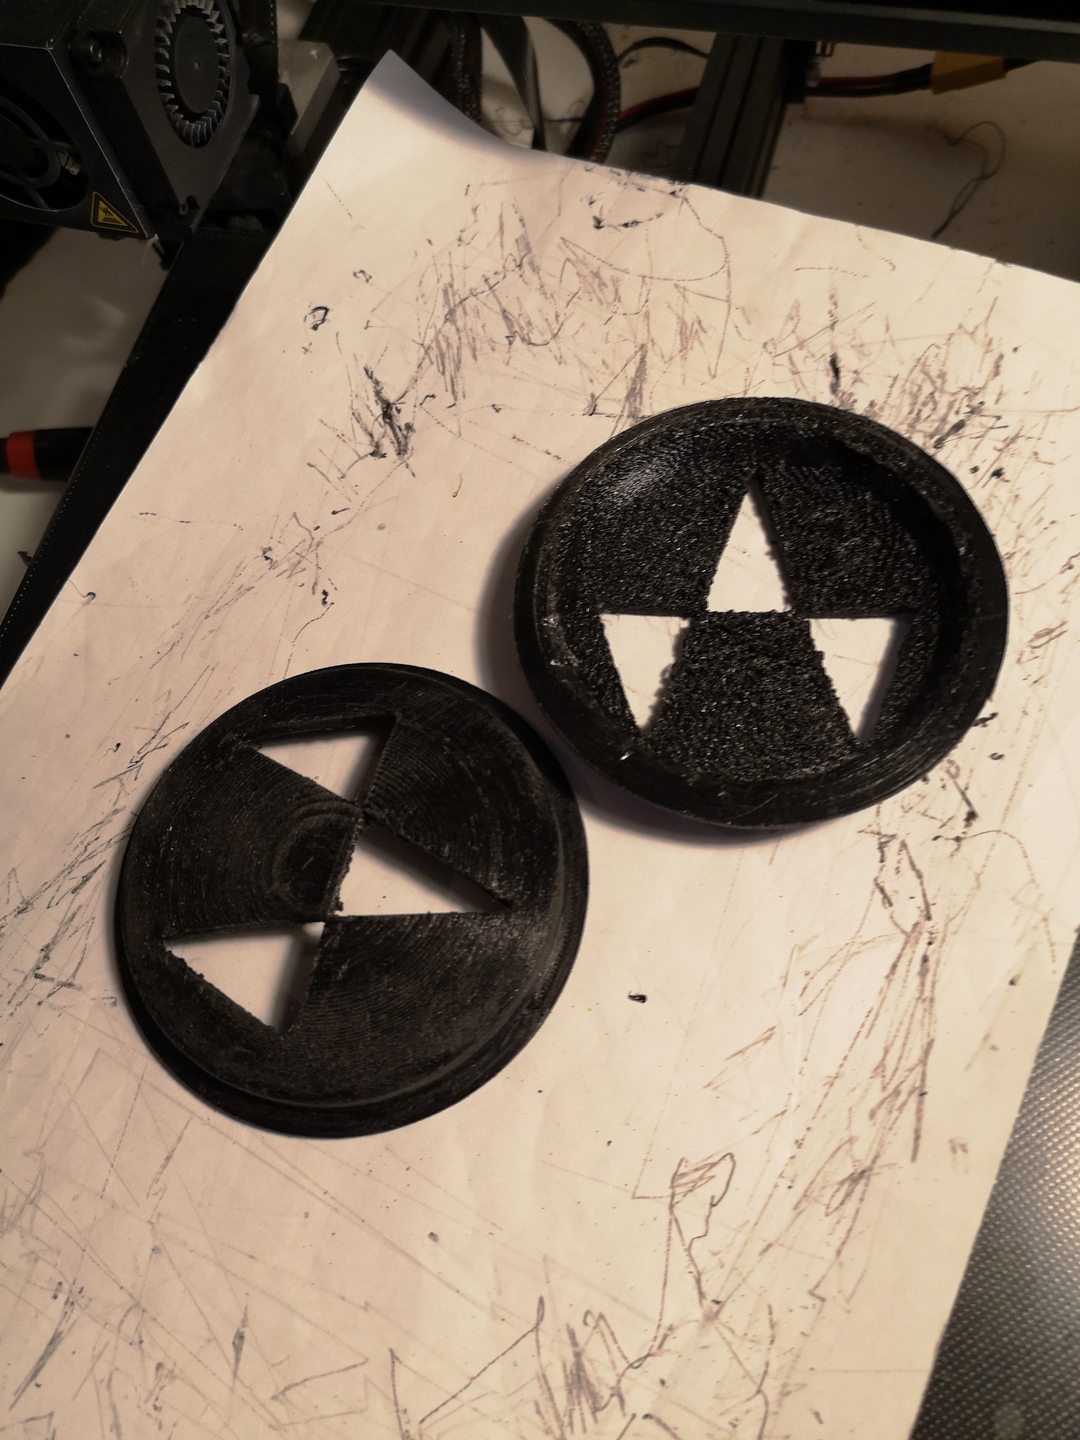
Protogen usually have a symbol on the back of their jaw. After choosing a symbol that looked vaguely like a fox but also a waveform, I worked on them throughout the project.
Printing:
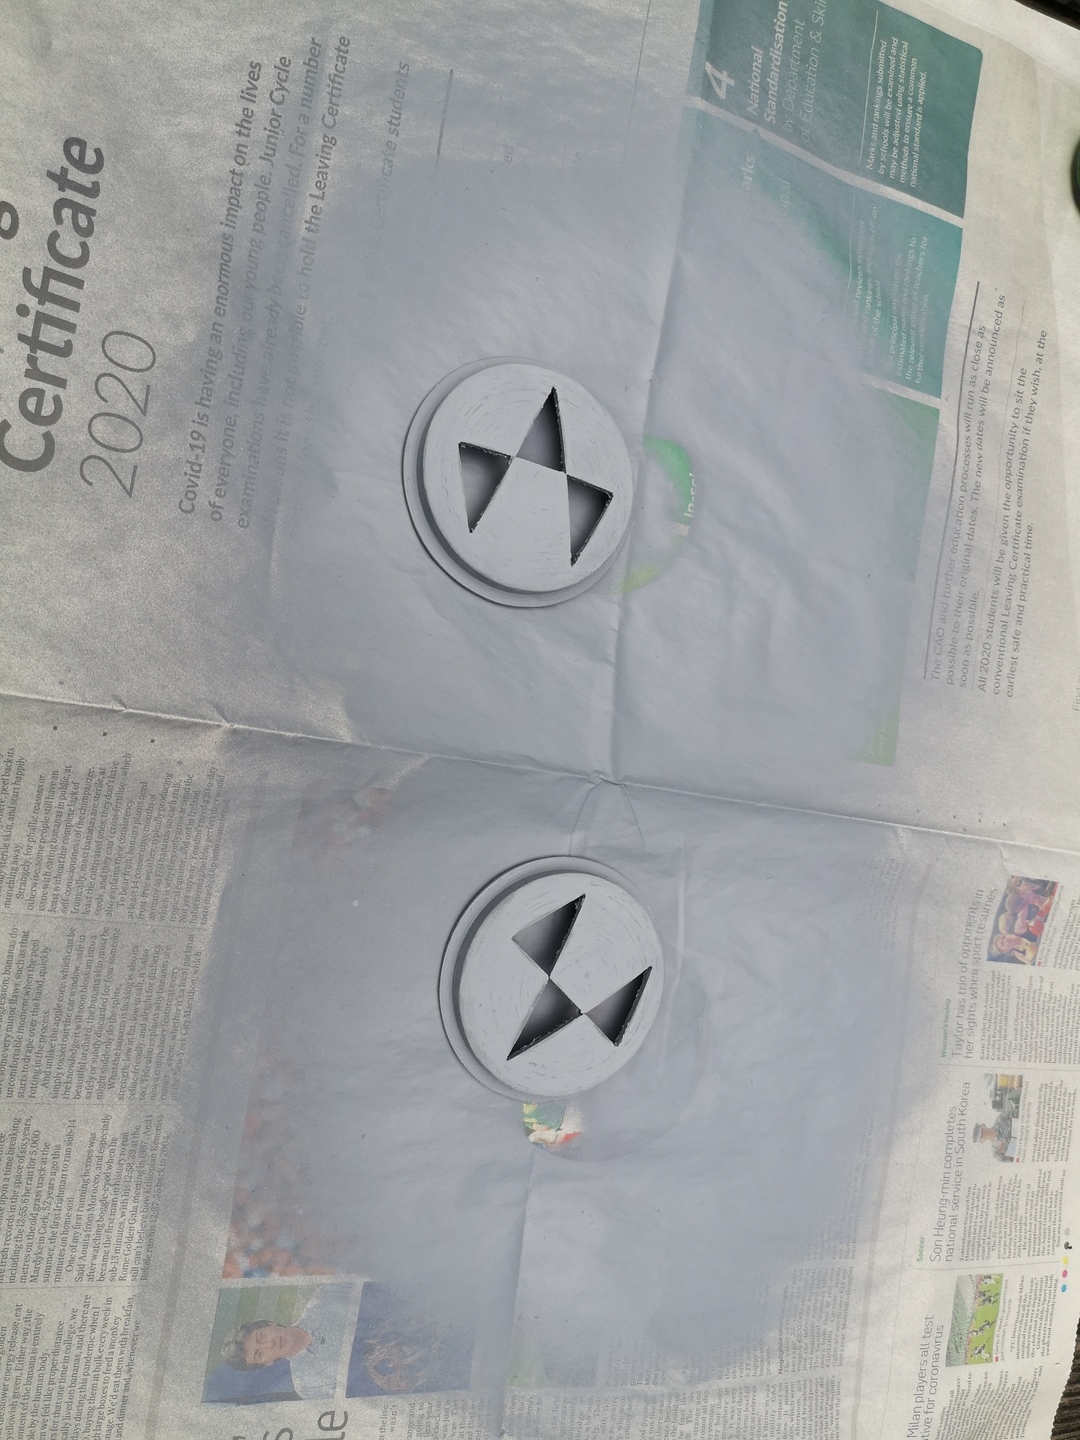
Priming & sanding:
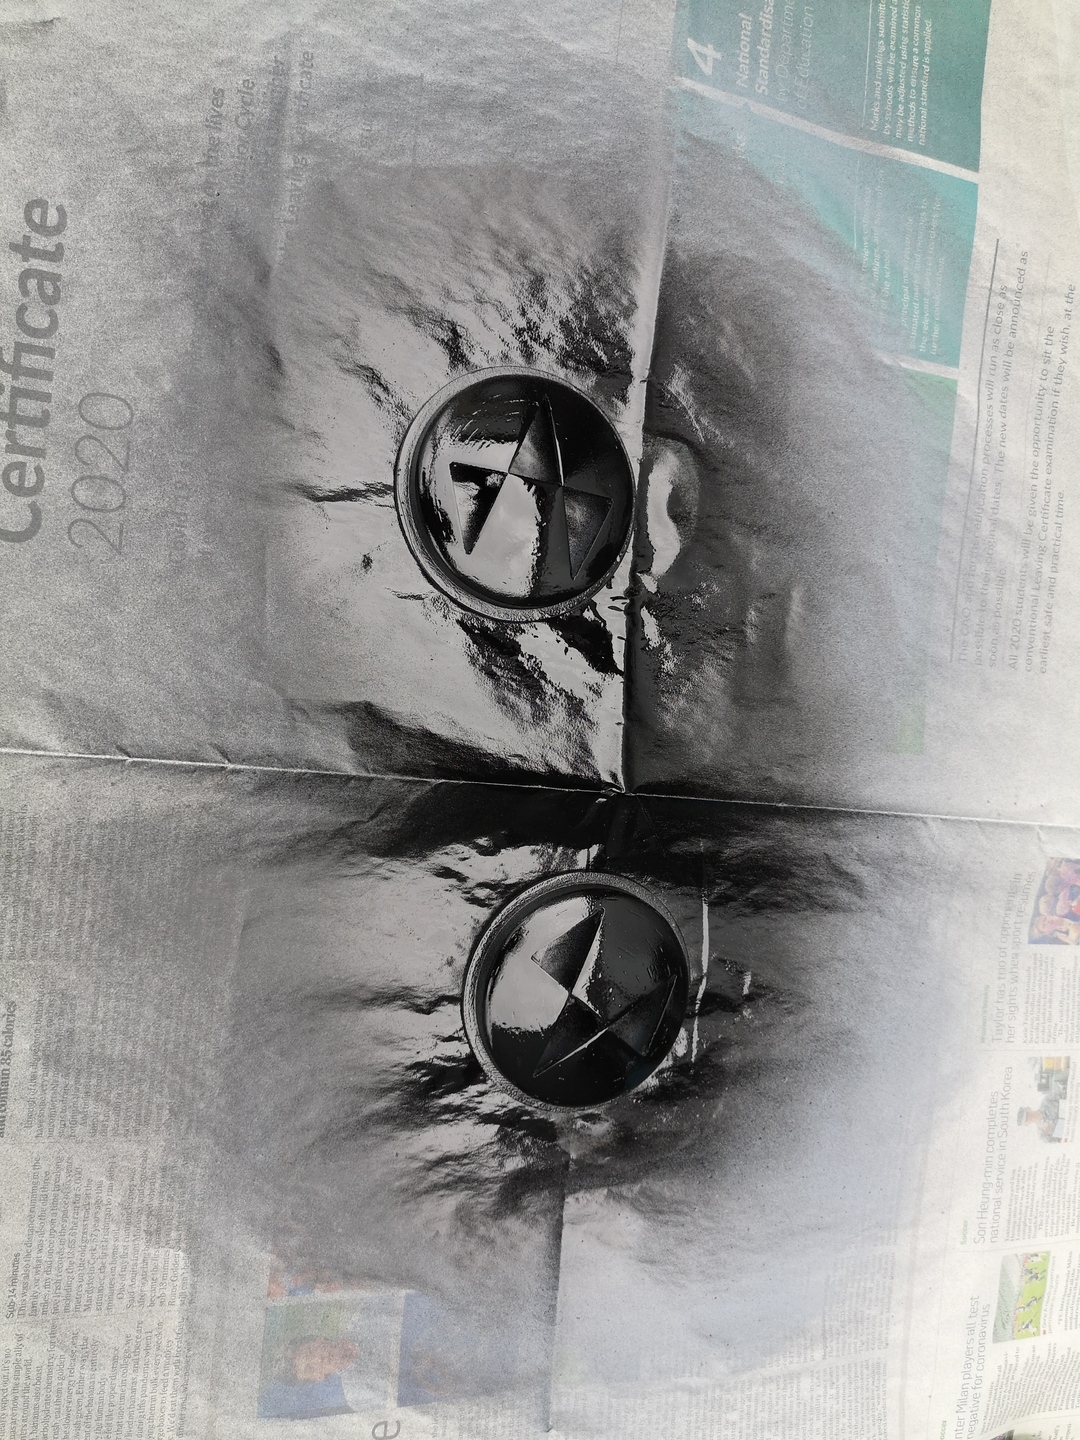
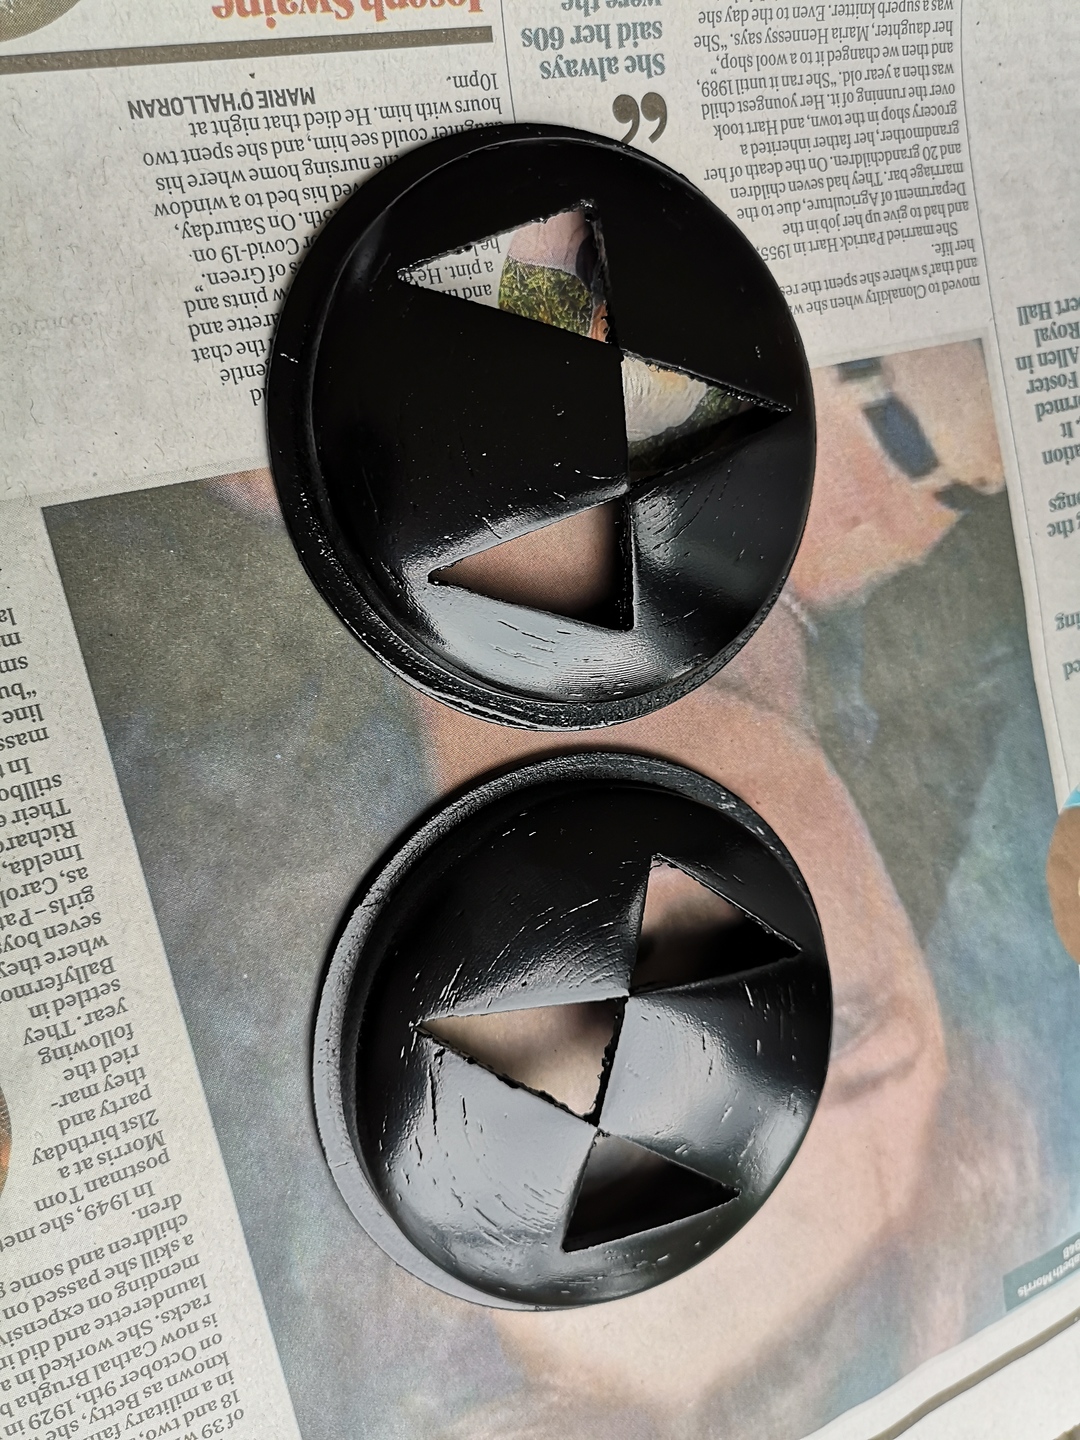
Spray painting:
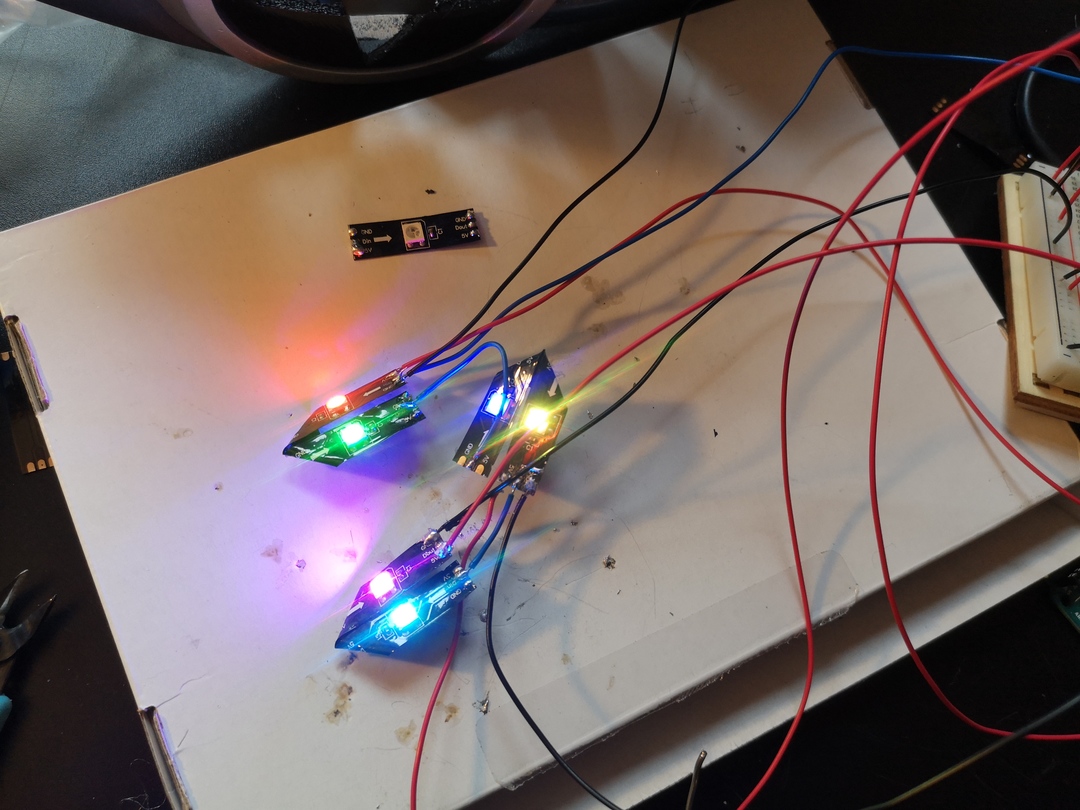
Then I wired it up to glow. Firstly I had some basic neopixel strips:
Then gluing it to a plastic base.
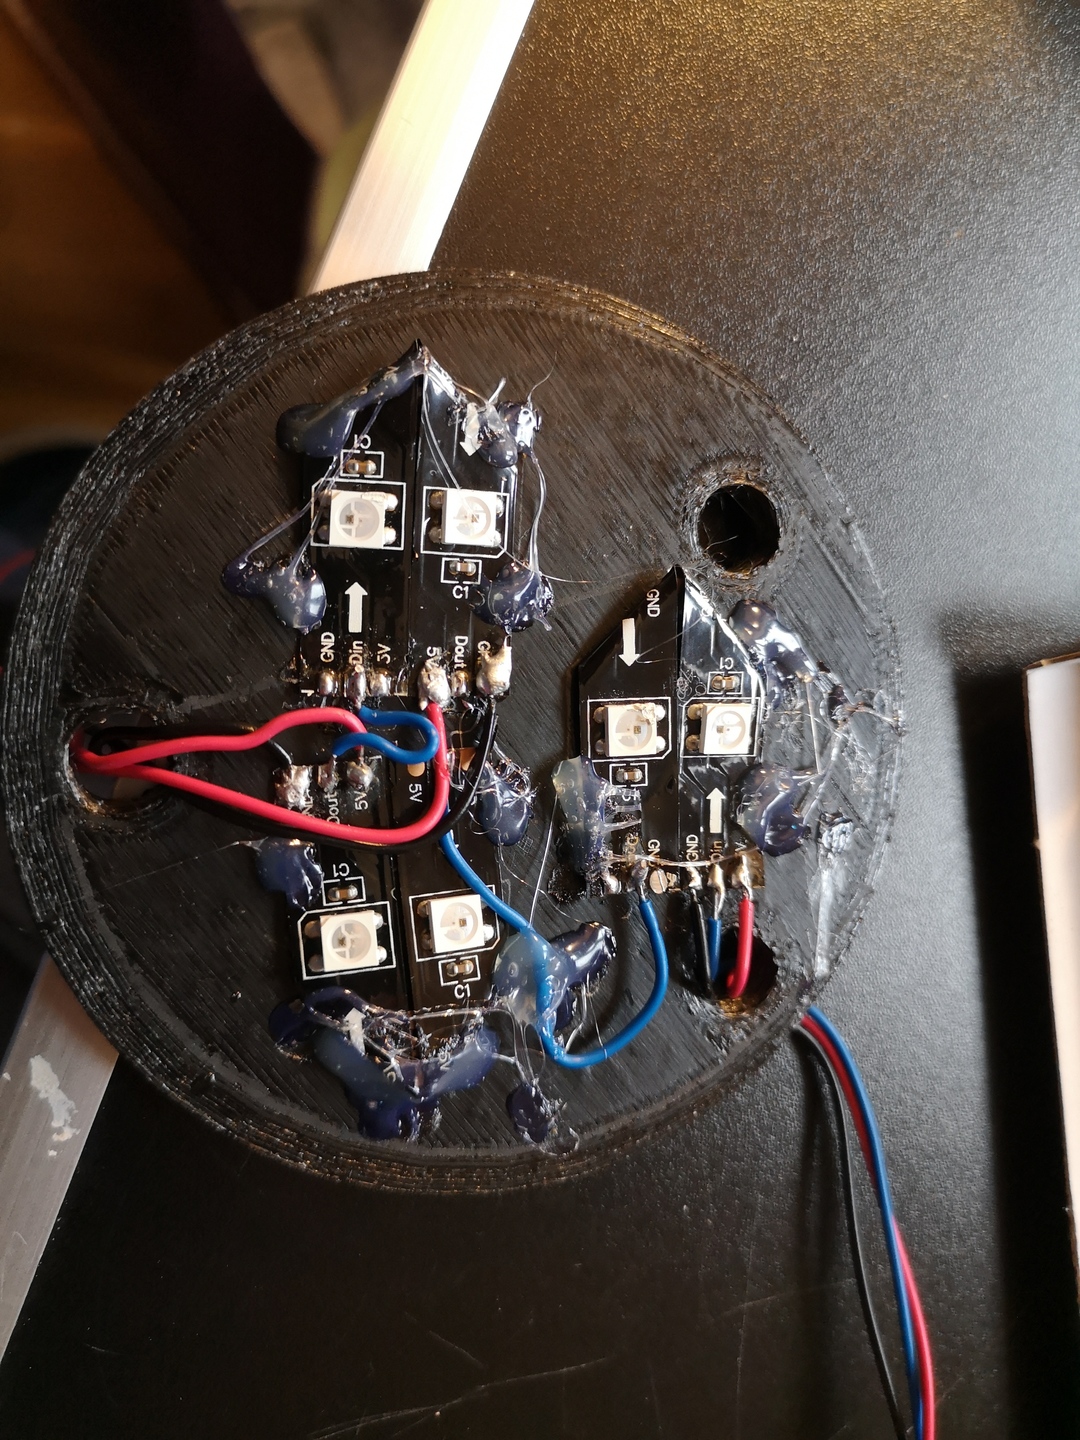
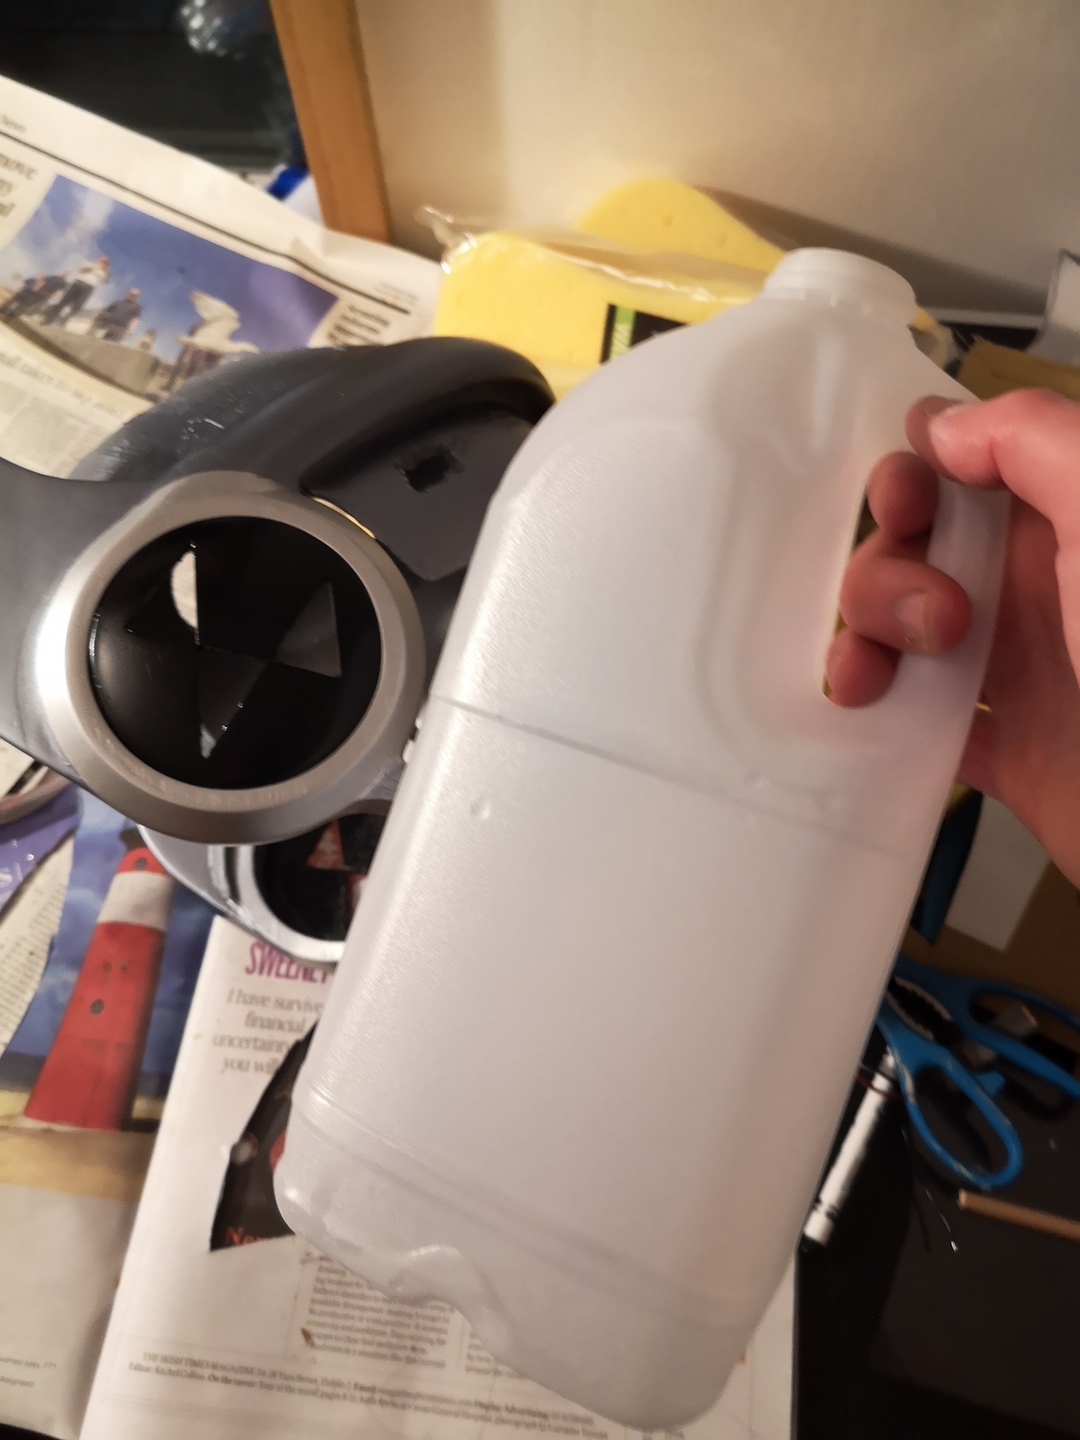
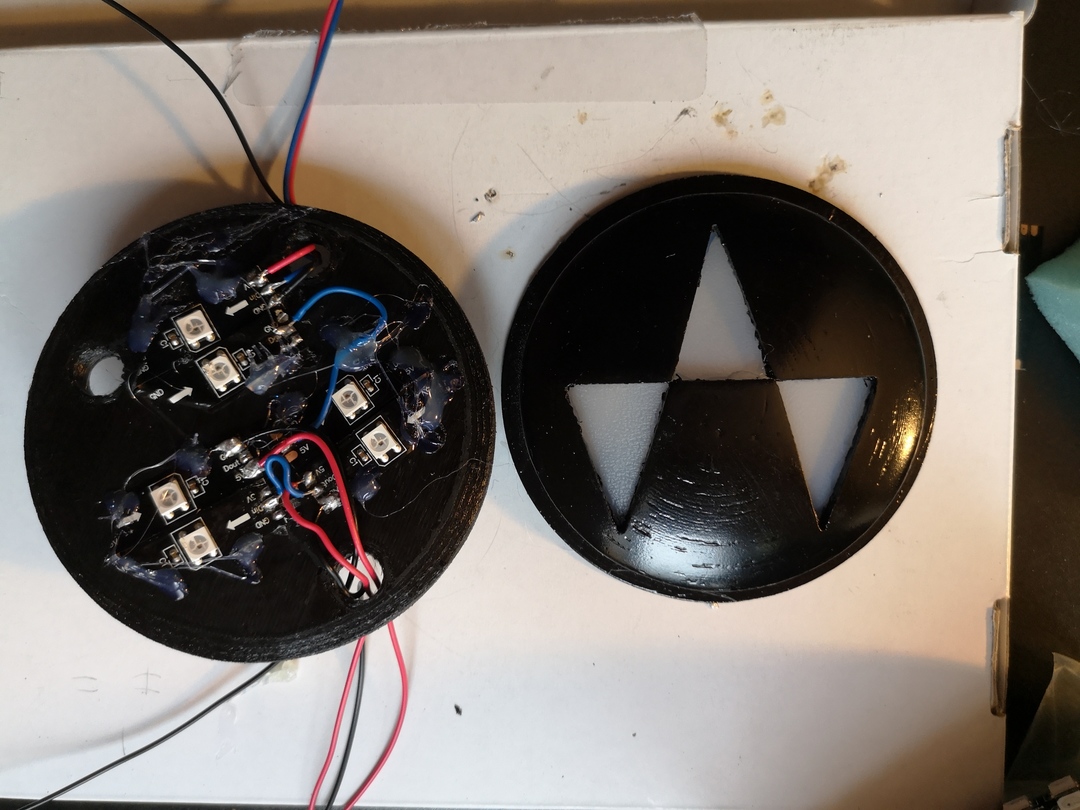
The idea is that the lights would shine out the the symbol holes in the cover. However, I needed a diffuser, something that would go over holes that would blur the lights, like frosted glass. I could get technical here, but I just used a plastic milk bottle.
The Result
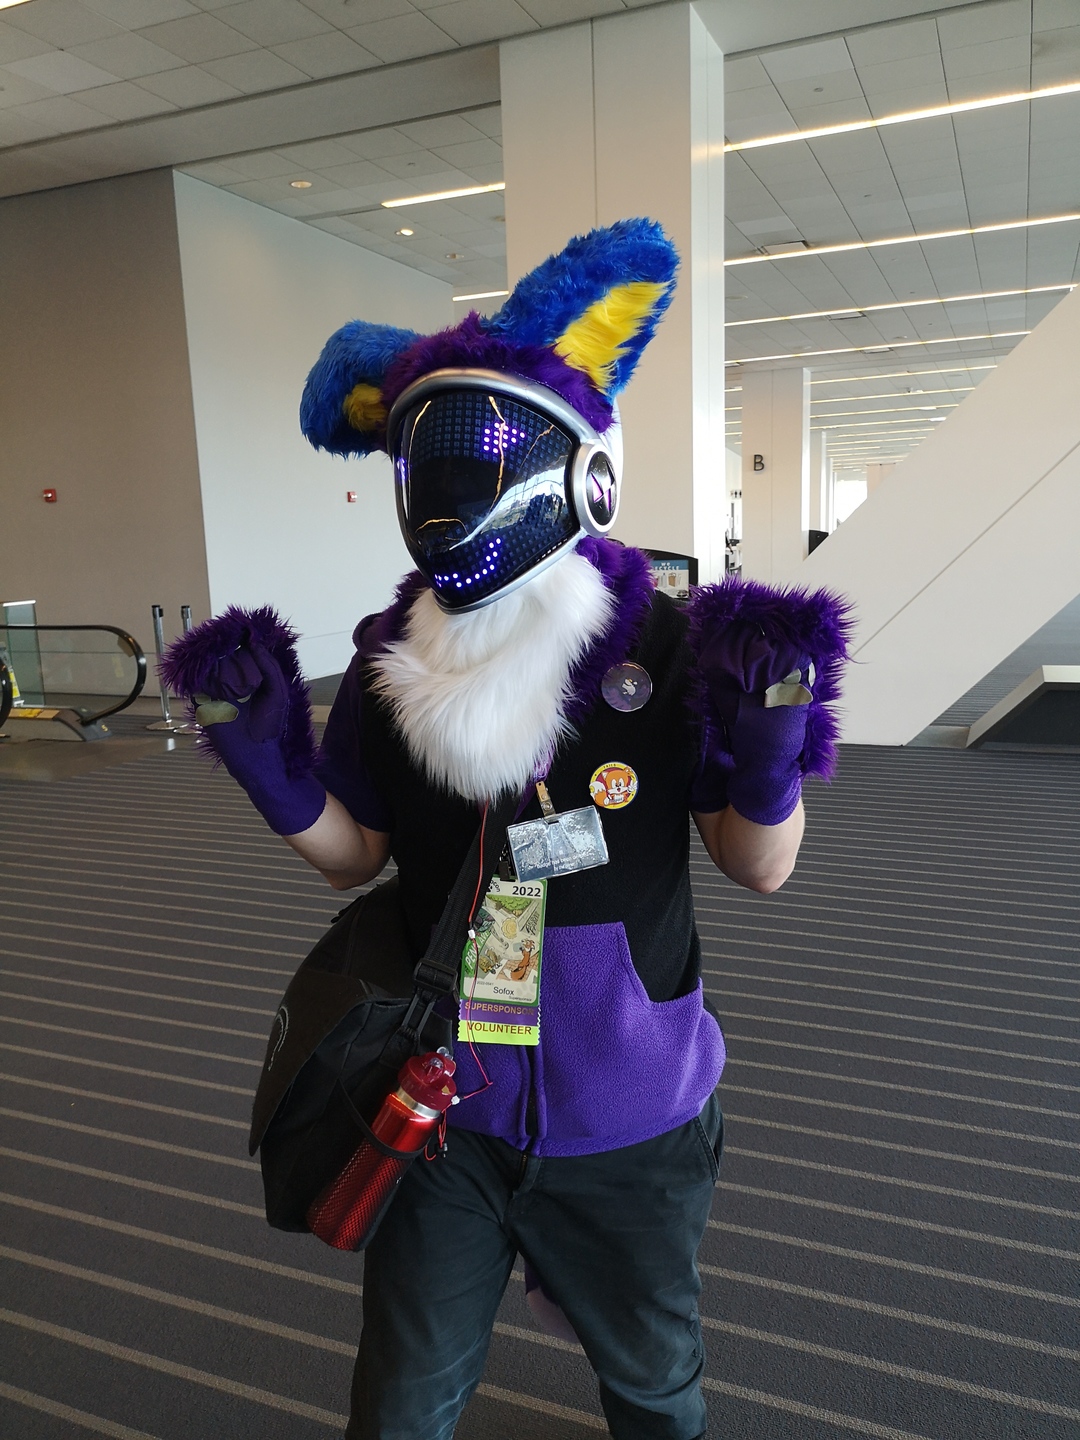
With the cheeks installed, the cowl glued on, all the wiring done, and magnets glued onto the visor and helmet to make them easily detachable.... I finally had my Protogen Helmet!
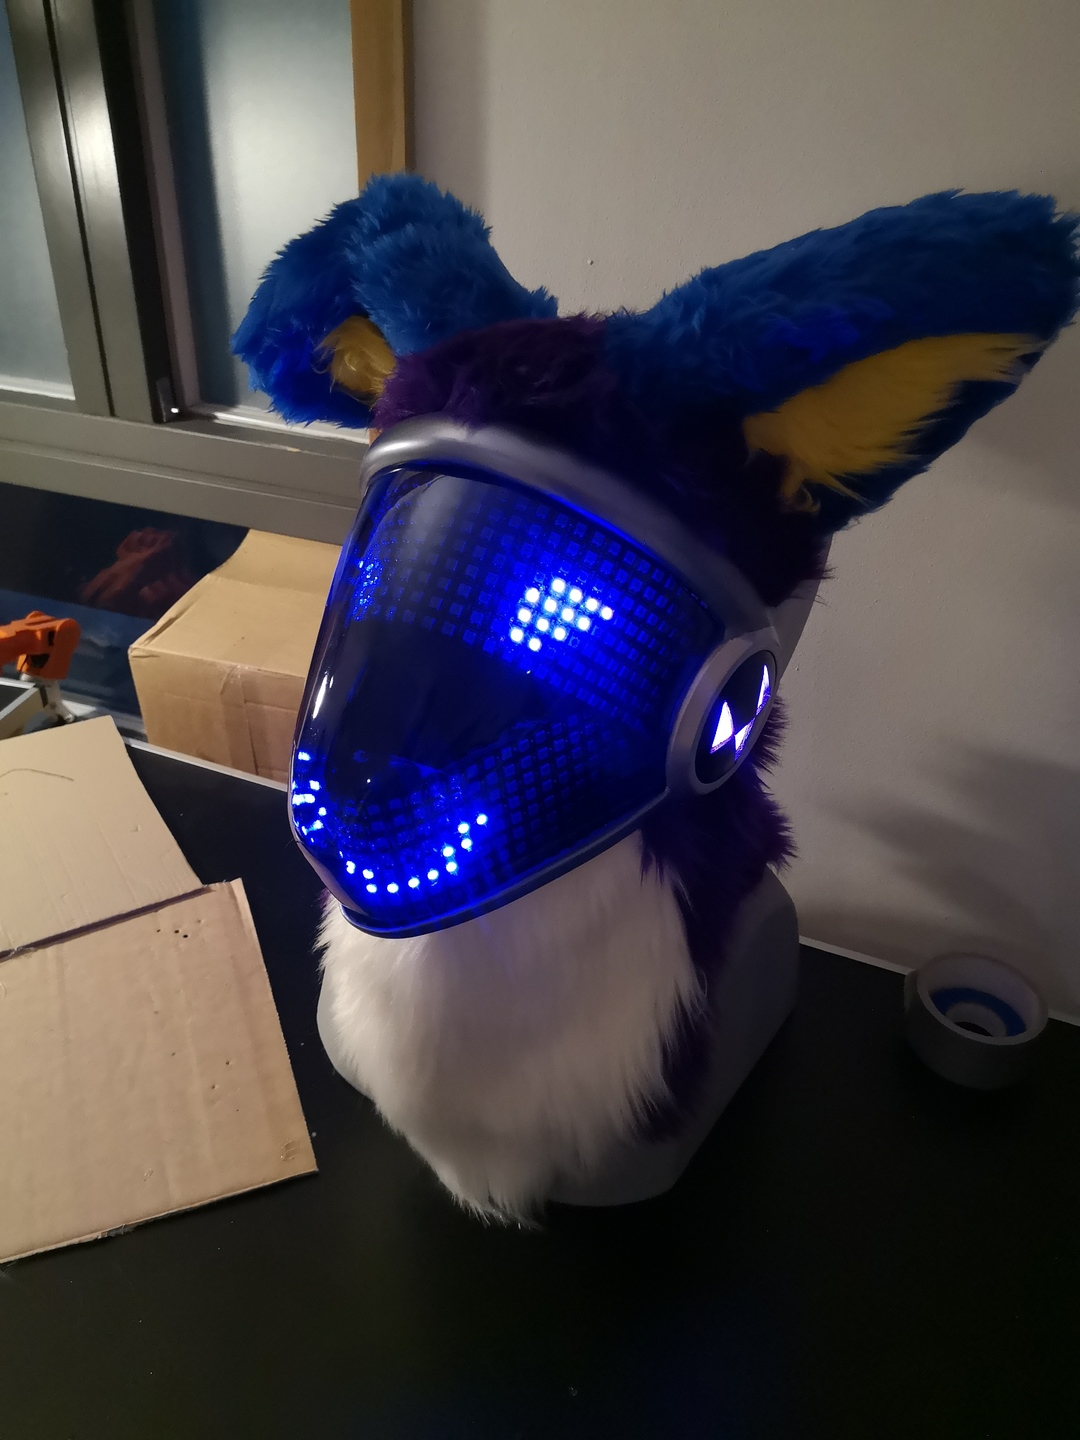
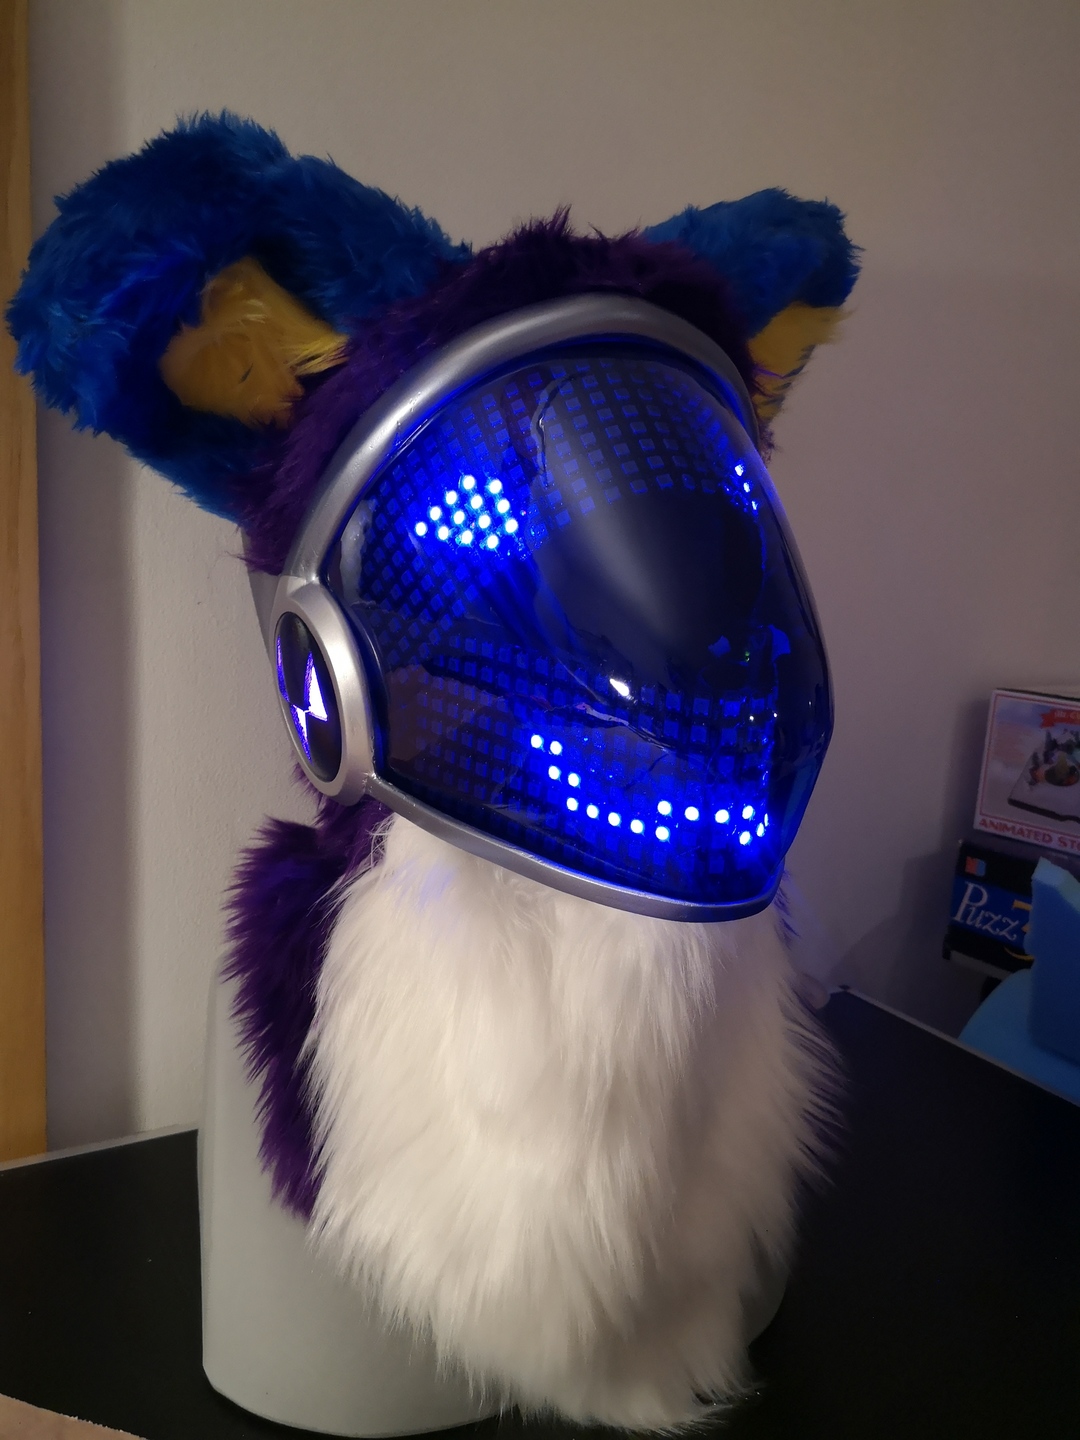
It first debut at Confuzzled 2022!
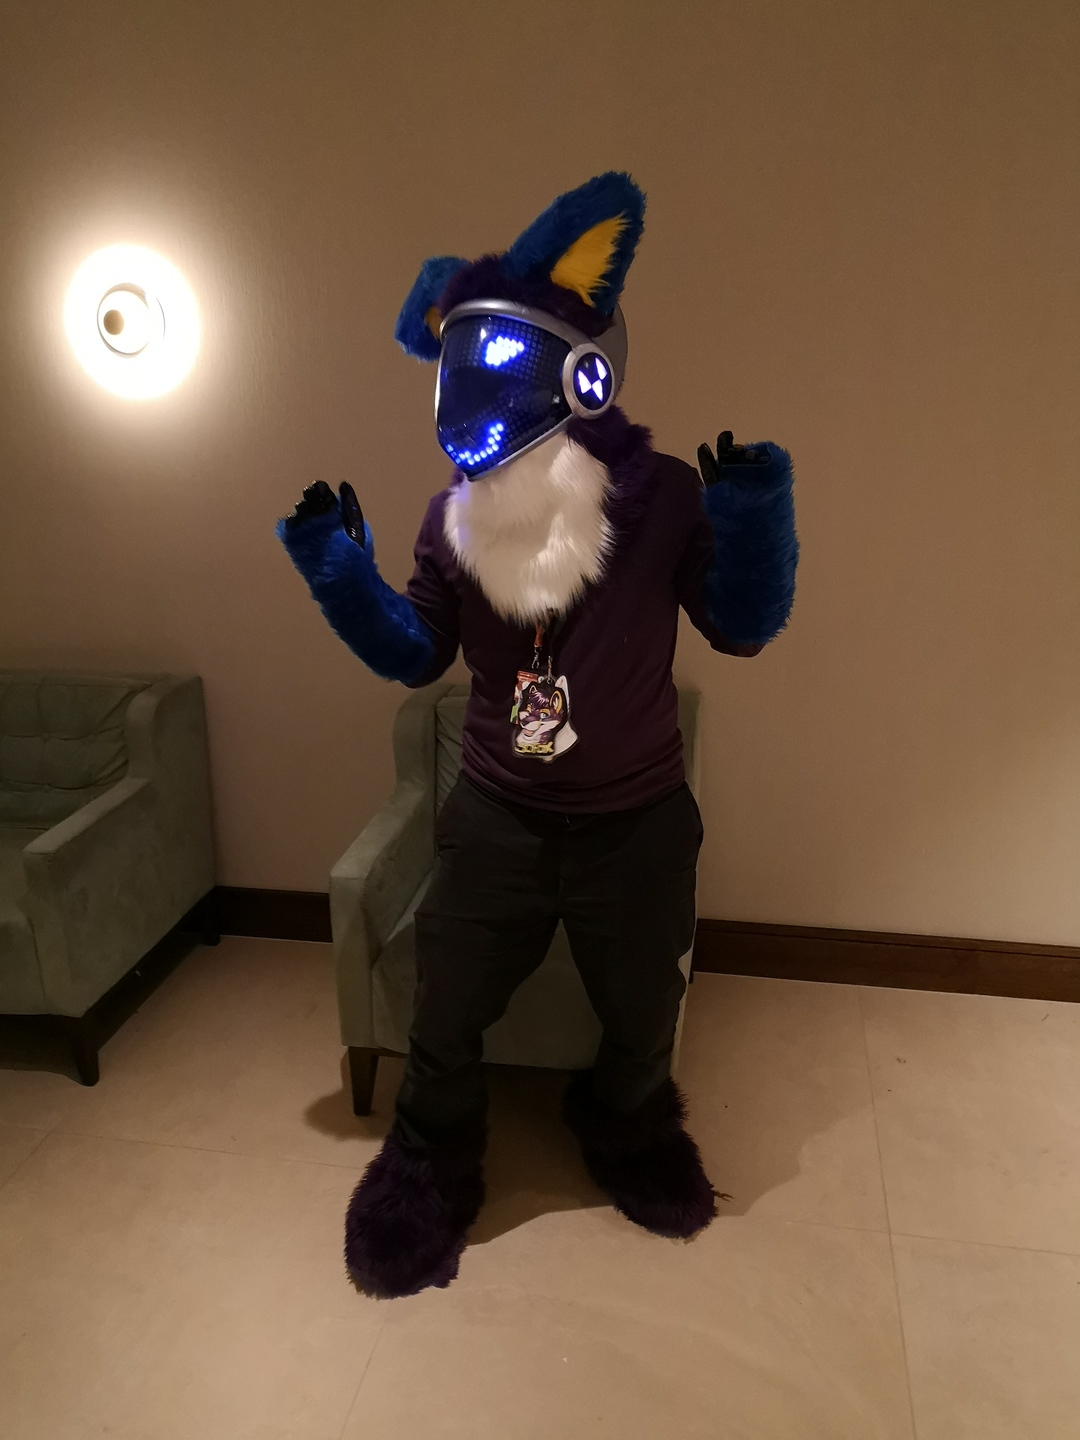
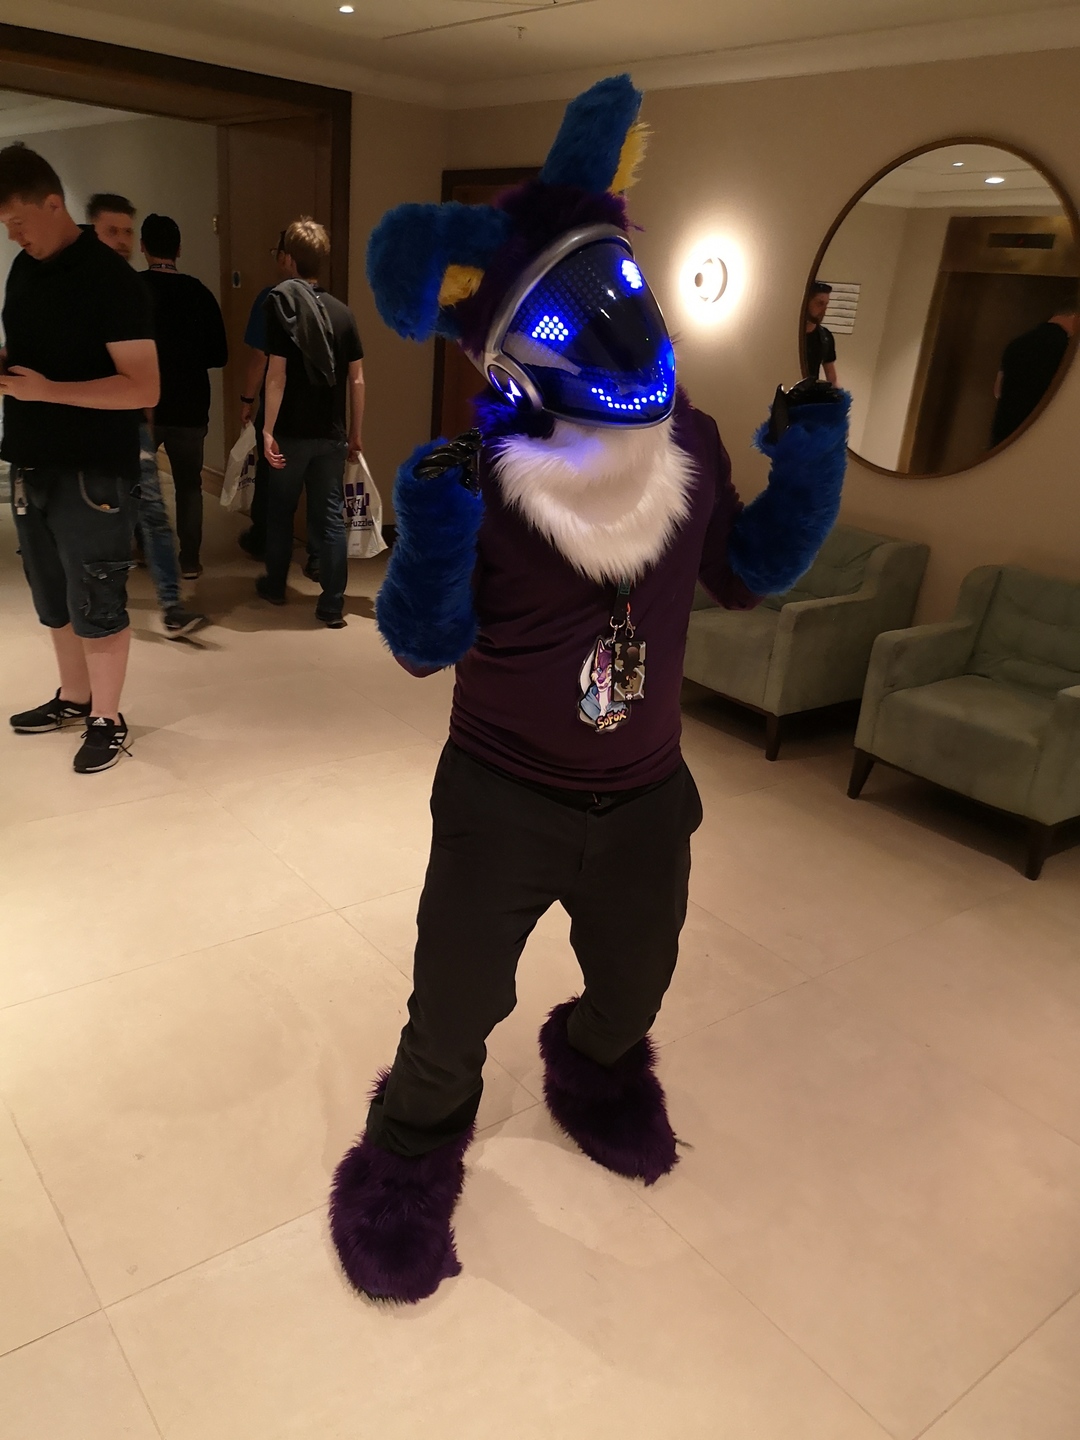
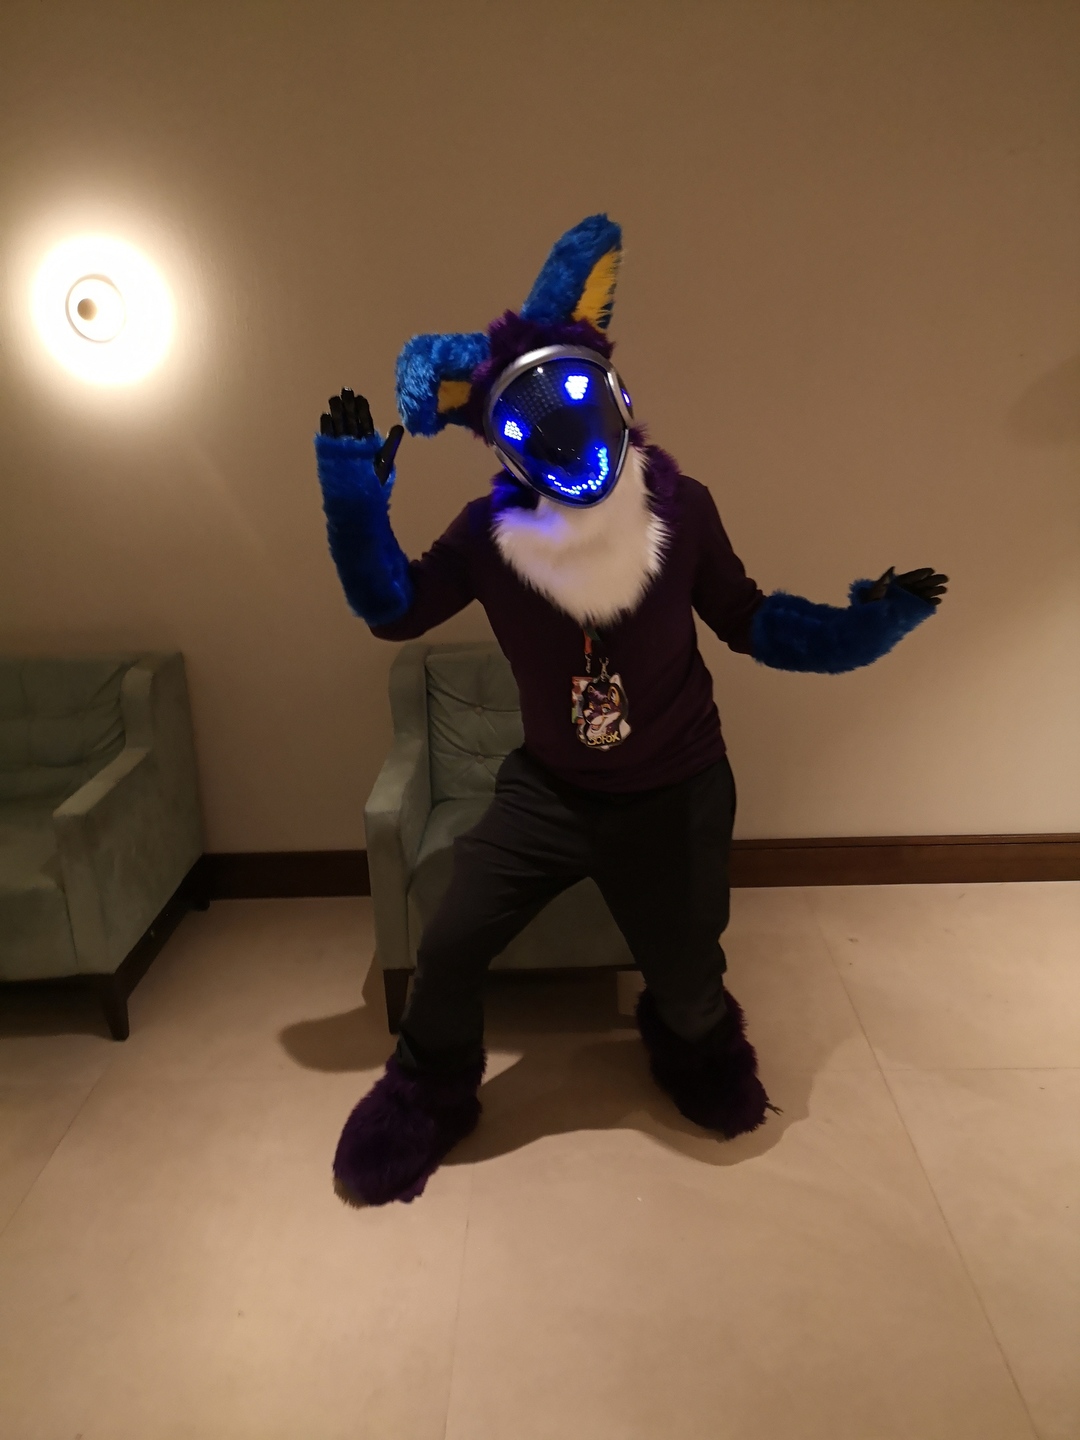
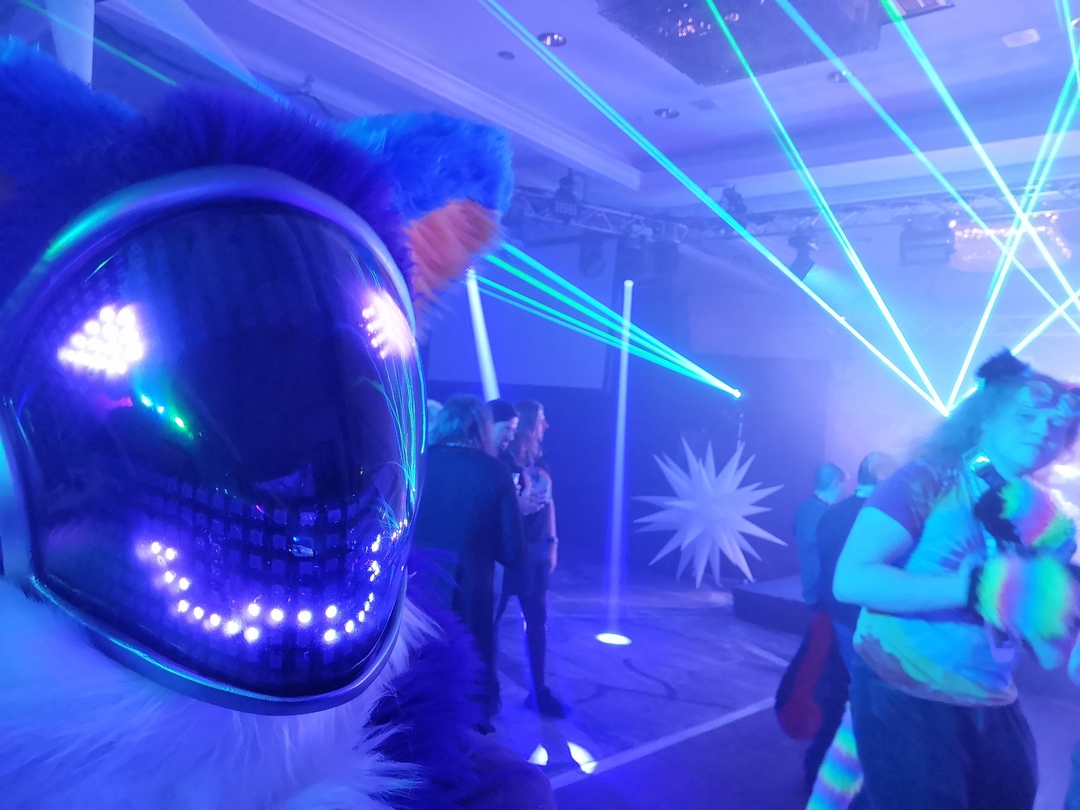
The Second Fall
After coming home from Confuzzled, I happily still had a fully working Protogen head. To be fair, during the con a magnet got detached and I had to find a glue gun to fix it, but that was okay because it got me and Tapewolf chatting with this nice Protogen called Chip who lent me his.
However a month later, while doing some last minuite tweaks on it for Anthrocon, the helmet fell off the table. The height was far shorter than the one that had destroyed a previous iteration, nonetheless, the jaw instantly broke.
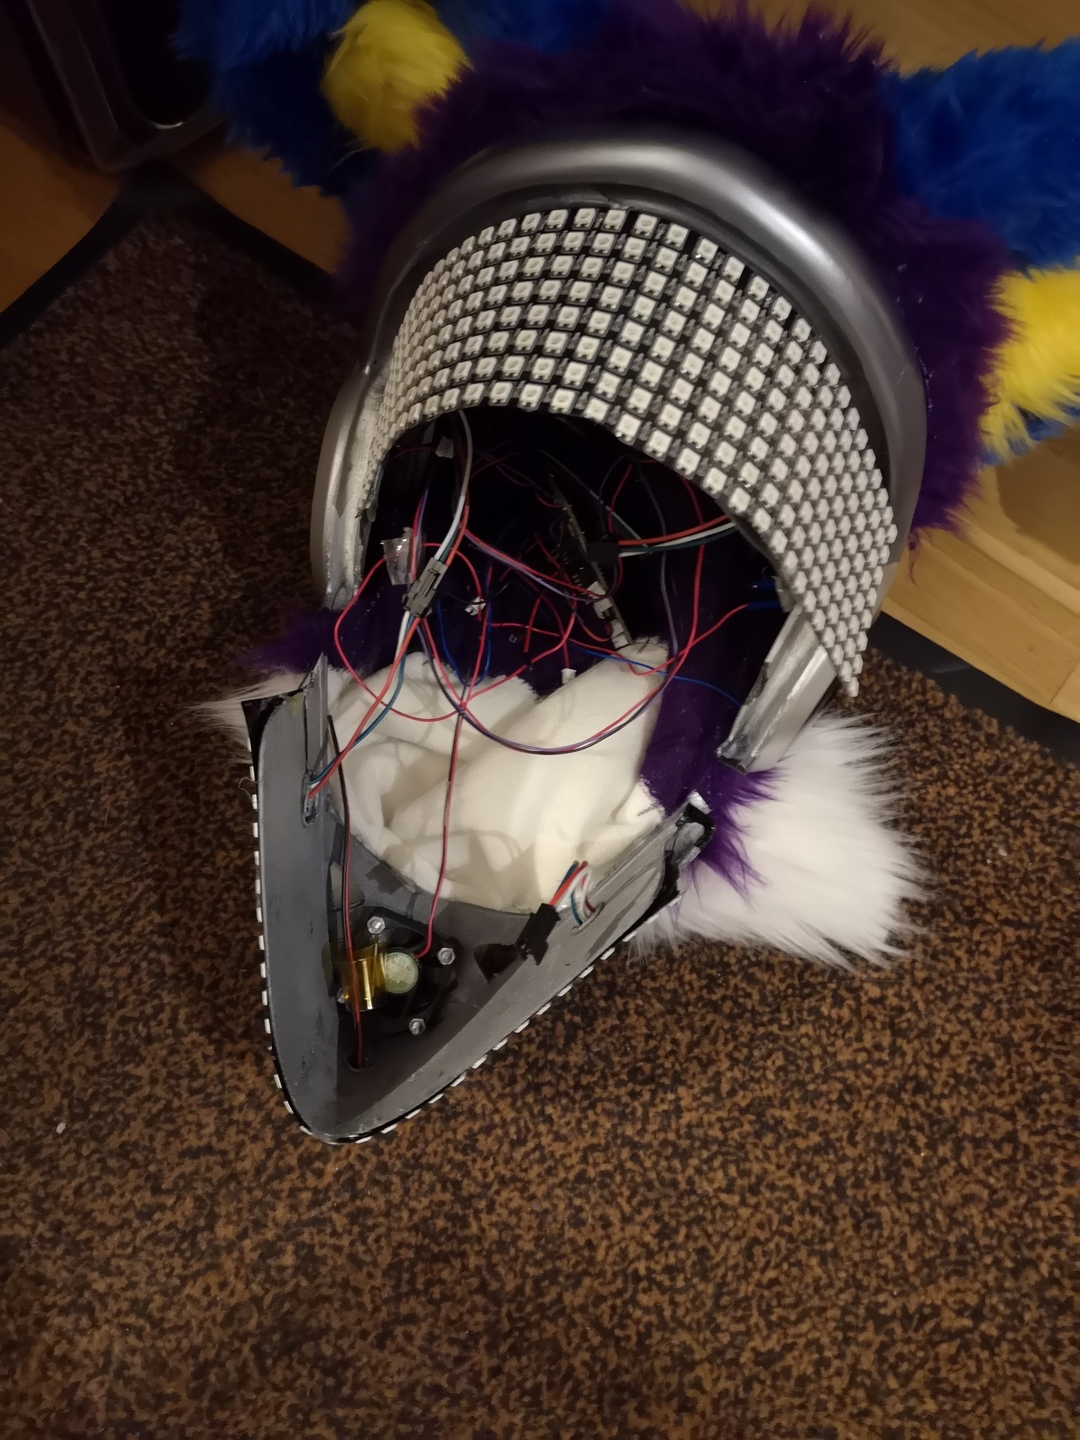
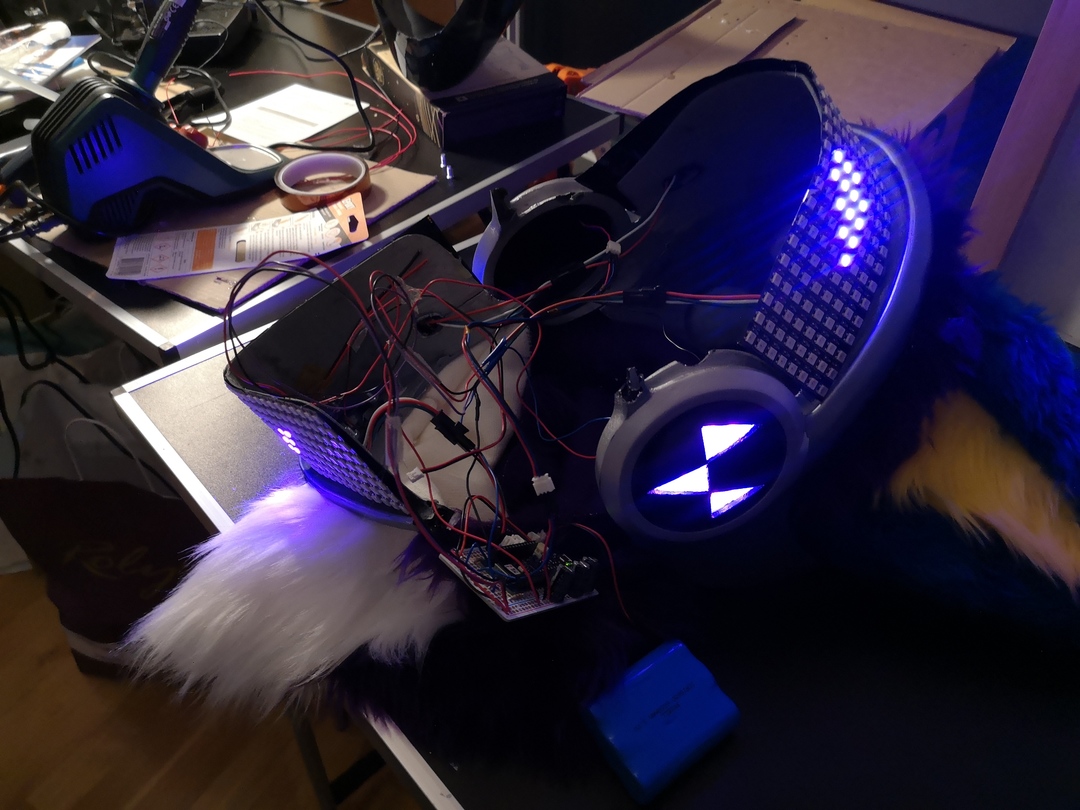
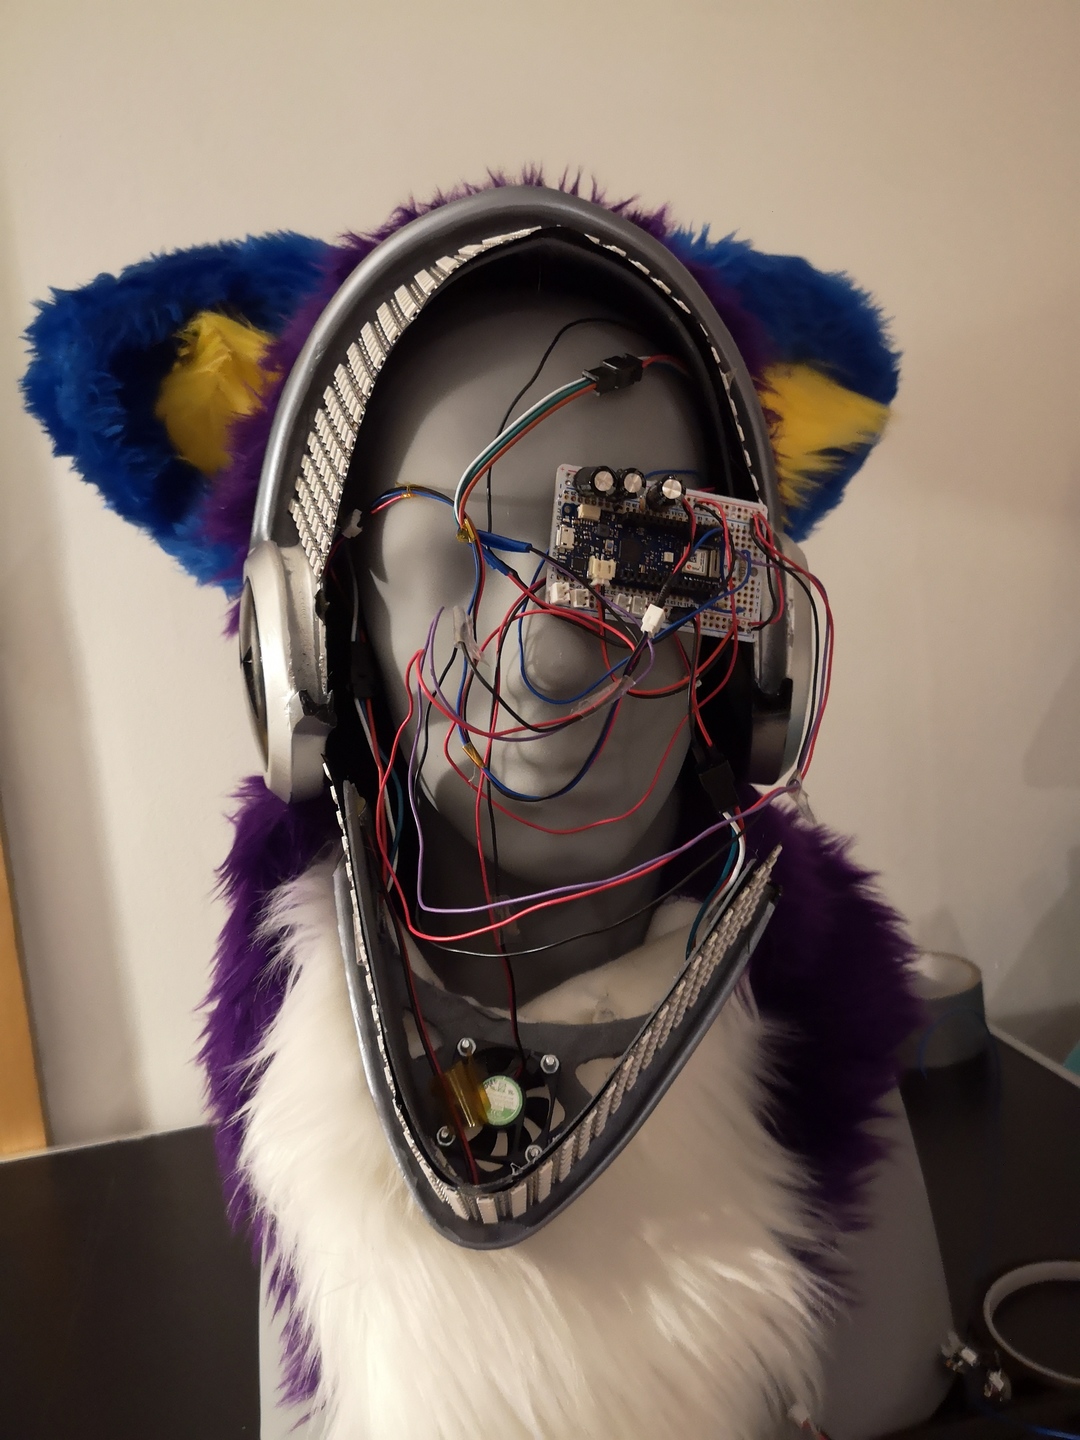
The lights still worked, but the jaw totally detached. With hours before my early morning flight, I prepared some epoxy glue and put it over the two breaks, moving the jaw into position and hoping it would cure in the few hours we had. I even took a later Aircoach to give it more time, making things tighter at the airport (I made it though).
Thankfully, despite the package saying the glue would take 24 hours to cure, the few hours overnight was enough.
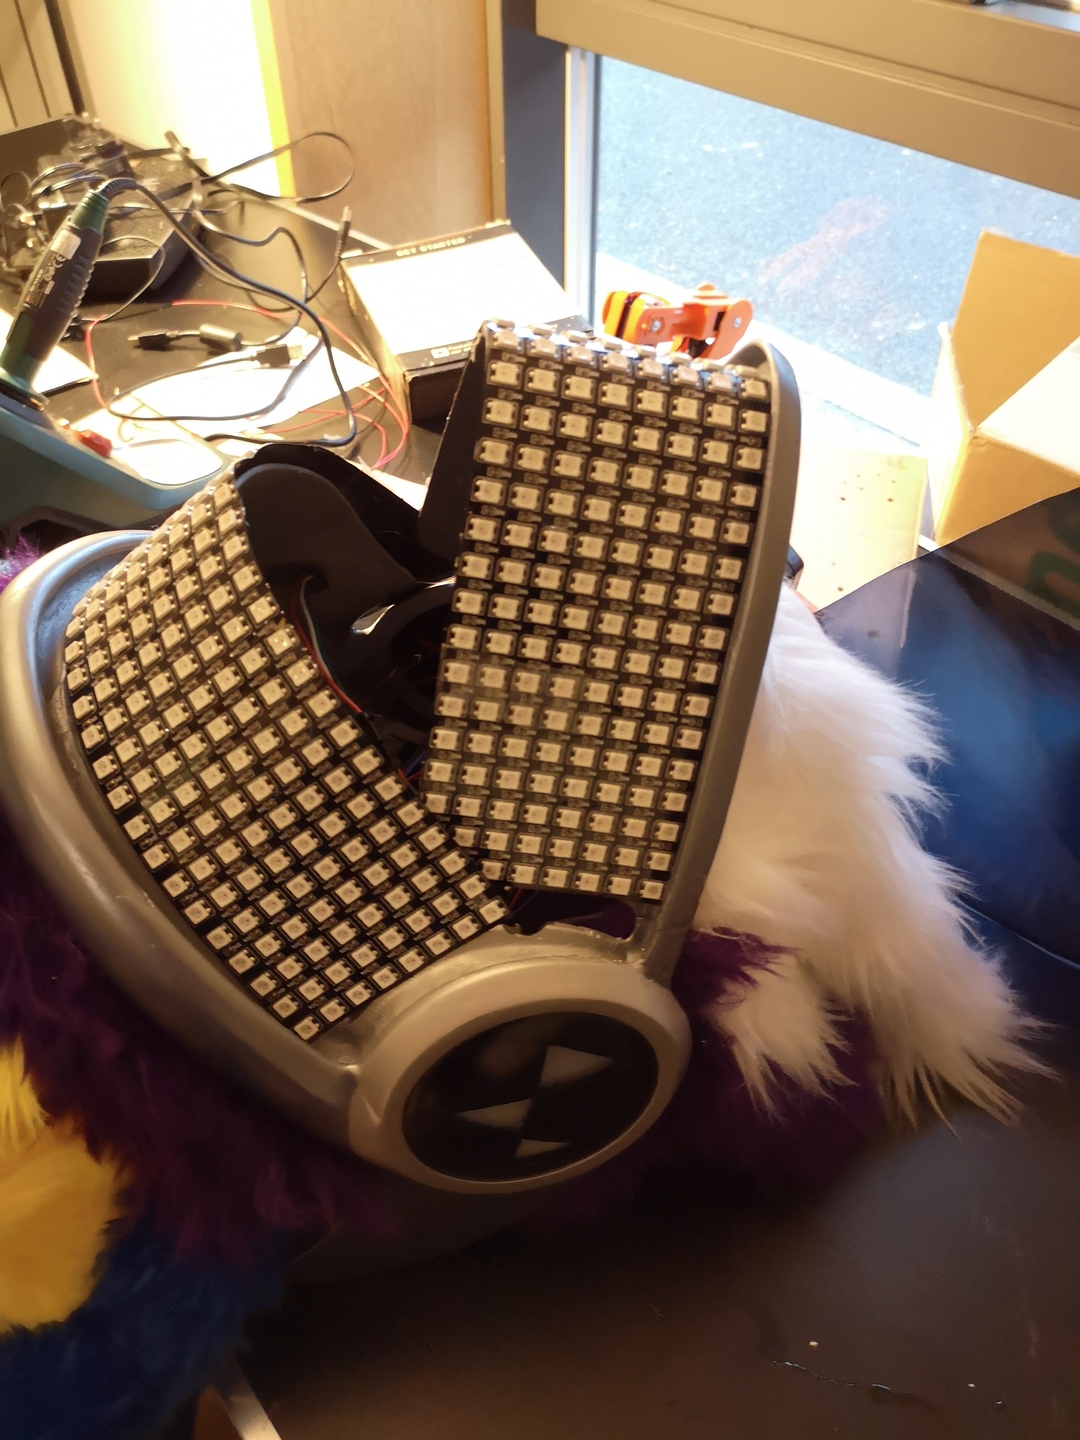
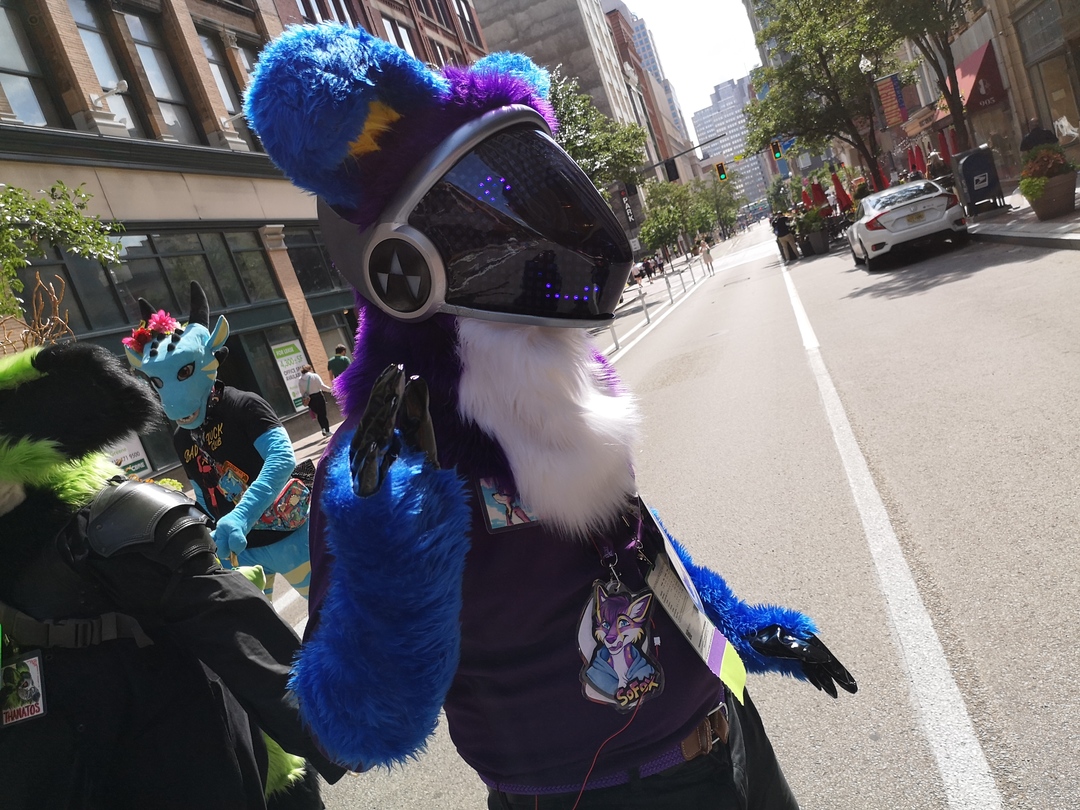
I put it in my hardshell case, and was soon wearing it at Anthrocon like nothing had happened. It hasn't given me any trouble since.
The Cheeks... Again
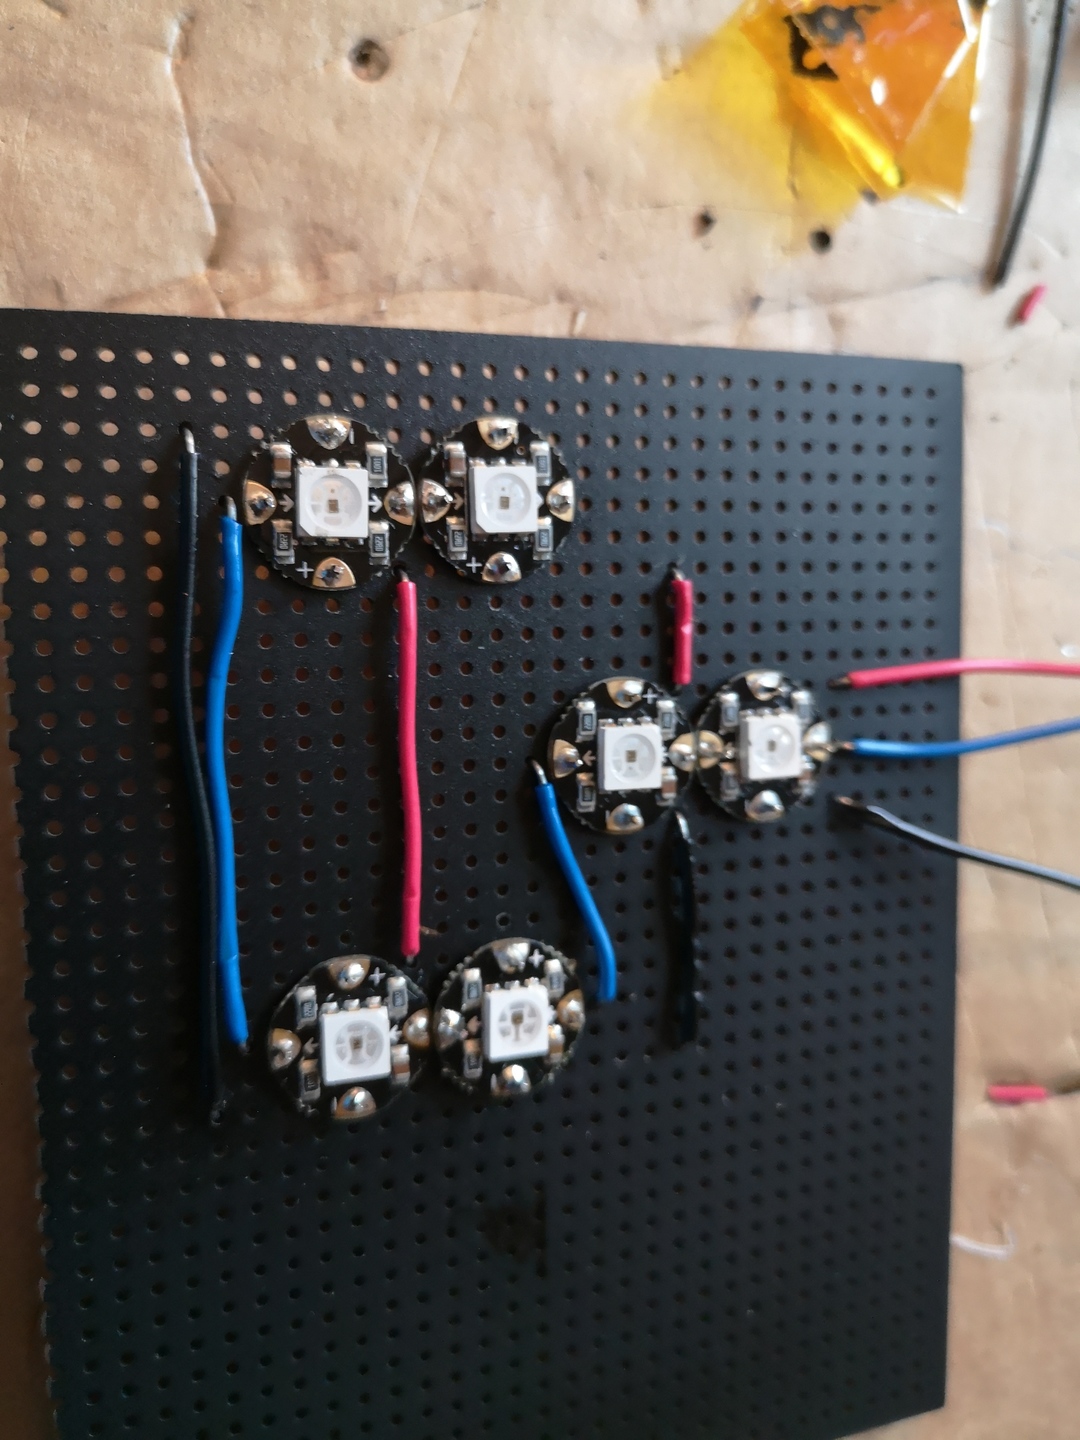
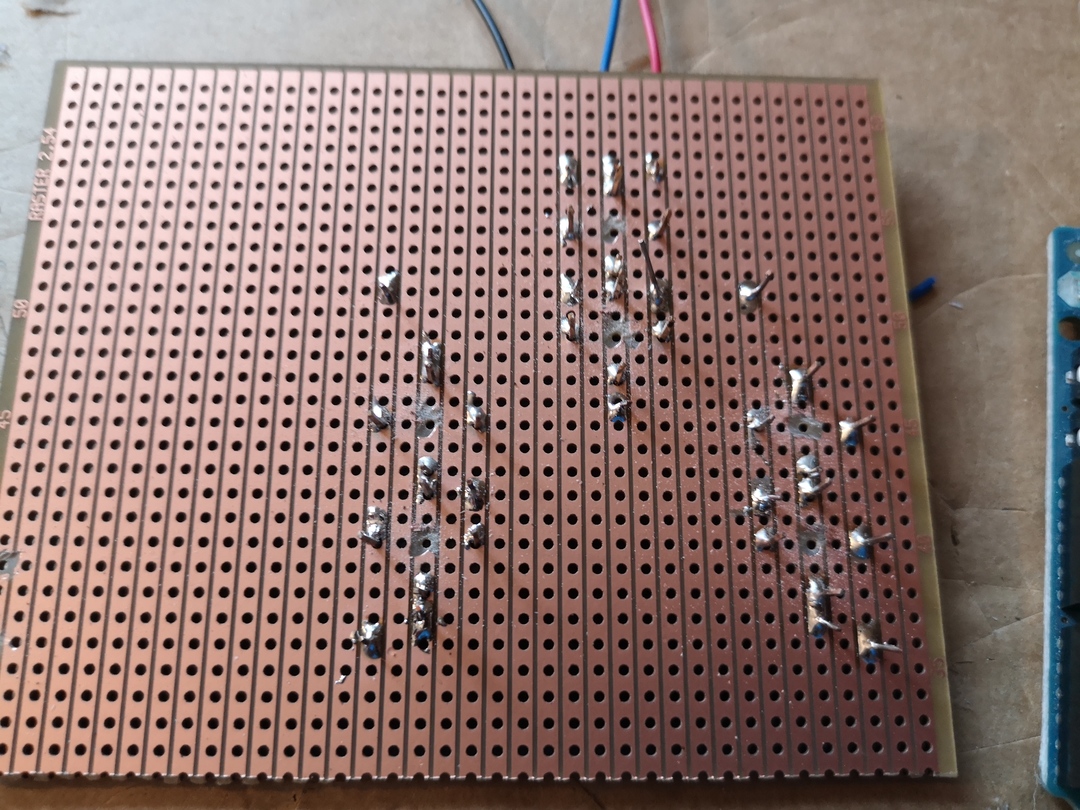
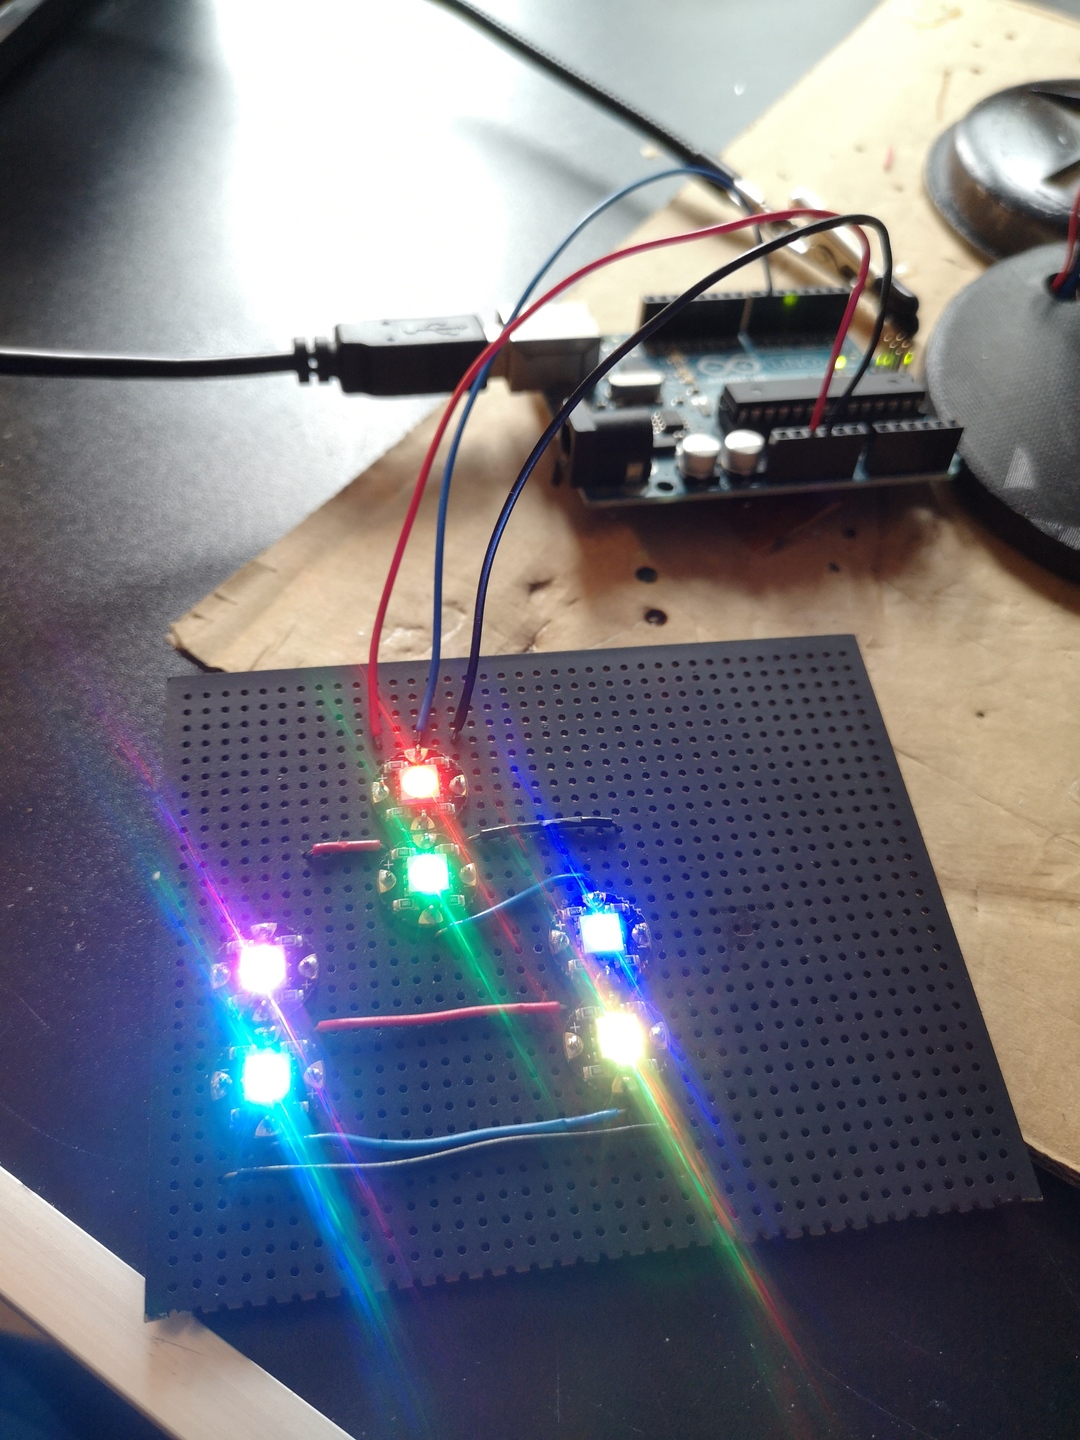
There were all sorts of glitches and things to tweak in the helmet. One thing were the cheeks, which could turn off randomly, show the wrong colour, etc. I redid them with stripboards, which meant less wiring and more reliable solder joints. Wasn't perfect, but it was solid.
The Hand Paws
The earlier version of the Protogen handpaws was a quickly sewn glovelet with shiny gloves underneath. The glovelet was basically a tube of blue fur a hole for the thumb. It's made by cutting out a long rectangle of fur, slightly tapered, and then sewing the long sides together leaving a gap for your thumb. Some trial and error to get the right shape. Underneath them I wore a pair of shiny PVC gloves that I had bought.
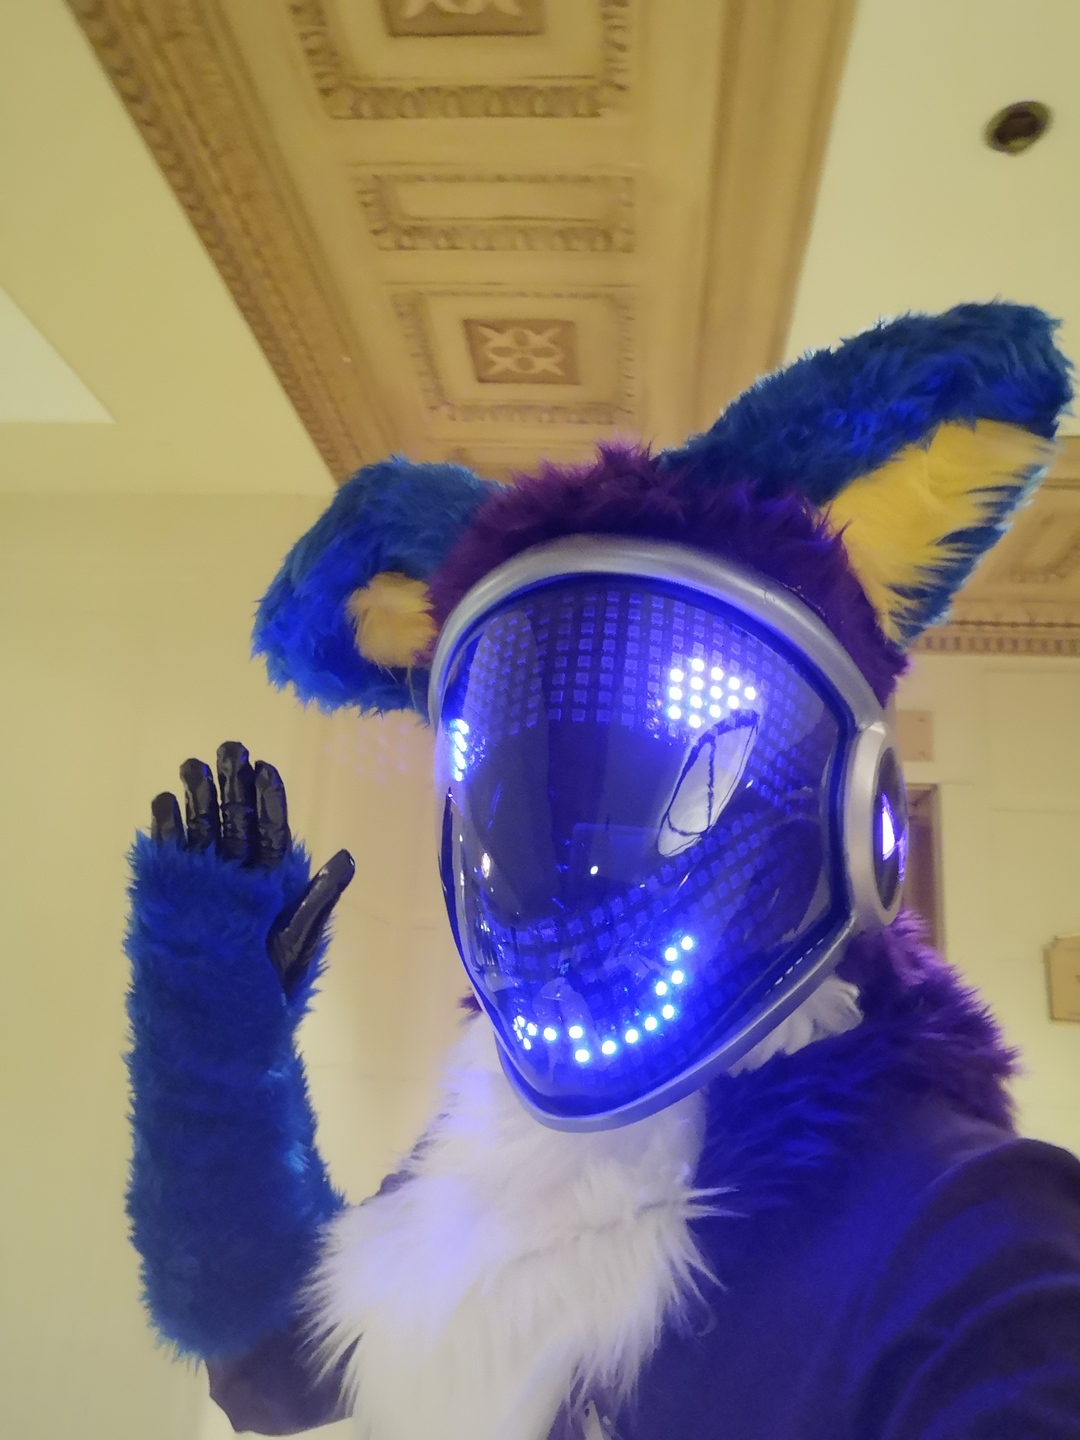
They actually worked pretty well, but I wanted to make better constructed Protogen paws. So I followed another video tutorial by Mugiwara Cosplay. It said it was for Wickerbeast Paws, but it was in their Protogen tutorial video playlist (and they've got a 2nd tutorial for more Wikerbeast-like paws). I had issues some following things (some of which I wrote up in a YouTube Comment), but here's the result:
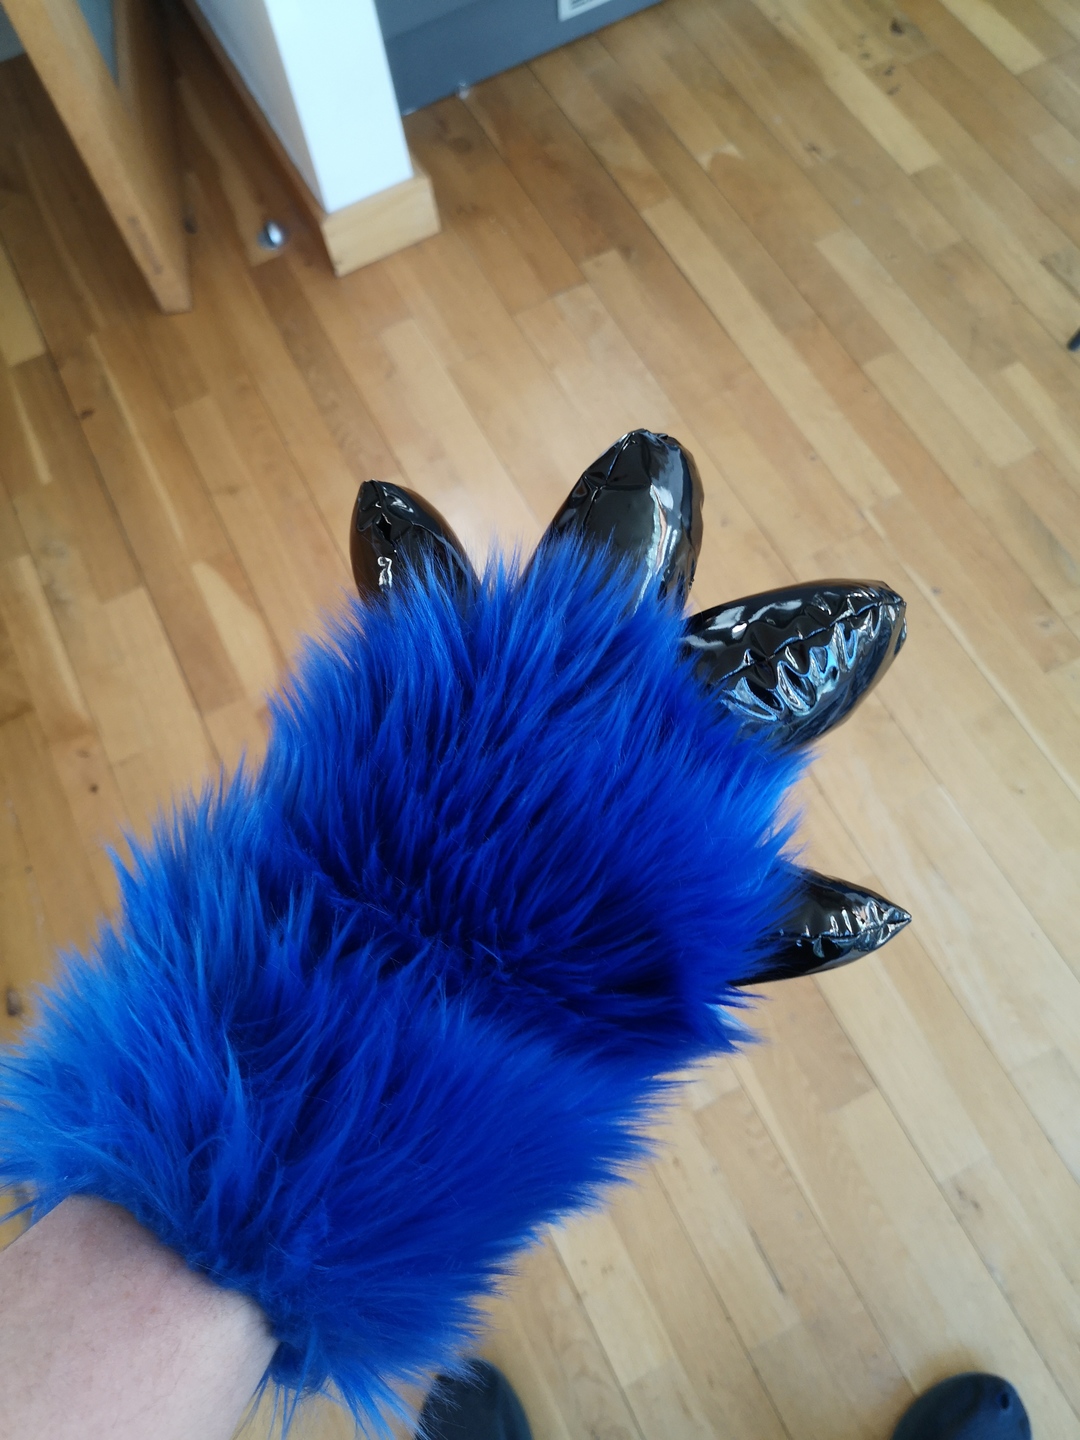
Got them finished just in time for Furry Not New Years in January, 2023.